
Choosing the correct sewing needle for embroidery is a critical decision for protecting your fabric and ensuring clean, professional stitches. The right needle glides smoothly through the weave without pulling threads, cutting fibers, or shredding delicate embroidery floss. By matching the needle’s point style and thickness to your specific fabric weight and thread type, you can prevent common frustrations like skipped stitches, puckering, and broken threads before they ever begin.
Understanding Sewing Needle Anatomy for Embroidery
To make an informed choice, you must first understand how a needle’s physical structure interacts with both your thread and your fabric. While standard sewing needles and specialized embroidery needles might look identical at a casual glance, their engineering differs significantly to accommodate different tasks. Specialized embroidery needles are designed specifically to handle decorative threads, which are often more fragile or textured than standard sewing threads.
The most prominent feature of an embroidery needle is its elongated eye. This larger opening allows thicker embroidery threads, such as rayon, polyester, or metallic floss, to pass through with minimal friction. A standard sewing needle has a much smaller, rounder eye that can pinch these delicate threads, leading to rapid wear and frequent breakage during high-speed stitching.
Products mentioned in this guide
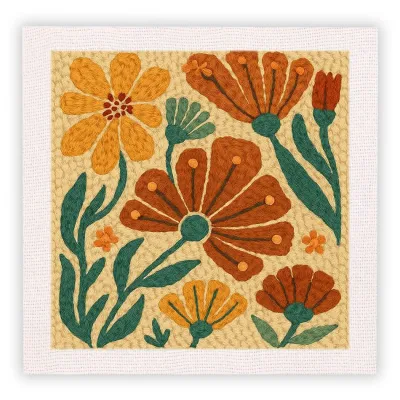
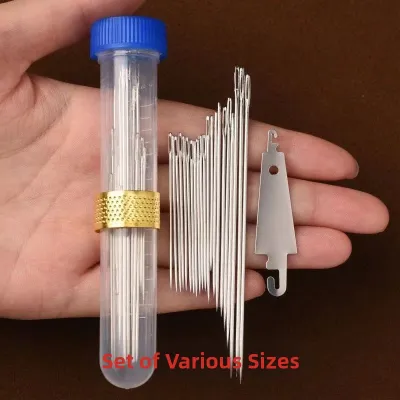
Prices are valid at publication and may change. Please refer to the product page for the latest price.
Directly above the eye lies the groove, a channel running down the front of the needle shaft. This groove acts as a protective guide, cradling the thread as the needle penetrates the fabric. In specialized embroidery needles, this groove is wider and deeper, ensuring the thread is shielded from abrasive contact with the fabric fibers.
Another critical structural element is the scarf, which is the small indentation on the back of the needle just above the eye. The scarf allows the sewing machine’s hook to pass extremely close to the needle eye to catch the thread loop and form a stitch. A well-designed scarf helps prevent skipped stitches, especially when working at high speeds or on dense fabrics.
Before starting any embroidery project, you should perform a quick visual and physical inspection of your needle. Even a microscopic burr or a slight bend can ruin expensive fabric or cause persistent tension issues. Run your fingertip carefully along the needle shaft and tip to feel for any rough spots or snags. You can also place the flat side of the needle shank on a flat surface, such as a glass table, to check if the needle lies perfectly straight; if the tip curves upward or the needle wobbles, it is bent and must be discarded immediately.
Matching Needle Types to Embroidery Fabrics
The point of the needle determines how it enters the fabric, and using the wrong point style can cause permanent damage to your material. Fabrics are generally categorized into woven, knit, and non-woven structures, each requiring a specific needle point to maintain structural integrity.

For tightly woven, non-stretch fabrics such as cotton, linen, silk, or taffeta, a sharp point needle is the standard choice. Sharp needles feature a slender, pointed tip that cleanly pierces the threads of the fabric. This clean penetration ensures that stitches remain perfectly aligned and the fabric fibers do not bunch up or pull out of alignment.
When working with knit fabrics, jersey, or other stretchy materials, you must switch to a ballpoint or rounded tip needle. Unlike sharp needles, a ballpoint needle features a slightly curved tip that slides between the fabric fibers rather than cutting through them. Piercing a knit fiber with a sharp needle can sever the yarn, leading to small holes that eventually unravel into runs after washing or wearing.
Heavy, non-woven materials like leather, suede, or dense vinyl require a wedge-shaped or leather point needle. These needles are designed with a cutting edge that slices a small opening as it enters the material, allowing the thread to pass through without excessive resistance. Because these needles cut the material, they leave permanent holes; you must plan your stitches carefully, as any mistakes or unpicked stitches will remain permanently visible.
Before selecting your needle point, always check the fabric care labels or manufacturer specifications to confirm the exact material composition. Synthetic blends or fabrics with high elastane content may behave differently than pure natural fibers, requiring a quick test to determine whether a sharp or ballpoint needle provides the cleanest entry without snagging.
Selecting the Correct Needle Size for Fabric Weight and Thread
Once you have identified the correct needle point type, you must determine the appropriate needle size, which refers to the thickness of the needle shaft. The general rule of thumb is to match the needle size to the weight of your fabric: lightweight fabrics require fine needles, while heavy, dense fabrics demand thicker, stronger needles.
Using a needle that is too large for a lightweight fabric like organza or batiste will leave unsightly, permanent holes in the material. Conversely, using a needle that is too small on heavy canvas, denim, or thick upholstery fabric can cause the needle to flex, bend, or snap under the pressure of penetration.
You must also evaluate your thread thickness in relation to the needle eye. The thread should fit comfortably through the eye with enough clearance to slide back and forth freely. If the eye is too small for the thread, the constant friction as the needle moves up and down will shred the outer fibers of the thread, causing it to break or bunch up at the eye. If the eye is too large, the thread may wobble during stitch formation, resulting in loose, uneven stitches.
Understanding needle packaging labels is essential for selecting the correct size. Most manufacturers use a dual sizing system, such as 75/11 or 90/14, printed clearly on the package. The first number represents the European metric size (the needle shaft diameter in hundredths of a millimeter), while the second number represents the American sizing standard. A size 75/11 needle is ideal for lightweight to medium fabrics, whereas a 90/14 needle is suited for medium to heavy fabrics.
When working with multiple strands of embroidery floss or specialty threads like metallic or wool blends, you face a unique trade-off. These threads require a larger needle eye to prevent shredding, but using a larger needle size can damage delicate fabrics. In these scenarios, look for specialized needles designed with an extra-large eye on a relatively slim shaft, allowing you to accommodate thick threads without leaving large holes in your fabric.
Step-by-Step Guide to Testing and Adjusting Your Needle Choice
Never begin embroidering your final piece without conducting a thorough test on a scrap of the same material. This simple step saves time, fabric, and thread by allowing you to identify and correct potential issues in a low-stakes environment.
Step 1: Prepare Your Test Swatch
Cut a small scrap of your project fabric, ensuring it is large enough to be hooped securely. Pair this swatch with the exact stabilizer, backing, and embroidery thread you plan to use for the main project. The stabilizer plays a critical role in supporting the fabric, and testing without it will not give an accurate representation of how the needle behaves during actual stitching.
Step 2: Run a Test Stitch Sequence
Secure the prepared swatch in your embroidery hoop and stitch a small sample pattern, such as a series of straight lines, satin stitches, and running stitches. As the machine runs, observe the fabric surface closely. Look for any signs of puckering along the stitch lines, visible holes left by the needle, or skipped stitches where the thread fails to lock.
Step 3: Adjust Based on Observable Signals
If you notice large, visible holes around the entry points, your needle is too large; switch to a smaller size, such as moving from a 90/14 to a 75/11. If the thread shreds, breaks, or bunches up near the needle eye, the needle is either too small or has a rough edge; replace it with a larger size or a fresh needle. If the fabric puckers despite proper tension, verify that your stabilizer is sufficient and that you are using the correct point type for the fabric weave.
When to Stop and Seek Professional Help
If you have adjusted the needle size, verified the point type, replaced the needle with a fresh one, and still experience persistent thread breaks, skipped stitches, or unusual mechanical noises, stop stitching immediately. These issues may indicate a timing misalignment in your sewing machine or a damaged needle plate. Consult your sewing machine manual or contact a qualified service professional to inspect the machine’s internal mechanisms before proceeding.
Troubleshooting Common Embroidery Needle Issues
Stitching problems can arise even mid-project, but understanding the root causes allows you to diagnose and resolve them quickly without ruining your work.
Thread shredding or breaking is one of the most common issues in embroidery. This is frequently caused by a needle eye that is too small for the thread weight, forcing the thread to squeeze through a tight space under high tension. It can also be caused by a microscopic burr or rough spot inside the needle eye, which acts like a tiny blade, cutting the thread fibers as they pass through. Replacing the needle with a fresh, high-quality embroidery needle usually resolves this issue.
Fabric puckering or pulling occurs when the needle struggles to penetrate the fabric smoothly, dragging the fibers downward with it. This is often a sign of a dull needle that has lost its sharp tip, or a needle that is too thick for the fabric weight. Ensure you are using the correct point type—such as a sharp point for woven fabrics—and that your stabilizer is securely hooped and matched to the fabric weight.
Skipped stitches happen when the machine’s hook fails to catch the thread loop behind the needle. This is a classic symptom of a bent needle, which alters the precise alignment between the needle eye and the hook. Even a bend that is invisible to the naked eye can cause skipped stitches. Replacing the needle with a fresh, straight one is a highly effective solution.
To maintain consistent stitch quality, establish a regular needle replacement routine. A general guideline is to replace your embroidery needle after every eight to ten hours of actual stitching time, or at the start of every major new project. Needles are consumable items that wear down over time due to friction and heat; replacing them proactively prevents fabric damage and ensures clean, beautiful embroidery.
Frequently Asked Questions (FAQ)
Can I use a universal needle for all embroidery projects?
Universal needles feature a slightly rounded point that is designed to act as a compromise between a sharp point and a ballpoint. While they can be used for basic utility sewing on a variety of fabrics, they are not ideal for detailed embroidery work. For high-quality embroidery, specialized needles with larger eyes and specific point types (such as sharps for woven fabrics or ballpoints for knits) yield reliable results and help prevent thread shredding.
How do I know when it is time to replace my embroidery needle?
You can identify a worn needle through several clear auditory and visual cues. If you hear a distinct popping or thudding sound as the needle penetrates the fabric, the tip is dull and needs replacement. Other signs include frequent skipped stitches, thread shredding, or visible puckering along the stitch lines. Replacing your needle regularly helps maintain smooth operation and protects your fabric from damage.

Community discussion
Share your experience or ask a question. Comments are reviewed before publication.