
Sashiko, the traditional Japanese art of functional embroidery, relies heavily on the structural integrity of its materials to achieve its signature geometric beauty. Unlike standard decorative embroidery, which often prioritizes high-gloss finishes and delicate details, sashiko is rooted in reinforcement and repair. For beginners in Singapore starting their needlework journey, selecting the correct sashiko thread is the single most critical factor in determining how smoothly the needle glides through the fabric and how well the finished piece withstands wear and washing. Success does not come from simply purchasing the most expensive option, but from understanding how thread twist, thickness, and material composition interact with your chosen fabric and needle. By learning to evaluate these technical specifications and performing simple hands-on checks, you can confidently select high-quality threads that prevent frustration and ensure your stitches remain clean, defined, and durable.
Understanding Sashiko Thread Characteristics
To make an informed purchase, you must first understand what makes dedicated sashiko thread distinct from standard embroidery floss. The most immediate visual difference is the matte finish. Traditional sashiko thread is completely devoid of the high-sheen, mercerized glint found in standard embroidery threads. This flat, matte appearance is intentional, designed to create a rustic, high-contrast line that stands out clearly against indigo-dyed cotton, linen, or heavy denim without reflecting light in a distracting manner.
Beyond aesthetics, the physical structure of sashiko thread is engineered for a specific mechanical action. It features a distinct, tight twist that binds the individual cotton fibers closely together. This tight construction is essential because sashiko involves loading multiple running stitches onto a long needle before pulling the entire length of thread through the fabric at once. Standard embroidery floss, which is loosely twisted to encourage a soft, spreading drape, will quickly fray, pill, or shred under the friction of this repetitive pulling motion.
Products mentioned in this guide
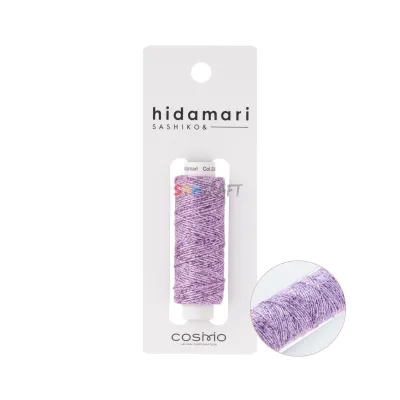
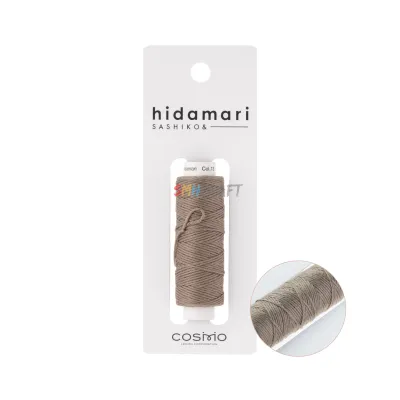
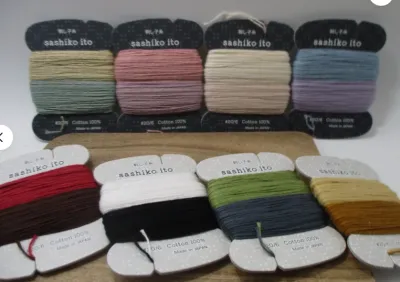
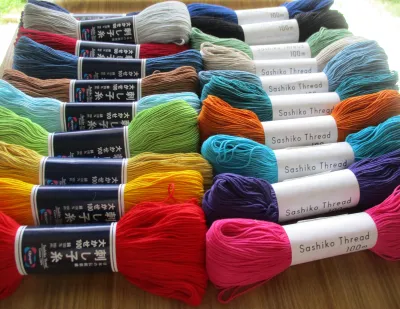
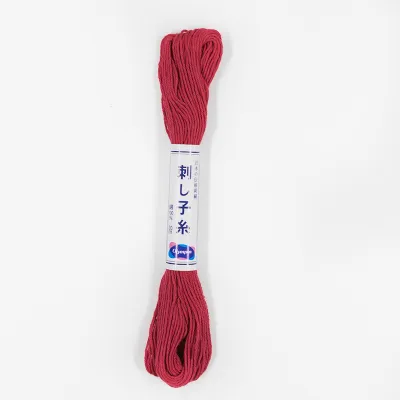
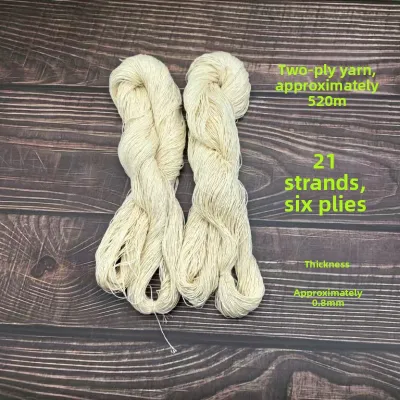
Prices are valid at publication and may change. Please refer to the product page for the latest price.
Another defining characteristic is that sashiko thread is non-divisible. Standard embroidery floss is designed to be split into individual strands depending on the desired thickness of the line. In contrast, sashiko thread is meant to be used exactly as it comes off the skein, as a single, unified strand. Attempting to split sashiko thread destroys its structural twist, leading to immediate unraveling and structural weakness. This single-strand design ensures that every stitch maintains a consistent volume and height across the entire pattern, giving the finished work its characteristic raised, tactile texture.
Essential Specifications to Check on the Label
When browsing options in Singapore, reading the product label carefully will save you from purchasing thread that is incompatible with your project. The first specification to examine is the thickness indicator. While some brands use numerical grading systems, many simply label their threads as “thin” (often suitable for lightweight cottons, fine linens, and intricate, dense patterns) or “thick” (ideal for heavy denim, canvas, and bold, geometric designs). Matching the thread thickness to the weight of your fabric is crucial; a thread that is too thick will distort a lightweight fabric, causing puckering, while a thread that is too thin will get lost in the weave of a heavy textile.

Next, check the recommended needle eye size or compatibility notes on the packaging. Sashiko needles are uniquely designed with long, oval eyes that accommodate thick, non-divisible threads while maintaining a slender shaft that pierces fabric easily. If you attempt to force a thick sashiko thread through a standard sewing needle, the excessive friction at the eye will strip the thread’s outer fibers, causing it to bunch up and snap. Ensure the thread label or product description matches the gauge of the sashiko needles you plan to use.
Material composition is another non-negotiable specification. Authentic sashiko thread is almost universally made from 100% cotton. Cotton provides the ideal balance of strength, flexibility, and traditional texture. It also shrinks slightly during its first wash, which helps the thread lock into the weave of the cotton or linen fabric, making the stitches an organic part of the textile rather than an unstable overlay. Avoid synthetic blends or polyester threads for traditional sashiko projects, as they lack this locking capability and can slice through softer fabric fibers over time.
Finally, verify the yardage or meterage printed on the skein. Sashiko patterns, particularly those with dense, overlapping lines, consume thread much faster than standard surface embroidery. Skeins typically range from 20 meters to over 100 meters. Calculating your project requirements beforehand prevents the frustration of running out of a specific dye lot mid-project. For beginners, starting with a medium-sized skein of 30 to 40 meters provides ample material for practice swatches and a small completed coaster or runner.
Sourcing Sashiko Supplies in Singapore
Finding authentic sashiko thread in Singapore requires knowing where to look, as general sewing shops may only carry standard sewing threads or basic embroidery floss. Local craft and stationery stores in major shopping hubs, particularly those with dedicated Japanese import sections, are excellent starting points. These physical stores allow you to examine the thread colors in natural light and physically feel the texture and twist of the skeins before committing to a purchase.
If you prefer the convenience of online marketplaces and e-commerce platforms, a cautious approach is necessary to ensure you receive genuine Japanese needlework supplies. Always check the seller’s ratings, read customer reviews specifically mentioning the thread’s texture and performance, and verify the product’s country of origin. Be wary of listings that offer generic “embroidery thread” under the sashiko label at unusually low prices, as these are often standard polyester threads or loosely twisted cotton that will not perform correctly.
For the most reliable selection, seek out specialized patchwork, quilting, or needlework shops in Singapore. These specialty retailers often act as authorized distributors for established Japanese brands, ensuring that you are purchasing genuine, high-quality cotton threads. The staff in these shops can also offer valuable advice on matching your thread to appropriate needles and fabrics.
When planning your initial purchase, budgeting for a complete starter setup is highly recommended. A practical beginner budget in Singapore typically ranges from S$15 to S$35. This investment should cover one or two skeins of high-quality sashiko thread (approximately S$4 to S$8 per skein), a pack of dedicated sashiko needles (around S$6 to S$10), and a pre-printed practice fabric swatch or a small piece of cotton linen (about S$5 to S$15). Starting with a pre-printed fabric is highly beneficial for beginners, as it allows you to focus entirely on mastering your stitch consistency and thread tension without the added step of transferring complex geometric grids.
Evaluating Thread Performance Before Starting a Project
Before committing your thread to a final project, conducting a few simple, observable tests on a scrap piece of your project fabric will prevent costly mistakes. The first test to perform is the friction check. Thread your needle with a standard working length and pull it through a double layer of your fabric several times. Observe how smoothly the thread passes through the fibers. If you feel significant resistance, or if the thread begins to pill or shred after only a few passes, your needle eye may be too small, or the fabric weave may be too tight for that specific thread thickness.
Next, evaluate the stitch lay and volume on a practice swatch. Stitch a single straight line of five to ten running stitches, keeping the spaces between the stitches slightly shorter than the stitches themselves, in the traditional sashiko style. Step back and look at the line. The thread should sit proudly on top of the fabric, creating a distinct, raised ridge. If the thread sinks completely into the weave and becomes invisible, it is too thin for that fabric. Conversely, if it distorts the fabric or creates large, unsightly holes at the entry points, it is too thick.
Colorfastness is another critical factor to verify, especially in Singapore’s warm, humid climate where finished items like coasters, table runners, or patched garments will require regular washing. Cut a small, five-centimeter piece of the thread, dampen it thoroughly with room-temperature water, and press it firmly between two layers of white paper towel or scrap white cotton fabric. Leave it to dry completely. If any dye transfers to the white material, the thread is not colorfast. In this case, you will need to pre-wash the thread or set the dye before stitching to prevent it from bleeding into your background fabric during future washes.
Finally, assess the thread’s natural tendency to twist or knot during use. Hold a one-meter length of thread by one end and let it hang freely. If it immediately twists tightly around itself, gently run your fingers down the length of the thread to release the tension before threading your needle. Observing how the thread behaves during a simulated stitching motion on your practice swatch will help you adjust your handling technique and prevent frustrating knots.
Common Thread Handling Mistakes to Avoid
Many beginners experience unnecessary frustration simply because of poor thread handling habits. The most common mistake is cutting the thread too long. While it may seem efficient to cut a long piece to avoid frequent re-threading, sashiko thread is subject to friction every time it passes through the fabric. A piece longer than 50 to 60 centimeters will suffer excessive wear, causing the tail end to fray, thin out, and lose its twist long before you reach the end of the strand. Keep your working thread length roughly equal to the distance from your fingertips to your elbow.
Another frequent error is pulling the stitches too tightly. Sashiko fabric should remain completely flat and supple. If you pull the thread taut at the end of a row, the fabric will pucker, and the finished piece will lose its drape. To prevent this, always leave a small, loose loop of thread (called a mimi or ear) on the back of the fabric whenever you turn a corner or change directions. This extra slack allows the fabric to stretch and move naturally without distorting the pattern.
Beginners should also resist the temptation to substitute standard divisible embroidery floss without making necessary adjustments. If you must use standard floss, do not use it as a single strand or split it haphazardly. You will need to combine multiple strands (typically four to six) to approximate the volume of sashiko thread, but keep in mind that the lack of a tight twist means the substitute will still be highly prone to pilling and will lack the crisp, defined line of authentic sashiko thread.
Lastly, pay close attention to the condition of your thread near the needle eye. If you notice the thread beginning to flatten, split, or shred at the point where it rests in the eye, stop stitching immediately. Cut away the damaged section and re-thread your needle. Continuing to stitch with a compromised thread will result in weak stitches that are highly likely to snap during subsequent wear or washing.
Frequently Asked Questions (FAQ)
Can I use regular embroidery floss instead of dedicated sashiko thread?
While you can technically use regular embroidery floss for practice, it is not an ideal substitute for dedicated sashiko projects. Standard embroidery floss is mercerized, giving it a shiny finish that conflicts with the traditional, rustic matte aesthetic of sashiko. Furthermore, standard floss is loosely twisted and designed to be divided, making it highly susceptible to fraying and pilling under the friction of sashiko’s long running stitches. If you must use it, combine four to six strands to match the thickness of sashiko thread, but be prepared for a less durable result and a flatter, less defined stitch texture.
How do I store leftover sashiko thread to prevent tangling?
Proper storage is essential to maintain the quality of your sashiko thread, especially in Singapore’s humid climate. Keep your threads in their original paper bands if you have not wound them, as these bands keep the skein organized and prevent individual loops from tangling. For longer leftover pieces, wind them onto dedicated plastic or cardboard embroidery bobbins, labeling them with the brand and color code for future reference. Store your organized threads in a cool, dry place, such as a sealed plastic container with a small silica gel packet, away from direct sunlight. This protects the natural cotton fibers from moisture, mold, and UV-induced color fading.

Community discussion
Share your experience or ask a question. Comments are reviewed before publication.