
Starting your embroidery journey begins with matching the right needle to your thread and fabric. Using an incorrect combination often leads to shredded threads, puckered fabric, or holes that are far too large for your stitches. By understanding how needle sizes interact with different thread thicknesses, you can set yourself up for a smooth, frustration-free crafting experience. Choosing your supplies carefully ensures that your stitches lay flat and your fabric remains smooth.
Understanding Embroidery Needles for Beginners
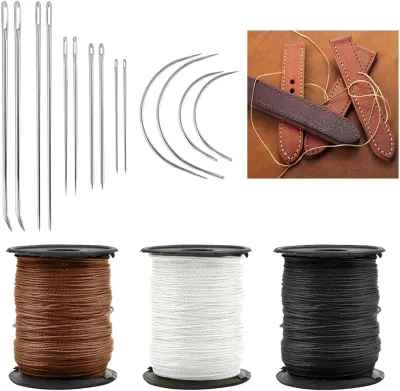
Embroidery needles, often sold as crewel needles, are specifically designed for hand stitching. Unlike standard sewing needles, they feature a medium-length shaft, a sharp point to pierce woven fabrics easily, and an elongated eye. This larger eye is crucial because it accommodates multiple strands of embroidery floss or thicker specialty threads without causing friction as you pull the thread through. It is important to distinguish them from tapestry needles, which have blunt tips and are meant for open-weave fabrics like Aida, or chenille needles, which have large eyes but are much thicker and sharper, designed for heavy crewel wool.
When shopping for needles, you will notice a numbering system that can initially seem counterintuitive. In hand sewing, a higher needle size number indicates a finer, thinner needle, while a lower number represents a larger, thicker needle. For example, a size 5 needle is much thicker and has a larger eye than a size 10 needle. Beginners typically start with a pack of assorted sizes, usually ranging from size 5 to 10, to accommodate different thread thicknesses. This variety allows you to experiment and find the exact match for your chosen design.
Products mentioned in this guide
![[SG SELLER]30 Pcs/Set Polyester Sewing Threads Set Embroidery Threads for Upholstery Sewing Machine (250 Yards / Roll)](https://img.lazcdn.com/g/p/99320171026eaf046e806d59bcb7c85c.jpg_400x400q80.jpg_.webp)
Prices are valid at publication and may change. Please refer to the product page for the latest price.
For standard beginner fabrics like medium-weight woven cotton, calico, or linen, a size 7 or 8 embroidery needle is generally the most versatile choice. These sizes are large enough to be threaded easily by a beginner but small enough to pass through the fabric weave without leaving visible, permanent holes. If you choose a heavier fabric like canvas, you may need to drop down to a larger size 5 needle to pierce the material comfortably. Conversely, delicate fabrics like lightweight batiste require a fine size 9 or 10 needle to prevent tearing the delicate fibers.
Selecting the Right Embroidery Thread
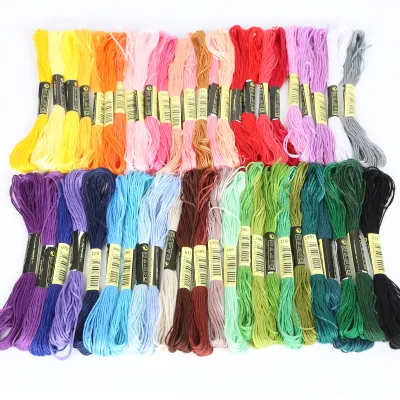
The most common thread you will encounter is six-strand embroidery floss, typically made from mercerised cotton. This thread is unique because it is designed to be separated. You can pull apart the six individual strands and use only the number required for your specific design, allowing you to control the thickness and detail of your stitches. For instance, a single strand is perfect for delicate, whisper-thin details, while using all six strands creates bold, chunky lines with high texture.

Another popular option is pearl cotton (sometimes labeled as Coton Perlé), which is a non-divisible, twisted thread. Pearl cotton has a distinct, rope-like texture and a beautiful satin sheen, making it excellent for textured stitches like French knots or chain stitches. It comes in established sizes such as 3, 5, 8, and 12, where a lower number indicates a thicker thread. Standard sewing thread, by contrast, is much thinner and lacks the coverage or sheen needed for traditional embroidery designs, making it less suitable for filling shapes.
When selecting thread at a local craft shop or online marketplace, look for indicators of quality to avoid future headaches. Check the label to ensure the thread is colorfast, which prevents the dye from bleeding when you wash or damp-block your finished piece. High-quality thread should feel smooth to the touch and exhibit a consistent sheen; avoid threads that look fuzzy or show uneven thickness, as these are highly prone to fraying and knotting while you work.
Matching Needle and Thread to Your First Projects
For your very first project, a classic combination is using two or three strands of standard six-strand embroidery floss paired with a size 7 or 8 embroidery needle on medium-weight woven cotton. This setup offers excellent control, glides smoothly through the fabric, and provides clean line definition for basic stitches like the backstitch or satin stitch. It is the standard configuration found in most beginner-friendly embroidery kits because it balances ease of use with beautiful, detailed results.
If you decide to embellish sturdier items like denim jackets or heavy canvas tote bags, you will need to adjust your tools. Heavier fabrics require a thicker needle, such as a size 5, to create a path wide enough for the thread to follow without friction. On these dense materials, you can easily use four to six strands of floss or a size 8 pearl cotton thread to ensure your stitches stand out and are not swallowed by the heavy texture of the background fabric. This combination ensures your embroidery remains visible and durable on everyday wear.
Paying attention to how your materials behave will tell you if your combination is incorrect. If you find your thread shredding or stripping at the eye, your needle is likely too small, causing excessive friction. Conversely, if you see visible gaps or holes in the fabric where the needle entered, your needle is too large for the number of thread strands you are using. Puckered fabric often indicates that your needle is too dull to pierce the weave cleanly, forcing you to pull too hard on the thread, or that your thread tension is simply too tight.
Essential Tools and Setup for Your Embroidery Kit
Beyond your needle and thread, a few basic tools are necessary to keep your fabric taut and your workspace organized. An embroidery hoop, typically made of wood or plastic, holds your fabric tight like a drum, which prevents puckering and ensures even stitch tension. A pair of small, sharp embroidery scissors is also essential for making clean cuts close to the fabric without fraying the thread ends. Thread organizers, such as plastic bobbins or paper cards, help keep your separated floss strands from tangling into unusable knots.
To prepare your needle, cut a length of thread roughly the distance from your fingertips to your elbow; using longer lengths increases the risk of tangling and knotting. Separate your desired number of strands by pulling them out one by one rather than pulling them apart all at once, which causes the thread to bunch up. Thread the needle by pinching the thread end tightly between your thumb and forefinger, then sliding the eye of the needle down over the pinched tip. Secure the tail on the back of your fabric with a simple waste knot or by weaving the tail under your first few stitches to avoid bulky, unsightly knots on the reverse side.
Proper storage will preserve the life of your embroidery supplies. Store your threads in a dry, dark place, such as a plastic organizer box, to prevent the colors from fading due to sunlight exposure. Keep your needles in a needle case or a pincushion with an emery sharpener to prevent rusting in humid climates. Never leave needles stuck in your fabric for long periods, as moisture in the air can cause the metal to rust and permanently stain your project.
Troubleshooting Common Beginner Stitching Issues
If your thread breaks or frays repeatedly near the needle eye, check the inside of the eye for tiny metal burrs or rough edges, which can occur in lower-quality needles. Replacing the needle with a fresh one often resolves this issue immediately. Additionally, ensure you are not using a thread length longer than 45 to 50 centimeters, as the constant friction of pulling the same section of thread through the fabric will naturally wear down the fibers over time. If the issue persists, try using a slightly larger needle size to reduce friction.
Fabric distortion and puckering are usually caused by pulling your stitches too tight or using a needle that is too thick for a delicate fabric. Keep your fabric drum-tight in the hoop and focus on laying the thread gently against the surface rather than pulling it taut. If the needle resists passing through the fabric, do not force it; switch to a smaller, sharper needle that can slip between the fabric threads without distorting the weave. Remember that the hoop should support the fabric, not stretch it out of shape.
Before committing to your main design, always dedicate a small scrap of your project fabric to a quick test run. Stitch a few lines using your chosen needle size and thread strand count to observe how they interact. This simple step allows you to adjust your tension, verify that the needle does not leave unsightly holes, and ensure the thread color looks correct against the fabric background before you begin your actual project. It is the best way to build confidence and avoid having to undo hours of work later.
Frequently Asked Questions (FAQ)
Can I use regular sewing thread for embroidery?
Regular sewing thread is generally not recommended for standard embroidery because it is very thin and lacks the lustrous sheen of embroidery floss. Using it for main designs will result in sparse coverage and require an excessive number of stitches to fill a space. However, regular sewing thread is highly useful for extremely fine, delicate details, such as stitching tiny facial features on a miniature design or securing delicate beads and sequins to your fabric.
How often should I change my embroidery needle?
You should change your embroidery needle as soon as you notice physical signs of wear or damage. Run your finger carefully along the tip; if it feels blunt, snagged, or bent, it is time for a replacement. A dull needle will resist piercing the fabric, causing puckering and hand fatigue. Additionally, inspect the eye for any roughness or discoloration; if the needle snags your thread or shows signs of rust, discard it immediately to protect your fabric from damage.

Community discussion
Share your experience or ask a question. Comments are reviewed before publication.