
Selecting the right tool for your creative endeavors can mean the difference between a flawless finish and a frustrating setback. To choose the right Fuumui brush for your craft project, you must match the bristle material and brush shape to the viscosity of your medium—such as fluid watercolors, heavy acrylics, or craft glues—and the texture of your working surface. By evaluating these factors alongside the scale of your project, you can find a brush that offers the precise control, fluid retention, and durability your work demands.
Because different crafting techniques place unique demands on brush fibers, understanding how these tools interact with your materials is essential. Whether you are painting delicate details on ceramics, applying broad washes of color to textured paper, or spreading thick adhesives, a systematic selection process ensures your brushes perform beautifully and last for years.
Identify Your Crafting Medium and Technique Requirements
Before browsing through brush options, analyze the physical properties of the medium you plan to use. Crafting mediums vary widely in viscosity, weight, and chemical composition. Fluid mediums, such as liquid watercolors, calligraphy inks, and thin dye-based washes, require a brush with high fluid retention that can release liquid smoothly and continuously. Conversely, heavy-bodied mediums, including acrylic paints, gesso, heavy craft glues, and varnishes, demand a brush with stiffer bristles that can push dense material across a surface without bending out of shape.
Products mentioned in this guide
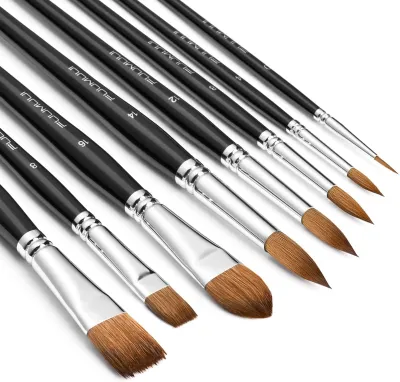
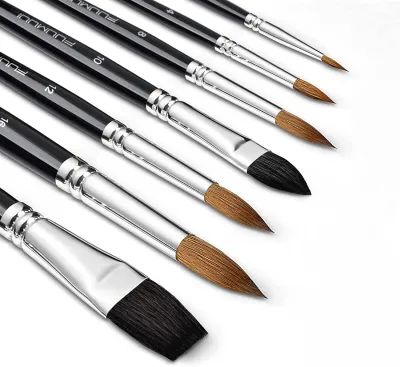
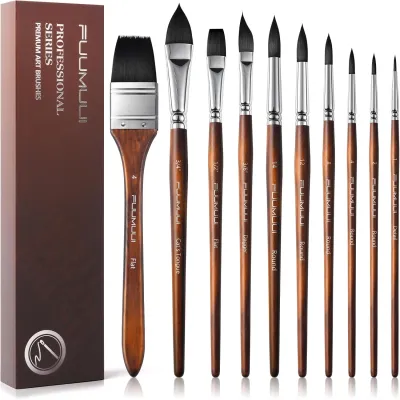
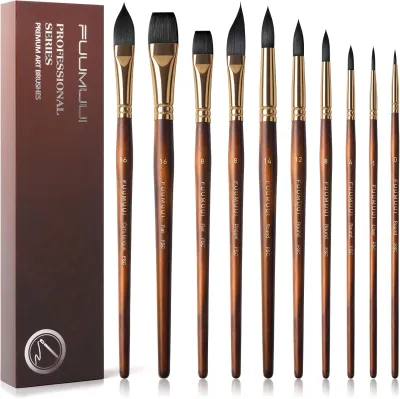
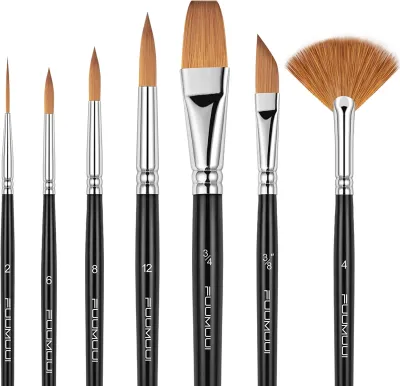
Prices are valid at publication and may change. Please refer to the product page for the latest price.
Your chosen application technique also dictates the ideal brush characteristics. If your project involves laying down broad washes of color or background coverage, you will need a brush that holds a large volume of liquid and covers wide areas quickly. For fine detailing, line work, or intricate patterns, you require a brush with a sharp, reliable tip that maintains its shape under light pressure. Techniques like dry brushing, stenciling, or stippling require resilient, stiff bristles that can withstand repetitive tapping or dragging motions without splaying permanently.
Finally, consider the texture and absorbency of your crafting surface. Rough surfaces like canvas, raw wood, terracotta, or textured handmade paper wear down delicate natural hairs quickly, making durable synthetic fibers a more practical choice. In humid environments, such as Singapore’s tropical climate, the drying speed of water-based mediums can be highly variable, and paper absorbency can change. Selecting a brush that allows you to control the exact amount of water or medium you introduce to your surface is critical to preventing paper warping, color bleeding, or excessive pooling.
Match Brush Specifications to Your Project Needs
Once you have defined your medium and technique, you can match these requirements to specific brush specifications. The first decision point is the bristle material, which generally falls into synthetic or natural categories. Synthetic bristles, typically made from nylon or polyester filaments, are highly durable, easy to clean, and resistant to damage from acrylic paints and heavy adhesives. Natural hair brushes, such as those made from sable, squirrel, or goat hair, excel at holding water-based mediums and delivering smooth, seamless washes. To verify the bristle type, inspect the product packaging or manufacturer specifications for terms like “synthetic filament,” “pure sable,” or “blended fibers.”

Brush shapes are engineered to produce specific stroke outcomes, and choosing the right shape is vital for efficiency. A flat brush features a square, straight edge, making it ideal for wide coverage, bold strokes, and clean, straight lines. Round brushes taper to a fine point, offering immense versatility for transitioning from thin lines to broader strokes in a single movement. Filbert brushes combine the benefits of flat and round shapes with a curved tip, making them excellent for soft blending, organic shapes, and figurative work. For specialized tasks, fan brushes help blend textures, while liner or rigger brushes feature long, thin bristles designed for continuous, fine line work.
Size selection must scale with the dimensions of your craft project. Brush sizes are typically indicated by numbers, ranging from extremely fine detail sizes like 000 or 0 to large utility sizes over 12. However, because sizing standards can vary between manufacturers, always verify the physical dimensions of the brush head—specifically the width and length of the bristles—against your project requirements. A large wooden tray or canvas panel might require a flat brush measuring 25 mm or wider for base coating, whereas a miniature figurine or delicate jewelry piece will require a size 0 or 2/0 round brush to execute fine details without overshooting boundaries.
Inspect Product Labels and Manufacturer Guidelines
To ensure your selected Fuumui brush is fully compatible with your project, always inspect the product labels and official manufacturer guidelines before use. Do not rely on general assumptions about brush appearance, as modern synthetic fibers can closely mimic natural hairs while behaving differently under chemical exposure. Look for explicit compatibility statements on the packaging, such as “optimized for watercolor,” “suitable for multi-medium use,” or “acrylic and oil compatible.” These labels indicate whether the glue holding the bristles in place (the ferrule adhesive) and the bristles themselves can withstand specific chemical formulations.
Safety and material compatibility are especially important when working with specialized craft adhesives, solvent-based varnishes, or solvent-based inks. If your project involves children or prolonged body contact, verify that the brush handles are finished with non-toxic, lead-free lacquers. Furthermore, check for warnings regarding solvent resistance. Some synthetic bristles can soften, curl, or dissolve when exposed to harsh solvents like acetone, mineral spirits, or alcohol-based cleaners. If the label does not explicitly state that the brush is solvent-resistant, reserve it strictly for water-based applications.
Heat exposure limits are another critical specification to verify on the product label. Crafters often use heat guns or embossing tools to speed up drying times in humid climates. However, direct heat can warp synthetic nylon bristles or melt the adhesive inside the metal ferrule, leading to premature bristle shedding. If your crafting process requires heat setting, ensure the brush is kept far from the heat source, and check the manufacturer’s care instructions to see if the brush can tolerate warm water cleaning or if it must be washed strictly in cool water.
Test and Evaluate Brush Performance on Scrap Material
Before applying a new brush to your final project, conduct a safe, reversible performance test on a piece of scrap material that matches your actual working surface. This trial allows you to observe how the brush behaves with your specific medium without risking damage to your artwork. Prepare a small amount of your paint, ink, or adhesive, and load the brush to evaluate its fluid retention. Observe whether the medium flows smoothly and predictably from the tip, or if it dumps all at once, which indicates that the bristle density or material may not be suited to the viscosity of your medium.
During this test, pay close attention to the brush’s spring and edge control. Press the brush down onto the scrap surface and gently lift it; high-quality bristles should snap back to their original shape quickly. If the bristles remain bent or splayed, you will struggle to maintain clean lines and precise control. Additionally, check for smoothness and bleed resistance on your test paper. If you notice fibers lifting from the paper or the paint bleeding excessively beyond your stroke, you may need to adjust your water-to-paint ratio, reduce your application pressure, or switch to a brush with softer bristles.
Shedding is another critical factor to monitor during your initial trial. Gently tug the bristles of a dry brush before wetting it to remove any loose fibers left over from the manufacturing process. During your test strokes, observe if any bristles shed onto the scrap material. A few loose hairs during the very first use can be normal, but persistent shedding indicates a weak ferrule crimp or poor adhesive bonding. If the brush continues to shed, splays under light pressure, or scratches the surface, stop using it immediately and switch to a different brush to protect your final project from embedded debris and uneven textures.
Clean and Store Your Brushes for Longevity
Proper maintenance is the single most effective way to preserve the shape, spring, and performance of your brushes. Cleaning should begin immediately after your crafting session, before the medium has a chance to dry and harden within the bristle bundle. For water-based mediums like watercolors, gouache, or acrylics, rinse the brush thoroughly in lukewarm water. You can use a mild, pH-neutral brush soap to gently massage the bristles, working from the ferrule down to the tip. Avoid using hot water, as it can soften the adhesive holding the bristles inside the metal ferrule.
If you have used solvent-based mediums, varnishes, or heavy craft glues, clean the brush using the specific solvent recommended by the medium’s manufacturer. Work in a well-ventilated space, especially in compact indoor crafting areas. After cleaning, rinse the brush thoroughly to remove all traces of the solvent or soap. Gently reshape the damp brush head with your fingers, restoring it to its original profile. Never leave brushes soaking face-down in a container of water or solvent, as this permanently bends the bristles and allows liquid to seep into the wooden handle, causing the wood to swell, crack, and loosen the ferrule.
Proper drying and storage are crucial, particularly in humid climates where trapped moisture can lead to mold growth or wood rot. Lay your cleaned and reshaped brushes flat on a clean towel, or hang them upside down using a brush drying rack so that any remaining water drains away from the ferrule. Once the brushes are completely dry, store them upright in a jar or flat in a breathable canvas wrap. Avoid storing damp brushes in airtight plastic containers or drawers, as this traps humidity and creates an ideal environment for mildew. Keeping your brushes in a dry, well-ventilated space ensures they remain clean, springy, and ready for your next creative project.
Frequently Asked Questions (FAQ)
Can I use the same brush for both water-based and solvent-based crafts?
It is generally not recommended to use the same brush for both water-based and solvent-based mediums. Residues from solvents, oils, or heavy varnishes can cling to the bristles even after cleaning, which can contaminate your water-based paints and cause them to bead up, dry unevenly, or fail to adhere to the surface. Additionally, the harsh chemicals required to clean solvent-based mediums can gradually degrade delicate natural hairs or soften synthetic filaments, reducing their effectiveness for delicate watercolor or gouache techniques. To maintain optimal performance, dedicate specific brushes to water-based projects and a separate set to solvent-based crafts.
How do I know if a brush is too stiff for my crafting surface?
You can determine if a brush is too stiff by observing its behavior on a scrap piece of your crafting material. If the bristles scratch the surface, leave visible, deep brush marks in your paint layer, or lift fibers from delicate paper, the brush is too stiff for that application. A brush that is too rigid can also disturb underlying, dry layers of paint when you attempt to glaze or layer colors. If you observe any of these signs, try reducing your application pressure. If the issue persists, switch to a softer synthetic brush or a natural hair alternative that glides smoothly over the surface without abrading it.

Community discussion
Share your experience or ask a question. Comments are reviewed before publication.