
Choosing the correct bubble envelope size is a balancing act between protection and cost. If the mailer is too small, your item will stretch the seams, flatten the protective bubbles, or fail to seal securely. If it is too large, the item will slide around inside, risking damage during transit while unnecessarily increasing your shipping fees. To find the perfect fit, you must calculate your item’s three-dimensional volume and compare it directly to the envelope’s usable inner dimensions.
Decoding Bubble Envelope Dimensions: Inner vs. Outer Size
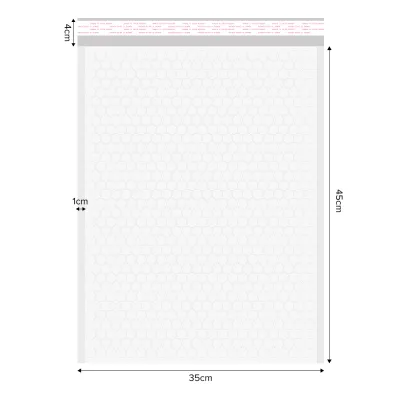
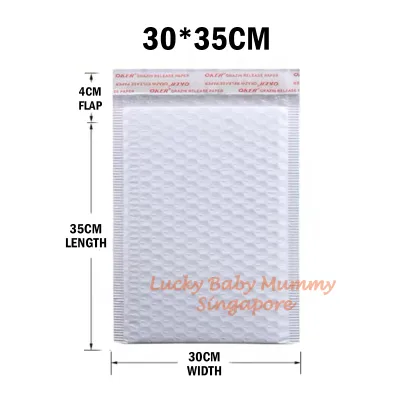
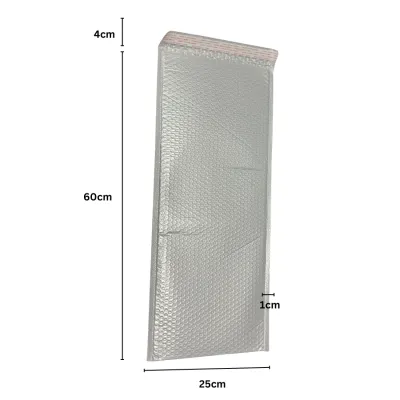
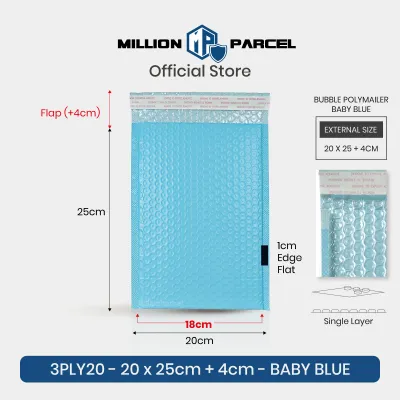
When browsing packaging supplies, you will notice two sets of measurements listed on product specifications: outer dimensions and inner dimensions. The outer dimensions represent the total footprint of the envelope, including the sealed side seams and the paper or plastic lip. While these measurements are important for calculating shipping postage and storage space, they do not represent the actual space available for your product.
The usable inner dimensions are always smaller than the outer dimensions. This reduction in space is caused by two main factors: the width of the welded side seams and the thickness of the internal bubble lining. Typically, the bubble wrap lining itself can reduce the interior width and length by several millimeters on each side, and heavy-duty bubble mailers with larger bubbles reduce this space even further.
Products mentioned in this guide
![[SG SELLER] Black Light Pink Lilac Pink Turquoise Bubble Envelope Bag Polymailer Bubble Wrap Envelope Wrap Bag](https://img.lazcdn.com/g/p/459a2341c3de79482ddaf9fb578ffe4c.jpg_400x400q80.jpg_.webp)
![[SG] ⭐CHEAPEST BUNDLE⭐ Bubble Polymailer | Bubble Envelope | Bubble Mailer | Padded Envelope | Bulk Purchase](https://img.lazcdn.com/g/p/d1f9b06ebe577dd9b0f70feb1fa794ad.jpg_400x400q80.jpg_.webp)
Prices are valid at publication and may change. Please refer to the product page for the latest price.
Relying solely on the printed outer size label is one of the most common mistakes in packaging selection. For instance, an envelope labeled as 150mm by 220mm might only offer a usable interior space of 130mm by 210mm. Always locate the manufacturer’s specified “usable inside dimensions” before making a purchase to ensure your items will actually fit inside the protective pocket.
How to Measure Your Items to Calculate the Required Size
To determine the minimum envelope size you need, you must measure your item as a three-dimensional object. Grab a reliable ruler or measuring tape and record the maximum length, width, and thickness of the item. If the item is already housed in retail packaging, a protective sleeve, or a small inner box, make sure to measure those outer boundaries rather than the bare product itself.

Calculating the required envelope width involves more than just matching the item’s width. You must account for the item’s thickness, which pulls the flat sides of the envelope inward when inserted. To find the minimum inner width required, use this simple formula: add the item’s width to its maximum thickness, then add a small clearance allowance of about 10 to 15 millimeters to accommodate the seam restrictions and bubble volume.
Calculating the required inner length follows a similar logic. Add the item’s length to its maximum thickness, and then add an extra allowance of at least 20 to 30 millimeters. This extra length ensures that the item sits completely below the opening line, leaving enough flat space for the adhesive flap to fold over and seal securely without being stretched over the item’s edge.
Forcing a thick, rigid, or tightly fitting item into an envelope that is technically too small carries severe risks. The tension stretches the exterior paper or plastic, which can easily pop the protective air bubbles and split the side seams during transit. When in doubt, always round up to the next available envelope size to maintain the structural integrity of the packaging.
Matching Item Profiles to the Right Envelope Fit
Different types of items interact with bubble mailers in unique ways, meaning your selection strategy should adapt to what you are shipping. Flat and flexible items, such as documents, brochures, clothing, or soft textiles, require very little thickness allowance. For these products, you can focus primarily on standard length and width calculations, choosing a mailer that keeps the items flat and prevents them from folding or creasing.
Rigid, boxy, or three-dimensional items like small electronics, cosmetics, or hard plastic cases demand much more careful thickness compensation. Because these items do not bend, they place intense localized stress on the envelope’s seams and corners. For these profiles, selecting a mailer with a generous thickness allowance is critical to prevent sharp corners from puncturing the outer packaging material.
Fragile items, such as glassware, ceramics, or delicate instruments, require a snug fit that prevents internal shifting without compressing the protective bubbles. If the item slides back and forth inside the mailer, it can gather momentum during handling, increasing the impact force if the package is dropped. The ideal fit cradles the item securely, ensuring the bubble layer remains uncompressed and fully functional.
Checking Seal Clearances and Knowing When to Switch to a Box
Once you have selected an envelope and placed your item inside, perform a quick physical check of the seal clearance. The adhesive flap must fold over completely flat against the exterior of the mailer. If the flap is forced to stretch over a bulky item, the adhesive bond may fail under tension, leaving your package vulnerable to opening or moisture ingress during transit.
Next, visually inspect the edges and seams of the packed envelope. The sides should remain relatively flat and relaxed, and the bubble lining should not feel tightly stretched or compressed against the item. If you notice the seams pulling apart, the paper creasing sharply, or the plastic turning white from stress, the envelope is too small and will likely fail during shipping.
There are clear boundaries where a bubble envelope is no longer the safe or appropriate choice. If your item is exceptionally heavy, highly rigid, or features sharp, unprotected corners, it can easily burst through the seams of a padded mailer. In these scenarios, you should switch to a sturdy corrugated box, using loose bubble wrap or packing paper to fill the voids and protect the contents.
Frequently Asked Questions (FAQ)
Can I use a bubble envelope for heavy items?
Bubble envelopes are primarily engineered for lightweight to medium-weight items. Heavy or highly dense items place excessive stress on the seams and can easily pop the protective air bubbles upon impact. Always check the manufacturer’s weight guidelines for your specific mailers, and if your item feels heavy or has sharp edges, opt for a corrugated box instead.
Do I need to add extra padding inside a bubble envelope?
For standard, non-fragile items, the built-in bubble layer provides sufficient cushioning if the envelope is sized correctly to prevent shifting. However, if you are shipping highly fragile items, products with sharp corners, or if you are using an oversized envelope, wrapping the item in an extra layer of bubble wrap or tissue paper is highly recommended to ensure maximum protection.

Community discussion
Share your experience or ask a question. Comments are reviewed before publication.