
Selecting a light drawing board for architectural drafting in Singapore requires balancing precision, durability, and optical clarity. Unlike general crafting, architectural work demands a flat, highly uniform, and scratch-resistant surface that can handle technical pens, heavy tracing paper, and multi-layered blueprints.
To make an informed decision, you must evaluate how a board performs under the pressure of drafting tools and whether its illumination remains consistent across large paper sizes. This guide outlines the essential technical specifications, practical pre-purchase checks, and maintenance protocols to help you select the right tool for your studio.
Quick Answer: Key Selection Criteria
When choosing a professional-grade light drawing board, prioritize three critical factors: active drawing area, brightness adjustability, and surface durability.
Products mentioned in this guide
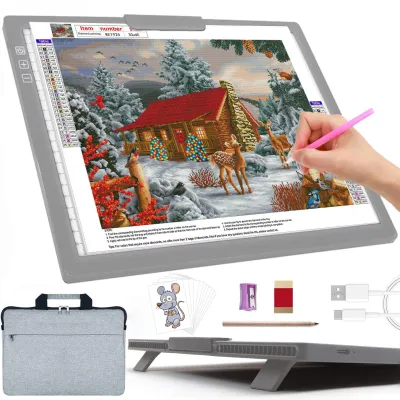
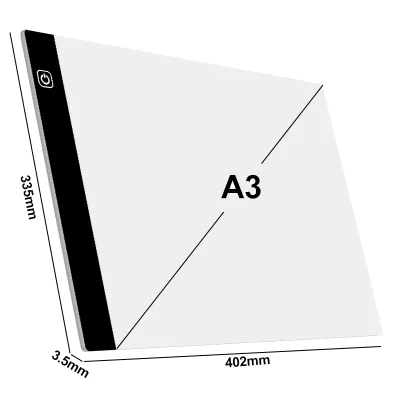
Prices are valid at publication and may change. Please refer to the product page for the latest price.
The active illuminated area must fully accommodate standard ISO paper sizes, typically A3 or A2, to prevent edge shadowing. Brightness must be highly adjustable, ideally featuring stepless dimming, to penetrate thick vellum and multiple tracing layers without causing eye strain. Finally, the surface material must resist scratches from metal compass points, dividers, and hard technical pen tips to maintain long-term optical clarity.
Core Requirements for Architectural Drafting
Architectural tracing demands far greater precision and structural integrity than casual sketching or animation. Understanding these specific requirements ensures your board can handle professional drafting workflows.

Active Area vs. Overall Dimensions
When reviewing product specifications, always distinguish between the overall dimensions of the board and the actual active illuminated area. Many entry-level boards are marketed by their outer frame size, leaving an illuminated zone that is too small for standard architectural sheets.
For example, if you regularly draft on A3 paper (297 mm x 420 mm), the active illuminated zone must be at least these dimensions. If your paper overlaps the non-illuminated border, you will experience edge shadowing and a slight lip at the boundary, making it difficult to draw precise lines near the margins. For A2 plans (420 mm x 594 mm), a larger board is essential to avoid constant repositioning of your sheets.
Surface Material Standards
Most light drawing boards feature either an acrylic or a tempered glass top surface. Acrylic is lightweight, highly shatterproof, and easy to transport between your home, studio, or site visits. However, standard acrylic is relatively soft and susceptible to micro-scratches from metal drafting tools, such as compasses, dividers, and technical pens with steel nibs.
Over time, these micro-scratches accumulate, catching dust and scattering light, which permanently reduces the clarity of your board. Tempered glass tops offer exceptional scratch resistance and a perfectly rigid drawing plane. While glass boards are heavier and more fragile, they provide a highly durable surface that remains pristine even after years of heavy technical drafting.
Light Uniformity
Tracing complex architectural plans often involves layering multiple sheets of vellum or heavy tracing paper, ranging from 80gsm to 112gsm. If the light source is uneven—showing bright spots near the LEDs and dim zones in the center—you will experience contrast loss.
This lack of uniformity makes it incredibly difficult to align fine structural grids and details across different layers. High-quality boards utilize advanced light guide plates (LGP) that print a precise pattern of light-diffusing dots across the panel, ensuring edge-to-edge consistent illumination.
Evaluating Technical Specifications
To ensure a light drawing board meets the rigorous standards of architectural work, you must look beyond basic marketing claims and evaluate its core technical specifications.
Brightness Control Mechanisms
Standard light pads often feature simple three-stage preset dimming (low, medium, high). While sufficient for basic tracing, preset levels rarely match the exact opacity of layered architectural media.
A high setting might be too blinding when tracing a single sheet of thin layout paper, while a medium setting might not provide enough contrast through three layers of heavy vellum. Stepless dimming allows you to adjust the brightness continuously, matching the exact opacity of your media and the ambient lighting of your workspace. This precise control is vital for maintaining line accuracy and reducing eye fatigue.
Light Source Characteristics
Modern light drawing boards rely on LED technology. When evaluating the light source, look for flicker-free technology. High-frequency flickering, even if imperceptible to the naked eye, causes rapid eye strain, headaches, and fatigue during extended drafting sessions.
Color temperature is another critical factor. A cool white light, typically between 5000K and 6500K, mimics daylight and provides the sharpest contrast for black ink lines on translucent paper. Some advanced boards offer adjustable color temperatures, allowing you to switch to a warmer tone to reduce blue light exposure during late-night design sessions.
Structural Rigidity and Thickness
While ultra-thin boards (ranging from 5mm to 8mm) look sleek and are highly portable, they can flex under the weight of your hands or when applying pressure with a heavy parallel ruler or T-square. A flexing surface distorts your lines and can cause scaling errors in your drawings.
Ensure the board has a rigid backing or a reinforced frame that maintains a perfectly flat plane under normal drafting pressure. If you plan to use the board on an angled drafting table, structural rigidity becomes even more critical to prevent the frame from twisting.
Building Your Shortlist: Pre-Purchase Checks
Before purchasing a light drawing board from an online marketplace or a local stationery supplier, compile a shortlist and perform these practical verification checks.
Verifying Manufacturer Specifications
Do not rely solely on product titles. Access the manufacturer’s technical datasheet to verify the actual lux rating, which measures the intensity of light emitted from the surface. For professional architectural drafting through heavy vellum, aim for a board that delivers at least 3000 to 4000 lux.
Confirm the precise active area dimensions in millimeters and compare them to the standard paper sizes you use. If you frequently work with non-standard or larger sheets, ensure the board’s physical borders are flat and flush with the illuminated area so your paper can overhang without creasing.
Power Supply Compatibility
Most modern light boards are powered via USB. However, larger A2 boards often require more power than a standard computer USB port can provide. Verify if the board requires a USB-C connection with Power Delivery (PD) or a dedicated 12V DC adapter.
If you plan to use the board in different studio spaces or on-site where power outlets may be limited, a model that can run efficiently off a high-capacity power bank (typically requiring a 5V/2A output) offers excellent flexibility.
Analyzing User Feedback
When researching specific models, look for reviews from other design professionals, artists, or students. Pay close attention to complaints regarding:
- Long-term surface clouding: Indicates low-quality acrylic that degrades under heat or light exposure.
- LED flickering: Suggests poor internal circuitry or fragile power ports.
- Edge light bleed: Occurs when the frame is poorly sealed, causing distracting light to escape from the sides of the board.
- Port durability: Check if users report the USB-C or DC port becoming loose over time, which can cause intermittent power loss.
Warranty and Support
Since light drawing boards are electronic devices, ensure the retailer or manufacturer offers a reliable warranty, ideally covering at least 12 months. This warranty should specifically cover LED failure, power port issues, and touch-control malfunctions. Check the return policy of the platform or local shop to ensure you can easily exchange the unit if it arrives with dead zones or uneven lighting.
Workspace Setup and Surface Maintenance
Integrating your light board into an ergonomic workspace and maintaining its surface is essential for both your physical comfort and the longevity of the device.
Ergonomic Positioning
Drafting flat on a desk for hours can lead to severe neck, shoulder, and back strain. To prevent this, integrate your light board with an adjustable drafting table or use a dedicated multi-angle stand.
Positioning the board at a 15 to 30-degree angle improves your viewing posture and makes it easier to use drafting tools like T-squares and triangles. Ensure the stand is sturdy enough to prevent any wobbling or sliding while you work.
Surface Care Protocols
Singapore’s humid climate can cause dust, oils, and moisture to adhere to the drawing surface. To maintain optical clarity, clean the surface regularly with a dry, non-abrasive microfiber cloth.
If deeper cleaning is needed, use a mild, highly diluted dish soap solution. Never use harsh solvents like acetone, benzene, or high-concentration isopropyl alcohol. These chemicals can cause acrylic to craze, cloud, or develop micro-cracks, permanently ruining the light diffusion. Always apply the cleaning solution to the cloth first, rather than spraying it directly onto the board, to prevent liquid from seeping into the internal electronics.
Cable Management and Safety
Ensure the power cable is routed securely along your desk or drafting stand. Avoid tight bends near the connection port on the board, as repeated strain can damage the internal soldering of the USB-C or DC jack. Use cable clips or hook-and-loop straps to keep the cord out of the way, preventing accidental snags that could pull the board off your workspace.
Frequently Asked Questions (FAQ)
Can I use a standard crafting light pad for architectural drafting?
Standard crafting light pads are generally unsuitable for professional architectural drafting. Craft pads are typically designed for hobbies like diamond painting or basic sketching, often limiting their size to A4 or A5. Architectural plans require at least an A3, and ideally an A2, active area.
Furthermore, standard craft pads often lack the high lux output needed to penetrate multiple layers of heavy vellum or tracing paper. Their softer acrylic surfaces also scratch easily under the pressure of metal drafting compasses and technical pens, quickly degrading the optical clarity required for precise line work.
Does the color temperature of the LEDs affect tracing accuracy?
Yes, color temperature significantly impacts contrast perception and eye strain. Cooler color temperatures, typically between 5000K and 6500K, provide a crisp, high-contrast light that makes fine black ink lines stand out sharply against translucent tracing paper. This high contrast is essential for aligning complex structural grids accurately.
However, prolonged exposure to cool blue-toned light can cause eye strain during long drafting sessions. Having an adjustable color temperature allows you to balance high-contrast cool light for detailed work with warmer, softer light for general layout tasks, helping to manage eye fatigue.
How do I prevent the light board from overheating during long sessions?
To prevent overheating, ensure the light board is placed on a hard, flat surface rather than a soft cloth or mat, allowing heat to dissipate naturally from the back panel. Avoid running the board at maximum brightness continuously if a lower setting suffices for your current tracing layer.
If you notice the surface becoming excessively hot to the touch or if the LEDs begin to flicker, power down the device immediately and allow it to cool. Always refer to the manufacturer’s guidelines regarding continuous run times and thermal limits to protect the internal electronic components.

Community discussion
Share your experience or ask a question. Comments are reviewed before publication.