
Architectural drafting is a discipline of absolute precision, where a fraction of a millimeter can dictate the structural alignment of an entire building plan. When overlaying tracing paper, vellum, or drafting film to refine floor plans, structural details, or elevation schematics, standard ambient office lighting is rarely sufficient. To achieve the necessary clarity without compromising accuracy, a high-performance led writing board is an indispensable tool. Choosing the right device requires understanding how optical performance, structural build quality, and physical dimensions interact with professional drafting media.
Unlike general illustration or casual sketching, where minor line variations are acceptable, technical drafting demands perfectly uniform, shadow-free illumination. This ensures that parallel lines, complex hatches, and minute annotations do not visually merge or distort. Furthermore, the physical surface must be exceptionally rigid to support heavy drafting tools like T-squares, parallel bars, heavy steel rulers, and precision compasses. By evaluating your options through a structured framework of optical performance, physical dimensions, surface build, and workflow compatibility, you can select a tool that enhances both accuracy and comfort.
Why Architectural Drafting Demands Specific LED Writing Board Features
In a professional architectural workflow, drawings are rarely single-layer creations. Draftsmen and architects frequently work with multiple overlays to coordinate structural, mechanical, electrical, and plumbing (MEP) layouts over a base architectural floor plan. This multi-layered process requires an illumination source capable of penetrating several sheets of high-density paper without losing the crispness of the underlying lines. A standard light pad designed for hobbyist crafting often fails under these conditions, either due to insufficient brightness or uneven light distribution that obscures fine details.
Products mentioned in this guide
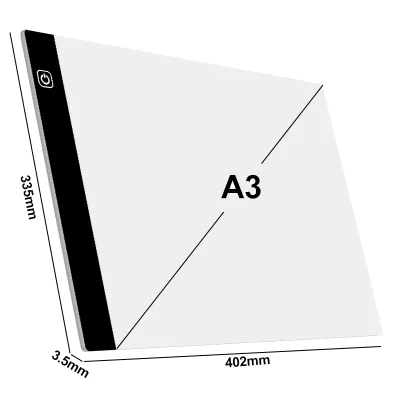
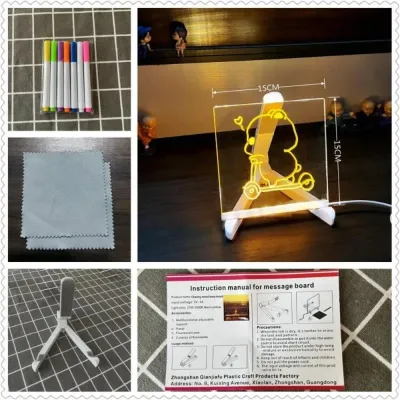
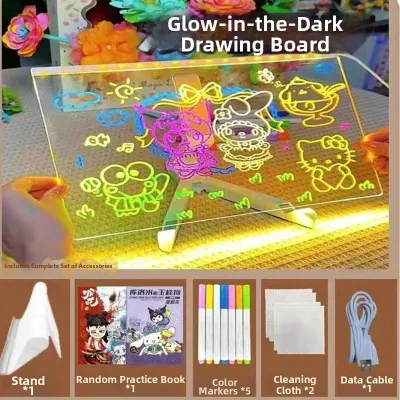
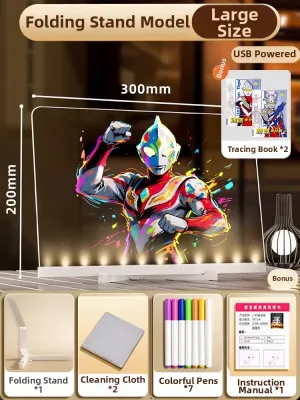
Prices are valid at publication and may change. Please refer to the product page for the latest price.
Technical drafting also relies heavily on the physical interaction between drawing instruments and the drawing surface. When sliding a heavy metal T-square or an adjustable triangle across a board, the surface must remain perfectly flat and unyielding. Any flexing, bowing, or dipping in the center of the board will cause physical tools to slip, leading to inaccurate measurements and misaligned lines. Furthermore, because architectural drawings are scaled documents, even a minor warp in the drafting surface can introduce cumulative measurement errors across a large-format sheet.
To make an informed investment, you must evaluate how a board handles optical demands, physical wear, and workflow integration. In Singapore’s professional design firms and architectural schools, where long hours and meticulous standards are the norm, selecting a board with the correct specifications directly impacts both the quality of the output and the physical well-being of the designer. The following sections break down these critical decision-making factors in detail.
Essential Optical Specifications for Precision Tracing
Brightness Levels and Dimming Control
The luminous intensity of an led writing board determines its ability to project light through dense or layered media. For technical tracing, look for boards that specify their brightness in lux, aiming for a maximum output of at least 3,000 to 5,000 lux. This high ceiling is necessary when working with heavy-weight drafting vellum or double-matte polyester films, which naturally diffuse and block more light than standard tracing paper.

However, maximum brightness is not always desirable. If the light is too intense when working with thin 40 GSM tracing paper, it can cause a visual phenomenon known as halation, where light bleeds around the edges of dark ink or pencil lines, making them appear blurry. To prevent this, adjustable dimming is essential. Stepless dimming controls, which allow you to adjust the brightness continuously from 10% to 100%, are highly superior to fixed-step controls (such as low, medium, and high). Stepless adjustment lets you fine-tune the illumination to match the exact opacity of your paper combination and the ambient light of your workspace.
Before finalizing a purchase, perform a practical verification check. Place your thickest intended tracing medium over a detailed base drawing on the board. Adjust the brightness to ensure you can clearly distinguish fine pencil lines (such as a light 2H lead) without experiencing glare or washed-out details. If the lines remain faint or if you must strain your eyes to see them, the board’s maximum light output is insufficient for your media workflow.
Color Temperature and Light Uniformity
Color temperature, measured in Kelvin (K), significantly influences visual contrast and eye strain. For architectural drafting, neutral to cool white light in the range of 5,000K to 6,500K is highly recommended. Cool white light closely mimics natural daylight, which maximizes the visual contrast between black technical ink or dark graphite lines and the white or translucent tracing paper. Warm light (below 4,000K) tends to soften line edges visually and can cause drowsiness during extended night sessions.
Light uniformity across the entire active area is another critical factor. Low-end boards often feature simple perimeter LED strips without adequate diffusion, resulting in bright hot spots near the edges and dim zones in the center. An architectural-grade board must utilize an advanced Light Guide Plate (LGP) made of high-grade optical acrylic. The LGP features a precise, computer-calculated dot-matrix pattern that evenly distributes light across the entire surface, ensuring that a line drawn in the corner of the board has the exact same visual weight as one drawn in the center.
Additionally, verify that the board features flicker-free technology. Many cheap LED drivers use low-frequency pulse-width modulation (PWM) to dim the lights, which creates an imperceptible flicker. While you may not consciously see this flicker, your eyes constantly adjust to it, leading to rapid pupil fatigue, headaches, and dry eyes. Opt for boards that utilize direct current (DC) dimming or high-frequency flicker-free certification to protect your vision during long drafting sessions.
Physical Dimensions and Surface Build Quality
Selecting the Active Area for Blueprint Sizes
When evaluating an led writing board, it is vital to distinguish between its overall physical footprint and its actual active, illuminated area. The active area must accommodate the standard paper sizes used in your architectural projects. In Singapore, professional construction drawings and academic submissions typically utilize ISO paper formats, primarily A3, A2, and A1.
- A3 (297 x 420 mm): Suitable for detail drawings, small residential floor plans, and portable sketching.
- A2 (420 x 594 mm): The practical sweet spot for most independent architects and students, offering ample space for schematic designs and elevations.
- A1 (594 x 841 mm): Required for comprehensive site plans, large commercial floor plans, and full-scale construction documents.
Always select a board where the active illuminated area is slightly larger than your primary paper size. For example, if you primarily draft on A3 paper, choosing an A2-sized board provides a highly beneficial margin. This extra space allows you to use drafting tape or magnetic clips to secure your base sheet and overlays outside the active drawing zone, and provides a flat surface for your parallel ruler or T-square to rest without slipping off the illuminated edge. Furthermore, larger boards must feature a robust internal frame, typically made of anodized aluminum, to prevent the center of the board from sagging or bowing when you apply physical pressure during drawing.
Surface Materials and Glare Reduction
The top surface of the board is the interface where your tools and media meet. The two primary materials used are optical-grade acrylic (PMMA) and tempered glass. Tempered glass is the premium choice for professional studios; it is exceptionally scratch-resistant, remains perfectly flat over years of use, and is unaffected by the sharp points of drafting compasses or dividers. However, glass boards are heavy and fragile if transported. Acrylic is lightweight and highly impact-resistant, making it ideal for mobile use, but it is susceptible to micro-scratches from sliding metal T-squares. If you choose an acrylic board, ensure the manufacturer specifies a hardened, scratch-resistant surface treatment.
Workspace lighting can also create distracting reflections on a glossy light board surface. To combat this, look for surfaces with an anti-glare or matte-finish coating. A matte surface diffuses external overhead light, preventing harsh reflections from masking your drawing lines. This is particularly important when working under bright fluorescent or LED studio lighting, as it allows you to maintain focus on the drawing without constantly shifting your body to avoid glare.
Finally, verify the flatness of the surface. Even a minor warp of one millimeter across the board can cause a technical pen to pool ink or allow a parallel bar to lift, leading to capillary bleeding under the ruler edge. You can check flatness by placing a high-precision steel ruler on its edge across the surface of the powered board; if you see light escaping through gaps between the ruler and the board, the surface is uneven and unsuitable for high-precision work.
Power Options, Portability, and Workflow Enhancements
Power delivery methods directly impact where and how you can use your light board. Large-format boards (A2 and A1) require substantial electrical current to maintain high, uniform brightness across their large surface areas. Consequently, these boards usually rely on dedicated AC power adapters (typically 12V or 24V). AC-powered boards provide consistent, flicker-free illumination and are ideal for permanent desktop setups in a home office or professional studio.
For students and architects who frequently move between the office, site visits, and collaborative workspaces, USB-powered boards (utilizing USB-C or Micro-USB) offer excellent flexibility. These can be powered directly from a laptop, a wall charger, or a portable power bank. The trade-off is that 5V USB power may limit the maximum brightness of larger boards, making them less effective when tracing through multiple layers of heavy vellum. If portability is your priority, look for an ultra-thin USB-C board, but ensure its maximum lux rating still meets your media requirements.
The physical design of the board’s edge, or bezel, is another critical factor for drafting comfort. A thick, raised bezel acts as a physical barrier, catching the edge of your T-square, set squares, or parallel ruler and disrupting smooth, continuous pen strokes. For drafting, a completely flush or ultra-thin bezel is essential, allowing your drawing tools to slide smoothly off the edge of the board without catching or tilting.
Some boards include built-in features designed to streamline your workflow. Integrated metric rulers printed along the borders can be useful for quick references, but ensure they do not clutter your visual field or conflict with the specific engineering scales (such as 1:50 or 1:100) you are using. A memory function is another highly practical feature; it automatically recalls your last-used brightness setting when you turn the board on, saving you from a sudden, blinding flash of light when starting a new session in a dimly lit room.
Recommended Board Configurations Based on Drafting Workflows
Fixed Desktop Light Boxes for Studio Drafting
For a permanent professional workstation or a dedicated home studio, a heavy-duty, fixed desktop light box is the ideal configuration. These units are designed to sit permanently on a drafting table or flat desk. They feature robust aluminum alloy frames, thick tempered glass surfaces, and high-output AC power supplies that deliver maximum brightness and flawless light uniformity.
These boards are typically A2 size or larger, providing the expansive active area required for detailed architectural plans. Because they are heavy and rigid, they do not slide or flex under pressure, allowing you to use heavy parallel drafting bars with confidence. The primary trade-off is their complete lack of portability and high power requirement, making them a dedicated investment for serious, stationary drafting work.
Portable and Foldable Boards for Fieldwork
If your workflow involves traveling to construction sites, attending client meetings, or hot-desking in shared offices, a portable, ultra-thin board is the most practical choice. These boards are typically under 8mm thick, lightweight, and constructed from impact-resistant acrylic. They are powered via USB-C, allowing you to run them off a laptop or a compact power bank while working on-site.
These portable boards are generally limited to A4 or A3 sizes. While highly convenient, they do exhibit minor flexing if heavy hand pressure is applied, and their maximum brightness may be lower than AC-powered studio models. They are best utilized for quick redlines, sketching design overlays during client consultations, or for students who need to carry their tools between home and university studios.
Large-Format Boards for Full-Size Plans
For professional architecture and engineering firms that regularly handle full-scale construction blueprints, specialized large-format light tables or modular LED panels are required. These systems are designed to accommodate A0 paper sizes (841 x 1189 mm) or even larger custom formats, allowing teams to review and trace complete site plans without folding or shifting the sheets.
These large-format systems are major investments and require dedicated floor space. They often feature reinforced steel legs, adjustable height and tilt mechanisms to support ergonomic posture, and specialized passive or active ventilation systems to dissipate the heat generated by the massive array of high-output LEDs. They are essential tools for large offices conducting comprehensive quality control and interdisciplinary coordination reviews.
Verifying Media Compatibility and Eye Comfort
To ensure your light board integrates seamlessly into your daily workflow, you must verify how it interacts with your preferred drafting media. Different papers and films have unique optical and physical properties that react differently to LED illumination. In Singapore’s humid tropical climate, paper can absorb moisture from the air, causing lightweight tracing paper to buckle or warp slightly; a flat, heat-free LED surface is crucial to prevent this moisture from causing ink bleeding or paper distortion.
- Tracing Paper (40–60 GSM): This highly translucent medium requires minimal light penetration. On high-brightness settings, light can bleed around your lines, so you will need to dim the board significantly to maintain sharp contrast.
- Drafting Vellum (90–110 GSM): Made from plasticized cotton fibers, vellum is durable but semi-opaque. It requires a high-lux board to project clear lines through the sheet, making adjustable brightness a necessity.
- Polyester Drafting Film (Mylar): This professional medium offers exceptional dimensional stability. Double-matte film has a textured surface that diffuses light, requiring a strong, uniform light source to prevent the underlying drawing from looking hazy.
Ink behavior must also be carefully monitored. Professional technical pens, such as Rotring Isograph or Staedtler Mars Matic, rely on precise capillary action to flow ink. Cheap light boards can generate significant heat from their internal LEDs, warming the drawing surface. This heat can cause the ink to dry prematurely inside the fine pen nib, leading to clogging, feathering on the paper, or uneven line weights. Always test your pens on a powered board for at least thirty minutes to ensure the surface remains cool to the touch.
Finally, prioritize your physical ergonomics. Prolonged drafting on a flat surface forces your neck into a forward-bent posture, leading to cervical spine strain and muscle fatigue. Use an adjustable drafting stand to tilt the board to an angle of 15 to 30 degrees, which aligns the surface closer to your natural line of sight. Additionally, ensure the ambient lighting in your room is balanced with the board’s output. Working with a bright light board in a pitch-black room forces your pupils to constrict and dilate constantly, leading to rapid eye strain. Keep your workspace moderately lit and adjust the board’s brightness to match the environment.
Frequently Asked Questions (FAQ)
Can I use a standard tablet or monitor as a tracing light board?
While a standard tablet or computer monitor emits light, it is not a suitable replacement for a dedicated technical light board. Digital screens lack the scratch-resistant surface required to withstand the sliding of metal drafting tools and the sharp points of compasses, and applying pressure can permanently damage the sensitive LCD or OLED panel. Furthermore, digital screens feature a pixel grid that creates distracting moiré patterns when viewed through translucent tracing paper, and they lack the flat, flush bezels needed to support T-squares and parallel rulers.
What paper weight is optimal for tracing architectural plans?
The optimal paper weight depends on your light board’s maximum brightness, but for general tracing, standard tracing paper between 40 and 60 GSM offers the best balance of translucency and tear resistance. For professional-grade archival drawings, 90 to 110 GSM drafting vellum or 3-mil double-matte polyester film is preferred due to their superior durability and dimensional stability, though these thicker media require a high-lux LED writing board with adjustable brightness to ensure clear visibility.
Do LED writing boards emit UV light that fades blueprints?
Modern LED writing boards utilize high-quality white LEDs that emit virtually no ultraviolet (UV) or infrared (IR) radiation. This makes them perfectly safe for prolonged exposure to sensitive historical blueprints, ammonia-developed prints (diazo), and archival-grade vellum without the risk of yellowing, fading, or heat-induced degradation. For added peace of mind, you can check product specifications for eye-care or UV-free certifications.
Community discussion
Share your experience or ask a question. Comments are reviewed before publication.