
Starting a glow-in-the-dark art project can be an exciting venture, but beginners often face the frustration of purchasing a single tube of paint only to realize they lack the necessary base coats, specialized brushes, or charging lights to make their creation shine. Choosing a complete glow-in-the-dark paint starter set solves this problem by providing a curated bundle of compatible materials designed to work together seamlessly. A well-chosen kit ensures that your first project is successful, saving you the time and expense of buying individual supplies.
To find the ideal starter set in Singapore, you must look beyond eye-catching packaging and evaluate the specific components included in the box. The right kit matches your target surface, offers a compatible charging mechanism, and provides clear instructions tailored to beginners. By focusing on these practical criteria, you can confidently select a set that delivers a vibrant, long-lasting glow for your crafts, stationery, or home decor projects.
What Defines a Complete Glow in the Dark Paint Starter Set
A truly complete starter set is more than just a collection of colorful paint tubes. For a beginner, the transition from opening the box to seeing a finished piece glow should require zero additional purchases. Standalone paint tubes often leave users searching for appropriate applicators or struggling to get the paint to adhere, whereas a comprehensive kit is designed as an all-in-one ecosystem.
Products mentioned in this guide
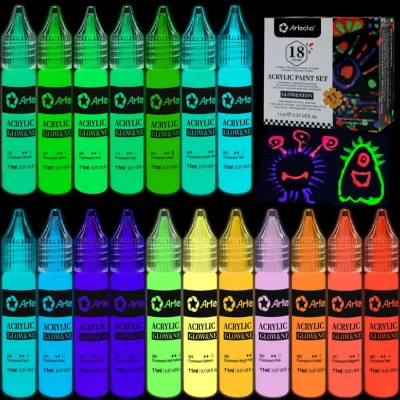
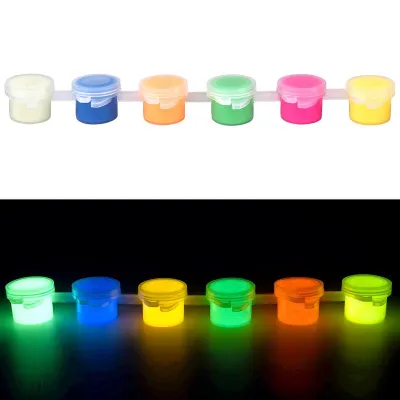
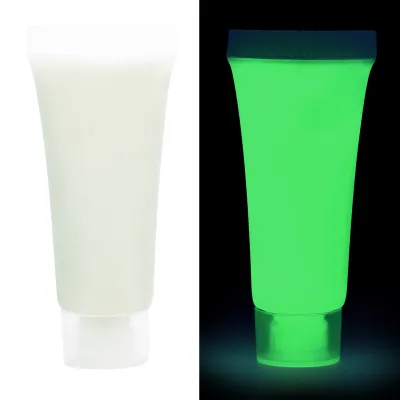
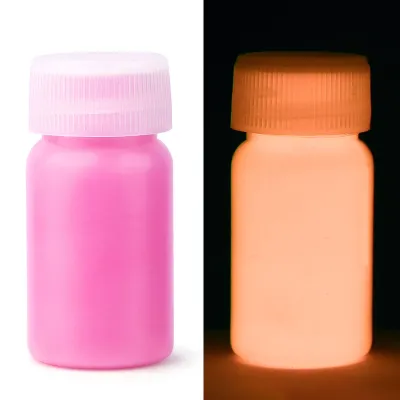
Prices are valid at publication and may change. Please refer to the product page for the latest price.
The core of any starter kit is the paint itself, but the accompanying accessories dictate the ease of use. Look for sets that include a variety of synthetic brushes, which are preferred for acrylic-based glow mediums because they hold their shape well and distribute heavy pigments evenly. A mixing palette is another essential accessory, allowing you to blend colors or thin the medium without contaminating the original paint containers.
Perhaps the most overlooked component of a complete set is a portable UV blacklight. Because phosphorescent pigments require light energy to charge, having a small UV flashlight or LED light strip included in the kit allows you to test your work immediately. Without an included light source, you may find yourself waiting hours for natural sunlight or struggling to find a household bulb with the correct wavelength to activate the glow.
Additionally, a high-quality starter set often includes a dedicated primer or a white base coat. Glow-in-the-dark pigments are naturally translucent, meaning they rely on a reflective background to bounce the emitted light back to your eyes. Including a white primer in the box ensures you do not have to search your home for a compatible base paint, guaranteeing optimal luminescent results right from the start.
Evaluating Paint Types and Surface Compatibility
When selecting a starter set, understanding the chemical medium of the paint is crucial for ensuring it bonds correctly with your chosen surface. Most beginner-friendly kits utilize water-based acrylics, which are highly favored for general craft and stationery projects. Acrylics are virtually odorless, dry relatively quickly, and can be cleaned up easily with soap and water before they cure, making them ideal for indoor crafting in residential spaces.

In contrast, solvent-based or oil-based glow paints are occasionally found in specialized kits meant for outdoor or heavy-duty industrial applications. While these formulations offer excellent weather resistance, they require harsh chemical solvents for cleanup and emit strong fumes that demand intensive ventilation. For typical hobbyists, crafters, and students, water-based acrylic sets remain the safest and most practical choice.
Before purchasing, always verify the surface compatibility listed on the product label. Standard craft acrylics bond exceptionally well to porous surfaces such as canvas, wood, paper, and unglazed ceramics. However, if you plan to paint on non-porous materials like glass, plastic, or metal, or flexible mediums like fabric, you must ensure the kit’s paint formulation is specifically rated for those surfaces to prevent peeling or cracking.
The color of the underlying surface plays a massive role in the final visual output of your project. Applying translucent glow paint directly onto a dark or highly patterned surface will result in the background absorbing the light energy, rendering the glow faint or completely invisible. To achieve the maximum possible brightness, you must apply a solid, light-colored base coat—preferably titanium white—before layering your glow paint, a step that should be detailed in any quality kit’s instruction manual.
Assessing the Glow Mechanism and Charging Requirements
To avoid disappointment, beginners must understand the scientific distinction between different types of luminous paints. True glow-in-the-dark paint is phosphorescent, meaning it contains specialized crystals that absorb ambient light energy, store it, and slowly release it as visible light over time in complete darkness. This is entirely different from fluorescent or “neon” paint, which does not store light and only glows when actively exposed to a continuous UV blacklight source.
When reviewing starter sets, check the manufacturer’s specifications to identify the type of phosphorescent pigment used. Older or lower-cost formulations often use zinc sulfide, which charges quickly but produces a relatively dim glow that fades within minutes. Modern, high-performance kits typically utilize strontium aluminate, a compound that can glow up to ten times brighter and sustain its luminosity for several hours after a full charge.
Charging requirements vary significantly depending on the pigment type and must be verified on the product packaging. While direct sunlight is an excellent universal charger, indoor crafters will benefit from using a UV light source with a specific wavelength, typically around 365 to 395 nanometers. A quality starter set will specify the optimal charging times and light sources required to achieve the peak glow performance of their specific paint formula.
Setting realistic expectations is key to enjoying your glow-in-the-dark projects. No hobby-grade paint will glow with the intensity of an LED light bulb indefinitely; the brightness will always be strongest immediately after charging and will gradually decay over time. By reading the printed product specifications rather than relying on stylized marketing images, you can select a kit that aligns with your performance expectations.
Building Your Shortlist: Pre-Purchase Checks for Beginners
As you compile a list of potential starter sets from local art shops or online marketplaces, performing a few systematic checks will help you avoid low-quality products. First, prioritize safety by verifying that the paint carries recognized non-toxic certifications, such as the ASTM D-4236 standard. This is particularly important if the kit will be used by children or in shared household spaces where skin contact is likely.
Next, evaluate the volume of paint provided in the kit relative to your planned projects. Many starter sets contain very small pots, often around 15 to 30 milliliters per color, which are excellent for detailed accent work but will quickly run out if you attempt to cover a large canvas or wooden sign. Calculate the total surface area you wish to paint and ensure the kit contains sufficient volume, or look for sets that offer larger squeeze tubes.
The quality of the included tools can make or break your painting experience. Examine product descriptions to ensure the brushes feature secure ferrules that prevent bristles from shedding into your wet paint, which can ruin the smooth texture required for an even glow. A sturdy, easy-to-clean plastic or silicone palette is also preferable to flimsy disposable paper alternatives, as it allows you to mix and save paint more effectively.
Finally, look for kits that include a comprehensive instruction manual or a beginner’s project guide. A good guide should explain not only how to apply the paint but also how to troubleshoot common issues, such as uneven glowing or clumping. Clear, step-by-step instructions are invaluable for beginners, helping to flatten the learning curve and ensuring you get the most value out of your investment.
Setting Up for Your First Glow in the Dark Project
Proper preparation of your workspace is essential for achieving professional-looking results and maintaining a clean environment. In Singapore’s warm and humid climate, indoor spaces are often air-conditioned, which can restrict natural airflow. Set up your crafting station in a well-ventilated room, and protect your table or desk with a plastic drop cloth or old newspapers to catch any accidental spills before they dry and bond to your furniture.
Before applying the paint to your final piece, always conduct a test run on a scrap piece of the same material. This trial allows you to observe how the paint flows from the brush, how quickly it dries under your local humidity conditions, and how many layers are required to achieve your desired glow intensity. It also gives you a chance to test your charging light source and view the glow in a dark room before committing to your main project.
When you are ready to paint, the golden rule is to apply multiple thin, even layers rather than one thick coat. Thick applications of acrylic paint can trap moisture underneath, leading to cracking, uneven drying, or a cloudy finish that blocks the luminescent pigments. Allow each layer to dry completely according to the manufacturer’s instructions—typically 30 to 60 minutes depending on ambient humidity—before applying the next coat.
Once the final layer is dry, allow the paint to cure fully before handling or exposing it to heavy wear. Curing is a chemical process that takes longer than simple surface drying, often requiring 24 to 48 hours to reach maximum durability. Once fully cured, your glow-in-the-dark creation will be ready to be charged, displayed, and enjoyed for years to come.
Frequently Asked Questions (FAQ)
Do I need a special blacklight to see the paint glow?
Whether you need a blacklight depends entirely on the type of paint included in your starter set. True phosphorescent paint does not require a continuous blacklight to glow; it simply needs to be charged under a light source (such as sunlight or a UV torch) and will then glow on its own in complete darkness. Fluorescent paint, however, does not store light and requires a continuous UV blacklight source to remain visible and vibrant.
Can I mix glow in the dark paint with regular acrylic colors?
It is generally not recommended to mix glow-in-the-dark paint directly with standard opaque acrylic paints. The solid pigments in regular paint will coat and block the luminescent particles, severely reducing or completely extinguishing the glow effect. If you want to add color, it is best to apply a very thin, transparent glaze over the glow paint, or apply the glow paint as a distinct top layer over your colored design.
How should I store leftover glow in the dark paint?
To preserve the lifespan of your leftover paint, ensure the container lids are sealed tightly to prevent air from entering and drying out the acrylic binder. Store the set in a cool, dry place away from direct sunlight and extreme temperature fluctuations, which are common in tropical climates. Always refer to the manufacturer’s label for specific shelf life recommendations and storage temperature limits to keep your paints usable for future projects.

Community discussion
Share your experience or ask a question. Comments are reviewed before publication.