
Selecting your first acrylic paint starter set can feel overwhelming given the sheer volume of options lining the shelves of art supply stores. To make an investment that supports your learning curve, you must look beyond eye-catching packaging and focus on three core pillars: pigment quality, tube volume, and the specific painting surface you intend to use. While the local market offers a vast array of imported and regional brands, the ideal set for a beginner is one that provides a balanced palette of primary colors in sufficient quantities to allow for experimentation without the fear of running out. By understanding how to read manufacturer labels and evaluate bundled accessories, you can avoid common pitfalls like buying chalky, low-pigment paints or paying a premium for low-quality brushes.
Core Criteria for Evaluating Beginner Acrylic Paint Sets
When evaluating acrylic paint sets, the most critical distinction to understand is the difference between student-grade and professional-grade formulations. Professional-grade acrylics contain a higher concentration of pure pigments suspended in a high-quality acrylic polymer emulsion, resulting in vibrant colors that retain their brilliance when dry. Student-grade paints, often labeled as “Academy,” “Studio,” or “Student,” substitute a portion of these expensive pigments with inert fillers like calcium carbonate or barium sulfate. While student-grade paints are highly economical for beginners practicing basic brushwork, they have a lower pigment load, which can lead to slightly duller or muddier mixtures when you blend multiple colors on your palette.
Another vital factor is the balance between the number of colors included in a set and the volume of the individual tubes. Many beginners are drawn to massive sets containing 24 or 36 tiny tubes, often holding only 12ml of paint each. However, these small volumes run out incredibly quickly, particularly essential mixing colors like titanium white, which is used in almost every tint. A far more practical approach for skill-building is to choose a set with fewer colors—such as a split-primary palette of six to eight colors—packaged in larger tubes of 59ml to 75ml. This volume provides enough material to practice color mixing, lay down thick brushstrokes, and complete several medium-sized canvases without running out of key shades.
Products mentioned in this guide
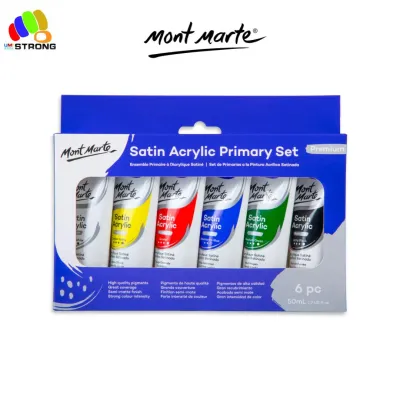
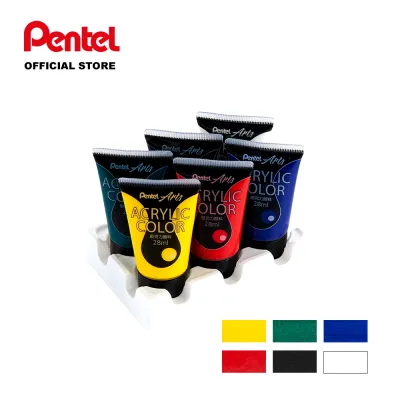
Prices are valid at publication and may change. Please refer to the product page for the latest price.
Before purchasing any set, you should also inspect the packaging for lightfastness ratings and opacity indicators. Lightfastness refers to a pigment’s resistance to fading when exposed to light over time, typically rated under ASTM International standards. Look for ratings of ASTM I (Excellent) or ASTM II (Very Good) on the tube labels to ensure your artwork remains stable over the years. Additionally, manufacturers use small symbols to indicate opacity: a clear square represents a transparent paint, a half-filled square indicates semi-opaque, and a solid black square denotes fully opaque. Understanding these indicators allows you to predict how colors will behave when layered, helping you avoid frustration during your initial painting sessions.
Assessing the Practical Value of Included Accessories
Many starter sets are marketed as complete kits, bundling paints with brushes, palettes, and mediums. While these all-in-one packages offer convenience, it is essential to evaluate whether these bundled accessories provide genuine utility or simply inflate the overall retail price. The brushes included in budget-friendly kits are frequently a weak point, often made with low-grade natural hair that sheds bristles onto your wet paint film or synthetic fibers that lose their shape after a single use. Because acrylic paint is a heavy, viscous medium, it requires synthetic brushes—typically made of nylon or polyester—that possess enough spring and durability to move the heavy paint without fraying.

Similarly, the design of the included palette deserves close inspection. Cheap kits often feature small plastic palettes with deep, circular wells. While these are suitable for watery mediums like watercolor, they are highly impractical for acrylics, which require flat, expansive mixing areas where you can blend paint with a palette knife. A flat, smooth plastic or acrylic plate is much easier to scrape clean once the paint dries. If a kit includes a flimsy, porous wooden palette, you may find that it absorbs moisture from the paint too quickly, causing your acrylics to dry out on the mixing surface before you can even apply them to your canvas.
Finally, check if the set includes any modifying mediums or if you will need to source them separately. Acrylic mediums are liquid additives used to alter the paint’s properties, such as extending drying time, increasing gloss, or creating textured impasto effects. A basic starter set that includes a small bottle of gloss medium or a drying retarder offers excellent value, as these tools allow you to experiment with glazing and blending techniques. If a kit lacks these mediums, you should factor in the additional cost of purchasing a basic bottle of acrylic medium to fully explore the capabilities of your new paint set.
Verifying Authentic Art Supply Channels in Singapore
To ensure you are purchasing genuine, high-quality acrylic paint, it is wise to buy from reputable, authorized sellers. In Singapore, visiting established brick-and-mortar art supply hubs—such as those located in the historic Bras Basah district or specialized retail outlets in central shopping areas—allows you to physically inspect the products before buying. Physical verification is invaluable; it lets you feel the weight of the tubes, check for any leaks around the caps, and ensure the packaging has not been damaged during transit or storage. Furthermore, experienced staff in these dedicated shops can often provide valuable insights into which brands are most reliable for beginners.
If you prefer the convenience of online shopping, you must navigate e-commerce platforms and online marketplaces with caution to avoid counterfeit or expired stock. Always look for official brand storefronts, authorized distributor badges, or highly rated local sellers with transparent return policies. Be skeptical of listings offering professional-grade paint sets at prices that seem too good to be true, as these are often counterfeit products filled with low-grade, chalky tempera paint or old, degraded stock that has been stored in poor conditions.
When your paint set arrives, perform a quick physical quality check before opening the tubes for your first session. Inspect the crimping at the bottom of each metal or plastic tube; it should be clean, tight, and free of any dried paint residue or cracks. Gently squeeze the tube to check its consistency. If the tube feels rock-hard, the paint inside has likely polymerized and dried out due to a faulty seal. Conversely, if you hear a watery, sloshing sound when shaking the tube, the pigment and acrylic binder may have separated significantly. While minor separation is normal and can often be remedied by kneading the tube, severe separation in a brand-new set indicates poor quality control or expired stock.
Building a Conditional Shortlist Based on Your Goals
Your choice of an acrylic paint starter set should align directly with your specific creative goals and the surfaces you plan to paint on. If your primary objective is traditional canvas painting, you should prioritize heavy body acrylic sets. Heavy body paints have a thick, buttery consistency similar to oil paints, allowing them to retain brush marks and palette knife textures on canvas. However, if you plan to focus on crafting, painting wooden models, or working on mixed-media paper, a fluid or multi-surface acrylic set is a much better fit. Fluid acrylics flow smoothly from the brush, self-level to minimize brush strokes, and adhere exceptionally well to non-porous surfaces.
Another key decision is choosing between a comprehensive kit and a paint-only set. If you are starting completely from scratch and do not own any art supplies, a well-reviewed comprehensive kit containing paints, a couple of decent synthetic brushes, and a basic mixing surface can be a cost-effective way to dip your toes into the hobby. On the other hand, if you already own basic tools, or if you prefer to select your brushes individually, you will get far better value by investing your entire budget into a high-quality, paint-only set. This ensures that every dollar spent goes toward superior pigment quality and larger tube volumes rather than mediocre accessories.
To help you compare options systematically, use the following structured checklist when evaluating potential starter sets in Singapore:
- Paint Consistency: Heavy body (for textured canvas work) vs. Fluid/Soft body (for crafts, detailing, and smooth washes).
- Tube Volume: Aim for at least 20ml to 59ml per tube for primary colors; avoid sets consisting entirely of 12ml tubes unless you only want to test colors.
- Color Selection: Ensure the set includes at least a warm and cool version of each primary color (red, yellow, blue), plus titanium white and a dark earth tone or black.
- Value per Milliliter: Calculate the total volume of paint in the set and divide the retail price (in S$) by this number to determine the actual cost-effectiveness of the paint itself.
- Safety Labels: Verify that the packaging carries safety certifications, such as the AP (Approved Product) seal from the Art and Creative Materials Institute (ACMI), ensuring the paints are non-toxic and safe for home use.
First Painting Session: Setup and Cleanup Checklist
Setting up your workspace correctly is essential for an enjoyable and stress-free first painting session. Because acrylic paint dries to a water-resistant, permanent plastic film, protecting your surrounding environment is crucial. Cover your table with old newspapers, a plastic tablecloth, or a heavy-duty drop cloth. Work in a well-ventilated room; while modern acrylic paints are low-odor and non-toxic, maintaining a gentle airflow helps the paint dry evenly and prevents any mild chemical odors from lingering in your living space.
Managing your paint on the palette requires a strategic approach due to acrylic’s rapid drying time, which can be accelerated by Singapore’s warm climate or indoor air conditioning. Only squeeze out a small, coin-sized amount of each color at a time, as paint left exposed on a dry palette can skin over and become unusable within 10 to 15 minutes. To extend your working time, keep a small plastic spray bottle filled with clean water nearby and lightly mist your palette every few minutes. Alternatively, you can use a stay-wet palette, which utilizes a damp sponge layer beneath permeable paper to keep the paints moist and workable for hours or even days.
When your painting session is complete, immediate cleanup is vital to preserve the life of your brushes. Never allow acrylic paint to dry on brush bristles; once dry, the paint becomes insoluble in water and will permanently ruin the brush shape. Keep a jar of clean water on your desk to rinse your brushes thoroughly whenever you switch colors or pause your work. Once you are finished, wash the brushes at the sink using lukewarm water and a mild soap or dedicated brush cleaner, gently massaging the bristles from the metal ferrule to the tip until the water runs completely clear. Reshape the damp bristles with your fingers and lay the brushes flat on a towel to dry, preventing water from seeping into the wooden handles and loosening the glue.
Frequently Asked Questions (FAQ)
Can student-grade acrylics be mixed with professional paints later?
Yes, you can safely mix student-grade and professional-grade acrylic paints on your palette, as they both utilize a compatible acrylic polymer binder. However, you should be aware of the visual and physical trade-offs when doing so. Mixing a highly concentrated professional paint with a student-grade paint will dilute the overall pigment density, resulting in a mixture that is less vibrant than pure professional paint. Additionally, the fillers present in the student-grade paint may slightly alter the sheen, texture, and archival longevity of the final paint film, though this is rarely an issue for practice pieces and study sketches.
How should I store acrylic tubes to prevent them from drying out?
To maximize the lifespan of your acrylic paint set, store the tubes in a cool, dry place away from direct sunlight and extreme temperature fluctuations, which is particularly important in Singapore’s tropical climate. Before screwing the cap back onto a tube after a painting session, always take a moment to wipe the threads of the nozzle with a damp cloth or paper towel. Removing excess wet paint from the threads prevents the cap from becoming permanently glued shut and ensures a tight, airtight seal that stops air from entering the tube and drying out the remaining paint over time.
Community discussion
Share your experience or ask a question. Comments are reviewed before publication.