
Starting your crochet journey with a DIY kit is an excellent way to avoid the overwhelm of sourcing individual supplies, but not all kits are created equal. For a beginner, the ideal DIY crochet kit must feature a highly visible, smooth-gliding yarn paired with a comfortable, appropriately sized hook that prevents hand strain. Choosing the wrong combination can lead to split yarn, invisible stitches, and physical fatigue, turning a relaxing hobby into a frustrating chore. By focusing on specific hook materials, ergonomic grips, yarn weights, and fiber structures, you can select a kit that supports your learning curve and ensures your first project is a success.
Essential Hook Specifications for Beginners
The crochet hook is the primary tool of your craft, acting as an extension of your hand as you manipulate yarn into stitches. For beginners, the material of the hook plays a critical role in how easily the yarn glides and how much control you maintain over your tension. Aluminum hooks are highly popular because they are lightweight, durable, and offer an exceptionally smooth surface that allows yarn to slide effortlessly. However, this slickness can sometimes cause stitches to slip off too quickly for a novice.
Bamboo and wooden hooks provide more natural grip and friction, which helps keep slippery yarns in place, though they can occasionally catch on rougher fibers if not polished perfectly. Plastic hooks are lightweight and highly affordable, but they can sometimes feel slightly flexible or create static with synthetic yarns. When evaluating a kit, look for polished aluminum or high-quality smooth plastic hooks to ensure a balanced glide that does not snag the yarn fibers.
Products mentioned in this guide
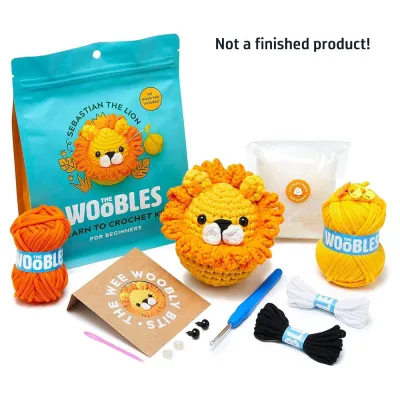
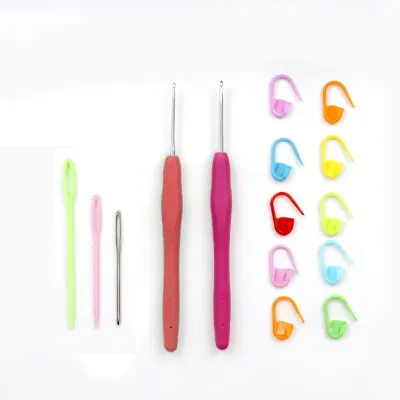
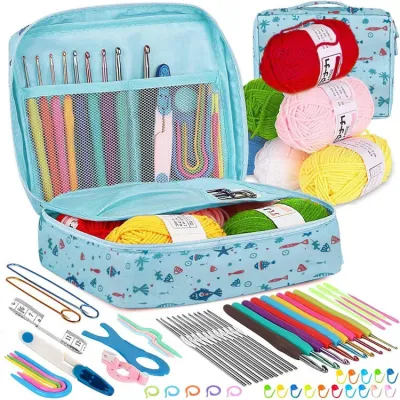
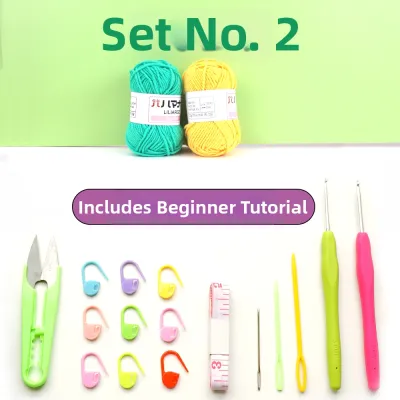
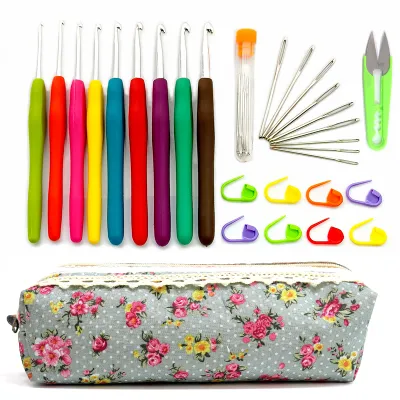
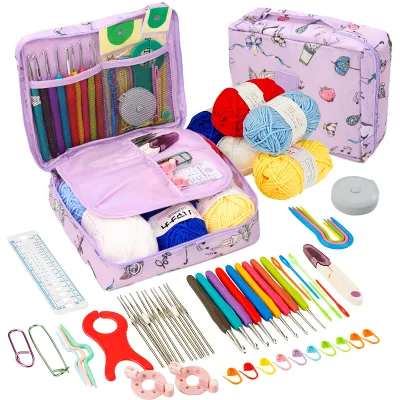
Prices are valid at publication and may change. Please refer to the product page for the latest price.
Hook size is another critical factor that directly influences your learning experience. Beginners should generally look for kits that include hooks in the medium range, specifically between 4.0 mm and 5.5 mm. Hooks smaller than 4.0 mm require fine motor control and thin yarn, which can make it incredibly difficult to see where to insert your hook. Conversely, hooks larger than 6.0 mm can feel bulky and awkward in untrained hands, making it harder to maintain consistent tension.
Ergonomics should never be overlooked, especially during long practice sessions where you are repeating unfamiliar hand movements. Standard metal hooks can be thin and cold, leading to hand cramps and joint fatigue after just a few minutes of work. Look for kits that feature ergonomic hooks with soft, cushioned grips made of silicone or thermoplastic rubber. These wider, flat-sided handles distribute pressure more evenly across your palm and fingers, allowing you to practice for longer periods without discomfort.
Yarn Characteristics That Make Learning Easier
The yarn included in your DIY crochet kit is just as important as the hook, as its physical properties determine how easily you can see and execute your stitches. Medium-weight yarn, often labeled as worsted weight, Aran, or Category 4, is widely considered the gold standard for beginners. This thickness is substantial enough to hold easily in your fingers without being so bulky that it obscures the anatomy of the stitch. Working with medium-weight yarn allows you to clearly identify the stitch loops, which is essential for knowing where to insert your hook next.

Fiber content significantly affects both the stitch definition and your ability to correct mistakes. Acrylic yarn is a common choice for beginner kits because it is highly resilient, inexpensive, and easy to unravel when you make an error. Cotton and cotton-blend yarns are also exceptional for beginners because they offer superb stitch definition and do not stretch excessively, making it easier to maintain a uniform tension. You should generally avoid 100% wool yarns in your first kit, as they can sometimes felt together slightly when unraveled, making it difficult to fix mistakes without tearing the fiber.
Color choice is a surprisingly critical factor in how quickly you learn to crochet. Dark colors, such as black, navy blue, deep forest green, or dark charcoal, absorb light and make it nearly impossible to see individual stitches, even in well-lit rooms. For your first project, prioritize kits that feature light, bright, or pastel colors like cream, soft yellow, mint green, or sky blue. These shades reflect light beautifully, allowing you to clearly distinguish between the front loop, back loop, and post of each stitch.
The structure of the yarn also dictates your level of frustration. Look for tightly spun yarns with a consistent ply, meaning the individual strands are twisted together securely. Loose-ply yarns tend to split easily when you insert the hook, causing you to accidentally grab only half of the strand and weakening your project. Avoid highly textured, fuzzy, or novelty yarns such as bouclé, chenille, or eyelash yarn in your first kit; while they look appealingly soft, their textured surfaces completely hide stitch structure and make unraveling mistakes an absolute nightmare.
Essential Notions and Accessories to Verify
While the hook and yarn are the stars of the show, a truly complete DIY crochet kit must include several supporting notions to make your crafting experience seamless. Stitch markers are arguably the most critical accessory for any beginner. These small, locking plastic clips are used to mark the beginning of a round or specific stitch counts, preventing you from losing your place in a pattern. Without stitch markers, working in the round—a common technique for popular beginner projects like amigurumi—becomes a guessing game that often ends in uneven shapes.
A tapestry needle, also known as a yarn needle, is another non-negotiable tool that must be included in your kit. These blunt-tipped needles feature extra-large eyes designed to accommodate thick yarn strands, allowing you to weave in loose ends securely once your project is finished. A flexible measuring tape is also highly useful for checking your gauge and ensuring your finished piece matches the intended dimensions specified in the pattern.
Some kits may include optional but highly convenient extras, such as manual row counters or small yarn bobbins to keep different colors organized. While these are not strictly necessary for basic projects, they add excellent value to a kit. Finally, pay close attention to any cutting tools included in the package. Many kits come with small folding scissors or thread snips; you should verify through user feedback or product descriptions that these are sharp enough to slice through yarn cleanly in a single snip, as dull blades will fray the yarn ends and make threading your tapestry needle incredibly difficult.
Evaluating Instructions and Pattern Support
Even the highest-quality tools and yarn are useless if the instructions included in your DIY crochet kit are confusing or incomplete. Traditional crochet patterns are written in a highly abbreviated shorthand that can look like a foreign language to a complete beginner. Therefore, you should look for kits that offer comprehensive, step-by-step visual guides rather than relying solely on printed text. Many modern kits now include QR codes that link directly to exclusive video tutorial playlists, which allow you to watch a professional crafter execute each stitch in real-time from multiple camera angles.
It is also vital to verify that the kit uses standard, universally recognized terminology. Crochet terms differ significantly between US and UK standards; for example, a single crochet in US terminology is called a double crochet in the UK. A good beginner kit will explicitly state which terminology is used and provide a clear glossary explaining what each abbreviation stands for. This foundational knowledge is crucial because it prepares you to read independent patterns once you move past the kit.
A robust troubleshooting section is another hallmark of a well-designed beginner kit. As you learn, you will inevitably encounter common issues such as accidentally adding or dropping stitches, creating edges that curl inward, or pulling your yarn so tight that you cannot insert your hook. Having a dedicated section in the manual—or a specific video segment—that explains how to identify, prevent, and fix these common mistakes will save you hours of frustration and keep you from abandoning the project altogether.
Building Your Shortlist: Pre-Purchase Checklist
Before purchasing a DIY crochet kit, taking a few minutes to run through a systematic checklist will ensure you get the best possible value and experience. First, cross-reference the hook size and yarn weight included in the kit to verify they are compatible. For instance, if the kit includes a medium Category 4 yarn, the hook should ideally be between 4.0 mm and 5.5 mm; if the hook is significantly smaller or larger, it may indicate a poorly designed kit that will be difficult to work with.
Next, calculate the overall cost-per-project value of the kit. While buying a kit is highly convenient, you want to ensure you are not paying an excessive premium just for the packaging. Compare the kit’s price against what it would cost to buy a single ergonomic hook, a skein of beginner-friendly yarn, and a pack of stitch markers separately. If the kit is priced reasonably close to or lower than these individual components, it represents excellent value, especially when you factor in the curated pattern and step-by-step instructions.
It is also wise to check the seller’s customer service policies regarding missing or defective components. Because hooks can occasionally arrive with rough edges or yarn skeins may contain unexpected knots, knowing you can easily request a replacement provides peace of mind. Finally, spend some time reading user reviews on online marketplaces or craft forums, focusing specifically on what previous buyers say about the clarity of the instructions. If multiple reviewers mention that the videos are too fast or the written steps are confusing, it is best to look for an alternative kit that is more supportive of true beginners.
Frequently Asked Questions (FAQ)
Can I use a DIY crochet kit meant for advanced crafters as a beginner?
Starting with an advanced crochet kit is generally not recommended because these projects often require complex stitch patterns, intricate color changes, and fine-gauge yarns that demand precise tension control. Advanced kits typically assume you already know how to read standard patterns and execute basic stitches, meaning they rarely include the detailed, step-by-step foundational tutorials that beginners rely on. Attempting a complex project too early can lead to extreme frustration, uneven stitches, and a high likelihood of abandoning the craft before you have had a chance to enjoy it.
What should I do if the yarn in my kit runs out before finishing the project?
If you run out of yarn before completing your project, your first step should be to check the yarn label or kit documentation for the specific fiber content, weight, and color name or dye lot number. You can then visit a local craft store or search an online marketplace to find a matching skein. If an exact match is unavailable, look for a yarn of the same weight and fiber content in a complementary color to create a unique, multi-colored finish. To prevent running out of yarn in future projects, try to maintain a relaxed but consistent tension, as working stitches too loosely consumes significantly more yarn than the pattern intends.

Community discussion
Share your experience or ask a question. Comments are reviewed before publication.