
Selecting the correct shipping bag size is a critical step for any e-commerce business, creative studio, or independent seller. When shipping items like delicate paper planners, handmade journals, or curated stationery sets, using a bag that is too small leads to burst seams and damaged products, while an oversized bag increases material waste and shipping costs. To determine the perfect dimensions, you must look beyond the flat measurements printed on the packaging sleeve. By calculating your product’s total width, length, and thickness—and adding a small buffer for easy insertion—you can ensure your items arrive safely and professionally.
In Singapore’s highly active e-commerce landscape, where local deliveries are handled by postal services and door-to-door couriers, packaging efficiency directly impacts your bottom line. Protecting paper goods from tropical humidity and handling wear requires a snug, secure fit. This guide breaks down the physical mechanics of shipping bags, provides a simple formula to calculate the exact dimensions you need, and highlights how to adjust your packaging choices for different product shapes.
Decoding Shipping Bag Dimensions: Flat vs. Usable Space
When purchasing poly mailers or paper shipping bags, the dimensions listed by manufacturers represent the bag’s flat, empty state. However, the moment you insert a three-dimensional product, the physics of the bag changes. As the bag expands to accommodate the thickness of your item, the front and back panels are pulled closer together, which significantly reduces the usable horizontal width. A flat bag that measures 20 cm wide cannot comfortably hold a book that is 20 cm wide, even if the book is incredibly thin.
Products mentioned in this guide
![[SG Stock]60x80cm Large Size Parcel Polymailer Bags | Mailer Bag | Poly Mailer | Polymailers | Mailing Bag | Courier Bag | Packing Bag](https://img.lazcdn.com/g/p/b96355f8e110fcafc7833fbebb6841fd.jpg_400x400q80.jpg_.webp)
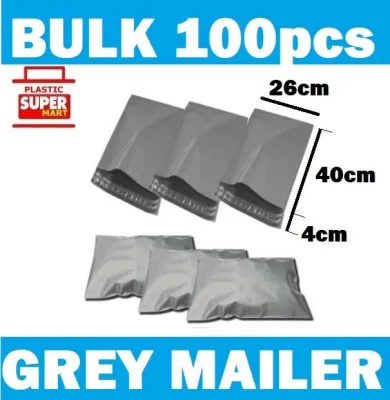
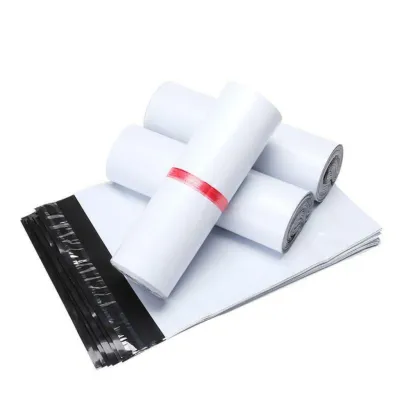
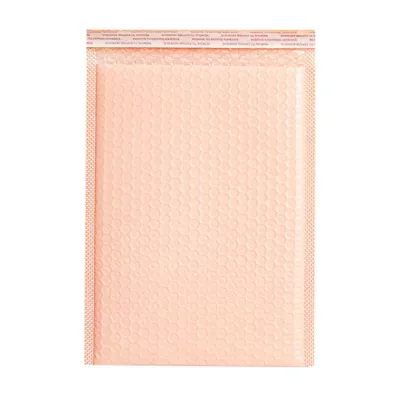
Prices are valid at publication and may change. Please refer to the product page for the latest price.
Length measurements also require careful evaluation. The stated length of a shipping bag typically measures from the bottom seam to the opening of the pocket. This measurement usually excludes the seal flap—the additional strip of plastic or paper containing the adhesive tape. However, some manufacturers include the flap in their total length specification. Always verify whether the listed length represents the total material length or the usable pocket depth before placing a bulk order. The seal flap itself, which generally ranges from 3 to 5 cm, must fold over completely flat against the body of the bag to create a secure, tamper-evident closure.
For flat items, standard flat poly mailers are highly efficient. However, when you need to ship thicker bundles, such as a stack of bullet journals, heavy sketchbooks, or complete craft kits, flat bags often fall short. In these scenarios, gusseted shipping bags are highly useful. Gusseted bags feature folded pleats along the sides or the bottom that expand outward when filled. This expansion creates a structured, box-like space that accommodates volume without placing excessive tension on the side seams, reducing the risk of splits during transit.
How to Measure Your Products and Inner Packaging
Calculating the correct shipping bag size begins with precise measurements of your items. Use a reliable ruler or measuring tape to record the maximum length, width, and height (thickness) of the product. If your item has a uniform shape, like a standard notebook, these measurements are straightforward. However, you must always measure the product at its widest and thickest points. For irregular stationery items, such as stuffed pencil cases, multi-pack marker sets, or layered sticker sheets, measuring only the average thickness will result in a bag that is far too tight at the center.

It is a common mistake to measure only the bare product. In professional shipping, items are rarely placed directly into an outer mailer without some form of protective inner packaging. If you wrap a delicate leather planner in bubble wrap, place an art print against a rigid cardboard backing board, or pack a set of delicate washi tapes inside a small cardboard gift box, you must measure the entire packaged bundle. Cardboard stiffeners and bubble wrap add substantial bulk and rigidity, which dramatically alters how the bundle fits inside a flexible shipping bag.
To ensure your measurements are accurate, assemble the complete product bundle exactly as it will be sent to the customer. Wrap it in your chosen tissue paper, bubble wrap, or protective sleeve, and then measure the final three-dimensional bundle. This ensures your calculations are based on the actual volume that needs to fit inside the mailer, preventing unexpected tight fits that can slow down your packing workflow or damage the contents.
The Sizing Formula: Calculating Width, Length, and Flap
To eliminate guesswork, you can use a straightforward mathematical formula to determine the minimum external dimensions your shipping bag needs to have. These formulas account for the physical displacement caused by the thickness of your product and include a safety buffer for smooth packing.
To calculate the required width of your shipping bag, use the following formula:
Required Bag Width = Product Width + Product Thickness + Insertion Allowance
The insertion allowance (typically 1 to 2 cm) is essential. Without this buffer, sliding the item into the bag creates friction that can tear the side seams or bend the corners of paper products.
To calculate the required length of your shipping bag, use this formula:
Required Bag Length = Product Length + Product Thickness + Seal Flap Allowance
The seal flap allowance (usually 3 to 5 cm) ensures that the adhesive strip can fold over the opening and adhere securely to the back of the bag without being pulled tight or distorted by the thickness of the item.
To visualize how these formulas apply to common stationery items, refer to the quick-reference guide below. These examples assume standard flat items and typical inner packaging:
| Common Stationery Item | Packaged Dimensions (L x W x H) | Calculated Minimum Bag Size | Recommended Standard Bag Size |
|---|---|---|---|
| A5 Hardcover Notebook | 21.0 x 14.8 x 1.8 cm | 25.8 cm (L) x 18.6 cm (W) | 28 x 19 cm |
| Stuffed Pen Pouch | 20.0 x 10.0 x 5.0 cm | 29.0 cm (L) x 17.0 cm (W) | 30 x 17 cm |
| Washi Tape Bundle (3 rolls) | 15.0 x 5.0 x 5.0 cm | 24.0 cm (L) x 12.0 cm (W) | 25 x 15 cm |
| A4 Art Print (with backing) | 30.0 x 21.0 x 0.5 cm | 34.0 cm (L) x 22.5 cm (W) | 35 x 23 cm |
Sizing Adjustments for Different Stationery Shapes
Different product geometries and material rigidities require specific adjustments to your sizing calculations. A formula that works perfectly for a flexible item may fail when applied to a completely rigid object.
Flat and Rigid Items (Notebooks, Planners, Art Prints)
Rigid items like hardbound planners, desk calendars, or art prints supported by thick backing boards do not flex or bend when inserted into a bag. This lack of flexibility puts extreme stress on the corners of the shipping bag during transit. If a rigid item is forced into a bag that is slightly too snug, the sharp corners of the book or cardboard are highly likely to puncture the plastic or paper material. To prevent corner punctures, add an extra 1 cm to your width calculation for rigid items. Additionally, always verify the manufacturer’s care or packaging instructions for heavy books to ensure the outer bag material has sufficient tensile strength to support the weight without sagging or tearing.
Bulky or Cylindrical Items (Pen Cases, Marker Sets, Tape Rolls)
Cylindrical or boxy items, such as round acrylic marker sets, stacked tape rolls, or structured canvas pencil cases, consume a large amount of volume relative to their footprint. Because their thickness is distributed evenly across their entire shape, they pull the front and back sheets of a flat poly mailer tightly together. This action drastically reduces the available width of the bag. For these bulky shapes, standard calculations can sometimes result in a fit that is too tight. It is highly recommended to size up by an additional 2 to 3 cm beyond the standard formula, or transition to a gusseted shipping bag that expands naturally along the sides to accommodate the three-dimensional volume without straining the seams.
Common Sizing Mistakes That Cause Transit Damage
One of the most frequent packaging mistakes is ignoring the seal flap allowance. Many sellers assume that if a product is 25 cm long, a 25 cm long bag will suffice. However, if you attempt to seal a bag where the flap barely reaches the adhesive contact point, the seal will be under constant tension. During transit, as packages are handled and stacked, this weak seal can easily pop open, exposing your stationery items to dust, moisture, and potential loss.
Choosing a bag that is too tight also carries significant risks. A tight fit might seem like a good way to save on material, but it leaves no room for air expansion or the natural flexing that occurs during shipping. When packages are stacked in courier vehicles or subjected to temperature changes, the air inside a tightly packed bag expands. If the material is already stretched to its limit, even a minor impact can cause the side seams to burst open, leaving your products unprotected.
Conversely, using excessively large bags is equally problematic. While it may seem safer to size up significantly, an oversized bag looks unprofessional and increases material waste. More importantly, it allows the contents to shift constantly inside the mailer. For paper goods like notebooks, planners, or sticker sheets, this constant movement leads to bent corners, scuffed covers, and creased pages. If you must use a larger bag, always secure the product inside with additional wrap or tape down the excess bag material to prevent the item from sliding around.
Frequently Asked Questions (FAQ)
How much extra space should I leave inside the shipping bag?
For most standard stationery items, you should aim for a consistent buffer of 1 to 2 cm of extra space on the sides of your product. This allowance ensures that you can slide the item into the mailer smoothly during the packing process without forcing it, while still keeping the package snug enough to prevent excessive shifting and sliding during transit.
Do I need a different bag size if I use a bubble mailer instead of a poly mailer?
Yes, you will need to select a larger external bag size if you are using a bubble mailer. The interior bubble lining of a padded mailer reduces the internal usable dimensions, typically taking up about 1 to 2 cm of space on each side. When buying bubble mailers, always check the manufacturer’s specified internal dimensions rather than relying on the external measurements to ensure your product fits comfortably.

Community discussion
Share your experience or ask a question. Comments are reviewed before publication.