
Creating custom goodie bags from wrapping paper and ribbon allows you to tailor your packaging to any event, from intimate birthday gatherings in Singapore to large corporate celebrations. By transforming a flat sheet of paper into a structured, self-standing bag, you gain complete control over the dimensions, strength, and aesthetic of your gift presentation. Creating your own packaging is also highly cost-effective, often costing less than S$1 per bag compared to pre-made retail options. This guide provides a clear, step-by-step method to fold, assemble, and decorate durable goodie bags that look professional and hold their shape beautifully.
Materials and Tools Needed for Goodie Bag Packaging
To begin, select a wrapping paper with the appropriate weight and texture. Standard lightweight wrapping paper (around 60 to 80 gsm) is easy to fold but may tear under the weight of heavier items. For sturdy goodie bags, look for medium-to-heavyweight papers, such as kraft paper, thick matte wrapping paper, or textured specialty sheets (typically 100 to 120 gsm). Ensure the sheet size is at least twice the width and height of your planned bag to allow for generous folds and overlaps.
Ribbons serve both functional and decorative purposes. Double-sided satin ribbons offer a smooth, luxurious finish, while grosgrain ribbons provide a ribbed texture that holds knots securely. For handles, a width of 1.5 cm to 2.5 cm is generally ideal, as it distributes weight comfortably across the hand. Thinner ribbons (0.5 cm to 1 cm) work well for tying decorative bows or attaching gift tags.
Products mentioned in this guide
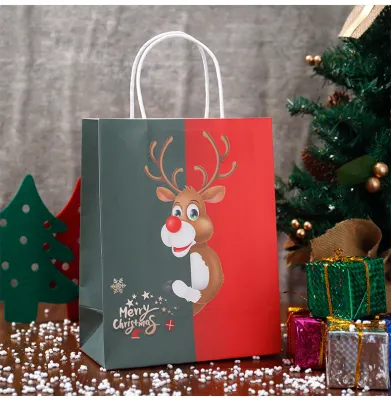
![[MQLITTLESHOP] 10PCS Set Paper Bag Gift Bags Birthday Party Bag Christmas Gift Bag Goodie Bag Kraft Paper Bag CNY Kids](https://img.lazcdn.com/g/p/c89aad5b030f1a3553f5950f93ec41a6.jpg_400x400q80.jpg_.webp)
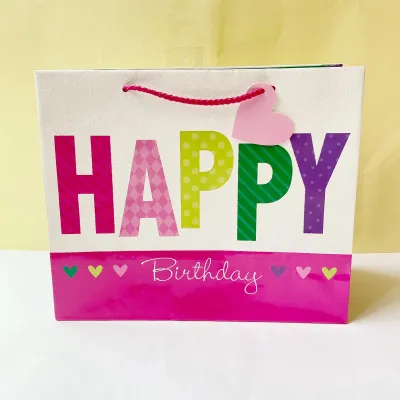
![[SG] Big Size Birthday Paper Bag Kids Birthday goodie bag High Quality Kraft Paperbag birthday party childrens day present](https://img.lazcdn.com/g/p/8199f691728dcfb094ba050068a33b81.jpg_400x400q80.jpg_.webp)
![[SG] 10pcs unicorn theme Paper Bag Kids Birthday goodie bag High Quality Kraft Paperbag birthday party childrens day present](https://img.lazcdn.com/g/ff/kf/S0b89034534e945a89009fb22ae56e49ae.jpg_400x400q80.jpg_.webp)
Prices are valid at publication and may change. Please refer to the product page for the latest price.
Gathering the right stationery tools ensures clean lines and secure bonds. You will need a pair of sharp scissors or a utility knife for precise cuts. A metal ruler helps with accurate measurements, while a bone folder or a clean plastic card is essential for scoring and pressing crisp, professional creases. For adhesives, high-tack double-sided tape is highly recommended over liquid glue, as it prevents the paper from warping or wrinkling while providing an immediate, strong hold.
When working with sharp cutting tools, always cut away from your body on a dedicated cutting mat to protect your work surface. If you choose to use solvent-based craft glues instead of double-sided tape, ensure your workspace is well-ventilated and avoid direct skin contact. Always perform a quick compatibility test by applying a small piece of tape or glue to a scrap piece of your wrapping paper to verify that the adhesive does not bleed through, discolor the paper, or lift over time.
Step-by-Step Guide to Assembling the Goodie Bag Base
Start by determining the dimensions of your finished bag. As a general rule, the width of your paper sheet should equal the desired bag width multiplied by two, plus the desired depth multiplied by two, plus an extra 3 cm to 5 cm for the side seam overlap. The height of the paper should equal the desired bag height, plus the depth of the bag (for the bottom fold), plus an extra 3 cm to 4 cm for the top fold reinforcement.

Lay your cut paper face down on a clean, flat work surface. Fold the top edge of the paper down by 3 cm to create a neat, reinforced collar inside the bag. Press this fold firmly with your bone folder. This double-layer top edge is crucial, as it provides the structural integrity needed to support the handles later.
Next, fold the left and right sides of the paper inward so they meet and overlap by about 2 cm in the center. Before applying adhesive, check that the resulting paper cylinder is perfectly straight and symmetrical. Apply a strip of double-sided tape along the overlapping edge, peel off the backing, and press the seam firmly to seal the main tube of your bag.
To construct the bottom of the bag, fold the bottom edge of the tube upward. The height of this fold determines the depth of your bag; for a bag that is 8 cm deep, fold the bottom up by approximately 10 cm to allow for secure overlapping. Press this fold flat to create a sharp crease.
Open the folded bottom section and press the left and right outer corners inward to form two neat triangles on either side. This action will create a diamond-like shape at the bottom of your bag, with two flat flaps meeting in the middle. Use your bone folder to sharpen all the new creases.
Fold the top and bottom flaps of this diamond shape toward the center line, ensuring they overlap by at least 1.5 cm. Apply double-sided tape to the overlapping sections of these flaps, taking care not to tape the bottom of the bag to the inside walls. Press the flaps down firmly to seal the bottom of the bag completely.
To create the classic side gussets, gently push the sides of the bag inward along the vertical center line of each side panel. Fold the bag flat along these new creases, pressing lightly with your fingers. When you open the bag and push the bottom flat, these gussets will allow the bag to expand and stand upright on its own.
Adding Handles and Reinforcing the Bag Structure
Determining the correct handle length ensures your goodie bags are comfortable to carry and visually balanced. A standard handle length of 30 cm to 35 cm works well for hand-held bags, leaving enough slack for easy access to the contents. Measure and cut two identical lengths of ribbon for each bag, sealing the cut ends with a tiny dab of craft glue or a quick pass near a flame to prevent fraying.
For lightweight to medium papers, punching holes is the most reliable method for attaching handles. Use a standard single-hole punch to make two holes through the reinforced top collar on the front panel, and two matching holes on the back panel. Space the holes evenly, typically keeping them about 6 cm to 8 cm apart, depending on the width of your bag.
Thread one end of the ribbon through the front of the hole to the inside of the bag. Tie a secure double knot on the inside, ensuring the knot is larger than the punched hole. Repeat this process for the other end of the ribbon and the second handle on the back panel.
If you prefer a clean look without visible holes, you can glue the ribbon handles directly to the inside of the top collar. Apply a strong, high-tack double-sided tape or a specialized paper-to-fabric adhesive to the bottom 3 cm of each ribbon end. Press the ribbon ends firmly against the inside of the reinforced top fold, holding them in place until the bond is secure.
To prevent the handles from tearing through the paper when the bag is filled, add structural reinforcement. Cut a piece of thick cardboard or cardstock to match the exact dimensions of the bag’s bottom, and slide it inside to sit flat against the base. This distributes the weight of the contents evenly and prevents the bottom from sagging. For the handles, you can glue small squares of cardstock to the inside of the bag over the punched holes before threading the ribbon, creating an extra layer of defense against tearing.
Wrapping and Decorating the Finished Goodie Bag
Once the structural assembly is complete, you can elevate the presentation with thoughtful decorative touches. Tie a coordinating ribbon bow around one of the handle bases, or thread a personalized gift tag onto the ribbon before knotting it inside the bag. If you are preparing bags for a specific theme, choose ribbon colors and textures that complement your event’s color palette.
For a premium, boutique-style presentation, line the inside of the goodie bag with one or two sheets of colorful tissue paper. Fold the tissue paper loosely and let the corners peek out of the top of the bag to add volume and conceal the gifts inside. Alternatively, if the contents are highly visual, you can place the entire assembled bag inside a clear cellophane sleeve and tie the top with a large, decorative ribbon bow.
Before filling your goodie bags, perform a quick quality check. Gently pull on the handles to ensure the knots or adhesive bonds are secure, and press down on the bottom insert to verify it sits flat. Inspect the seams for any lifting tape or visible adhesive residue, smoothing down any loose edges to guarantee a polished, professional finish.
Troubleshooting Common Goodie Bag Packaging Issues
If your bag turns out asymmetrical or has uneven side gussets, the issue usually stems from misaligned initial folds. To fix this, always use a ruler to mark your folding lines lightly with a pencil before creasing. If a fold is slightly off, you can gently work the paper back into alignment using a bone folder, but avoid refolding the same area multiple times, as this weakens the paper fibers and leaves visible score marks.
Adhesive residue or visible tape marks can ruin the clean look of your packaging. If you accidentally place double-sided tape in the wrong spot, use a specialized adhesive eraser or gently rub the residue with a clean finger to roll it away. To prevent this issue entirely, always apply the tape slightly inside the paper edge rather than right on the boundary, ensuring no adhesive squeezes out when the seams are pressed together.
Ribbon handles that slip out of their holes or sag under weight are typically caused by knots that are too small or loose. Ensure you tie a tight double knot and leave a small tail of ribbon (about 1 cm) past the knot to prevent it from unraveling. If the paper around the hole begins to stretch or tear, apply a small piece of clear adhesive tape over the hole on the inside of the bag to reinforce the area before re-threading the ribbon.
Frequently Asked Questions (FAQ)
What is the best paper weight for making durable goodie bags?
For a durable, self-standing goodie bag, a paper weight between 100 gsm and 120 gsm is highly recommended. This thickness, often found in premium kraft paper, heavy wrapping paper, or light cardstock, provides the structural rigidity needed to hold its shape without cracking along the fold lines. Lightweight papers (under 80 gsm) tend to tear easily under the weight of gifts, while papers heavier than 150 gsm can be difficult to fold cleanly without scoring tools.
How can I prevent the ribbon handles from tearing the paper?
To prevent ribbon handles from tearing the paper, always fold the top edge of the bag inward by at least 3 cm to create a double-layered collar. For added security, glue a small strip of heavy cardstock inside this folded collar before punching your handle holes. When you thread the ribbon through and tie a knot on the inside, the knot will pull against the rigid cardstock rather than the pliable wrapping paper, distributing the tension safely.

Community discussion
Share your experience or ask a question. Comments are reviewed before publication.