
Selecting the right heat transfer sticker for your child’s school gear depends on matching the label’s material to the specific fabric of the item, while adjusting the size and placement to suit their grade level. Younger students in primary school benefit from large, high-contrast labels placed in highly visible areas to help them identify misplaced items quickly. Conversely, older students in secondary school or junior college prefer discreet, minimalist labels that protect their privacy and maintain a clean uniform aesthetic. By understanding how these labels bond with different textiles, you can ensure they remain securely attached through countless laundry cycles.
Unlike standard adhesive labels that peel off in the wash, heat transfer stickers use a heat-activated adhesive that fuses directly with the fibers of the fabric. This makes them highly durable, but it also means they require careful selection and application. Choosing the wrong type of transfer or applying it to an incompatible fabric can lead to ruined uniforms, melted synthetic fibers, or labels that peel off after a single wash. This guide provides a comprehensive framework to help you select, verify, and apply heat transfer labels successfully across all grade levels.
What Heat Transfer Stickers Are Actually For
Heat transfer stickers are designed specifically for fabric-based school belongings. They excel on porous, flexible textiles such as cotton uniforms, polyester physical education (PE) kits, canvas school bags, and fabric pencil cases. The heat-activated adhesive backing melts under the pressure and temperature of a household iron or heat press, flowing into the weave of the fabric. Once cooled, the adhesive solidifies, locking the label permanently into the textile fibers so it can withstand regular washing and stretching.
Products mentioned in this guide



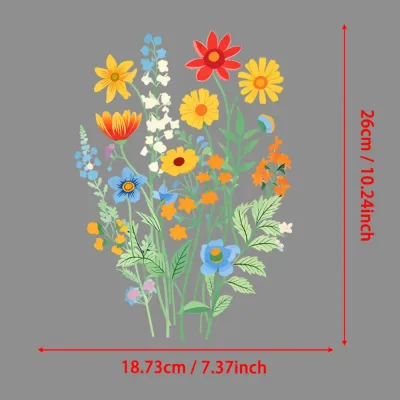


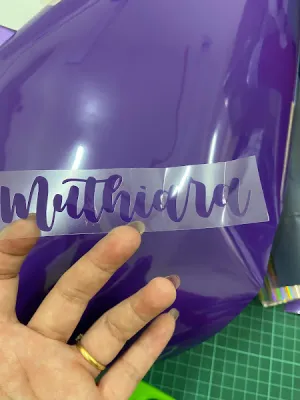
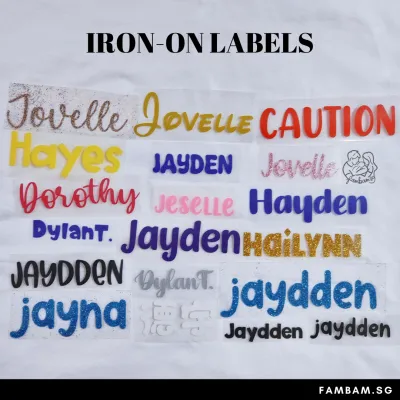
Prices are valid at publication and may change. Please refer to the product page for the latest price.
It is critical to understand that heat transfer stickers are not suitable for hard, non-porous surfaces. Attempting to apply them to plastic water bottles, metal lunchboxes, plastic rulers, or silicone pencil cases will result in immediate failure. Because these hard materials do not have open fibers for the adhesive to grip, the sticker will either fail to adhere entirely or melt into a messy residue under the heat of the iron. For hard surfaces, you must use alternative labeling methods such as waterproof vinyl decals or permanent markers.
To make an informed purchase, you should distinguish heat transfer labels from other common labeling options. Standard iron-on patches are typically thick, embroidered fabric pieces with a heavy adhesive backing designed for structural repairs or decorative embellishments. Vinyl decals are pressure-sensitive stickers meant for hard surfaces and do not use heat for application. Woven tags, on the other hand, must be physically sewn into the garment. Heat transfer labels offer a flush, weightless finish that does not irritate the skin, making them the preferred choice for daily school wear.
Sizing and Placement Guidelines by Grade Level
As children progress through the school system, their labeling needs change dramatically. While a primary school student requires bold, unmistakable markers to prevent loss in a chaotic classroom, an older student values subtlety and personal style. Balancing these shifting requirements with school uniform guidelines and personal comfort is key to a successful labeling strategy.

Primary School (Lower and Upper Primary)
For lower and upper primary school students, visibility is the primary goal. Children in this age group are still developing organizational skills and frequently misplace their belongings during recess, physical education, or co-curricular activities. To facilitate quick recovery, select larger label dimensions, typically ranging from 30mm to 50mm in width. Use bold, high-contrast fonts—such as dark blue or black text on a white background—that are easy for young children and teachers to read at a glance.
Placement should be highly strategic and standardized across all uniform items. For school shirts and blouses, apply the heat transfer sticker to the inside of the main collar or directly onto the facing fabric near the buttons. For PE t-shirts and shorts, the inner back collar or the inside waistband are ideal locations. If the school allows, you can also apply a slightly larger label to the outer bottom hem of the shirt or the outer corner of a canvas school bag. This allows teachers to quickly identify the owner without having to search inside the garment.
Because primary school uniforms undergo frequent, heavy-duty washing to remove playground dirt, food stains, and sweat, the labels must possess exceptional adhesive durability. Ensure you choose transfers rated for high-temperature washes and frequent tumble drying. The physical stress of active play means that any weak edge on a label can quickly lead to peeling, so rounded corners on your custom stickers are highly recommended to prevent snagging.
Secondary School and Junior College
As students transition into secondary school and junior college, their attitude toward labeling changes. Teenagers are highly sensitive to peer perception and generally dislike conspicuous name tags on their clothing. At this stage, the primary purpose of the label shifts from active loss prevention by teachers to private ownership verification in the event of a dispute or mix-up.
For these older students, select much smaller, minimalist label sizes, such as micro-labels measuring 10mm by 20mm. Use clean, simple sans-serif fonts in neutral colors that blend in with the garment’s interior. Instead of printing the student’s full name in large letters, consider using only their initials, a classroom code, or a small monogram. This satisfies school identification policies while respecting the student’s desire for privacy and a mature aesthetic.
Placement must be discreet. Avoid any visible outer placements and instead apply the transfers to hidden areas such as the lower inner hem of the shirt, the side seam near the care label, or directly onto the manufacturer’s care tag itself. This ensures the label remains completely invisible while the uniform is worn, yet remains accessible if the student needs to verify ownership. Additionally, placing the label near the care tag ensures it does not cause any rubbing or discomfort against the skin during long school days.
Matching Transfer Materials to School Uniform Fabrics
Before purchasing any heat transfer stickers, you must verify the fabric composition of the school items you intend to label. School uniforms are rarely made of a single, uniform material; they often consist of various fiber blends designed for durability, breathability, or stretch. Applying a heat transfer sticker without checking the fabric composition can lead to permanent damage to the garment or a complete failure of the adhesive.
Always begin by reading the garment care label sewn into the inside seam of the clothing. Look for the exact fiber percentages, such as 100% cotton, 100% polyester, or blends like 65% polyester and 35% cotton. Some modern PE kits or athletic wear may also contain elastane, spandex, or nylon. Each of these fibers reacts differently to heat and pressure, which dictates the type of heat transfer material you must use.
Applying a high-heat transfer sticker to synthetic or heat-sensitive fabrics carries significant risks. Synthetic fibers like polyester, nylon, and spandex have relatively low melting points. If you use a standard iron-on label that requires high temperatures (such as 160°C or higher) and prolonged pressure, you risk scorching, glazing, or completely melting the fabric. This can leave shiny, discolored patches on the uniform or even burn a hole through the material. Conversely, if you use a low-temperature transfer on a heavy cotton canvas bag, the adhesive may not melt sufficiently to penetrate the dense cotton fibers, causing the label to peel off after the first wash.
To prevent these issues, you must verify the sticker manufacturer’s specifications before buying. Look for labels explicitly categorized by fabric compatibility. For example, standard polyurethane (PU) transfers are highly versatile and work well on cotton and cotton-polyester blends. For highly stretchable PE kits containing spandex, you must select stretch-compatible heat transfers that can expand and contract with the fabric without cracking. For heat-sensitive synthetics like nylon, look for low-temperature transfers that bond at lower heat levels (around 120°C to 130°C) to protect the fabric from thermal damage.
Application and Washing Checklist for Durability
Achieving a permanent, laundry-safe bond with a heat transfer sticker requires a precise application technique. Because different manufacturers use different adhesive formulations, you must always read and follow the specific instructions provided with your stickers. However, following a standardized preparation and application checklist will significantly increase your chances of success.
Before you begin, perform a series of pre-application checks on the garment. Ensure the fabric is clean and completely dry. If the uniform is brand new, wash it at least once without fabric softener before applying the label. Fabric softeners leave a chemical residue on the fibers that can prevent the heat-activated adhesive from bonding properly. Place the garment on a hard, flat, heat-resistant surface—such as a wooden table protected by a thin cloth, or a sturdy ironing board. Avoid soft, padded surfaces, as they prevent you from applying the firm, downward pressure needed to force the adhesive into the fabric fibers. Iron the target area briefly to remove all wrinkles and moisture before positioning the sticker.
When applying the sticker, pay close attention to the manufacturer’s specified temperature, pressure, and dwell time. Use a household iron with the steam setting turned completely off, as moisture will ruin the adhesive bond. Place a sheet of parchment paper or a thin pressing cloth over the transfer to protect both the sticker and the iron. Press down firmly with two hands, applying steady, vertical pressure rather than sliding the iron back and forth as you would during normal ironing. Hold the iron in place for the exact number of seconds recommended by the manufacturer.
After pressing, you must verify the peeling method. Some heat transfer stickers are “hot peel,” meaning you must remove the backing paper immediately while the transfer is still hot. Others are “cold peel,” requiring you to let the transfer cool completely to room temperature before gently peeling away the carrier sheet. Peeling a cold-peel sticker while hot, or vice versa, can tear the design or pull the adhesive away from the fabric. Once the backing is removed, inspect the edges of the label. They should appear slightly textured, showing the weave of the fabric underneath, which indicates a successful bond.
To maintain the label’s durability over time, observe strict post-application washing restrictions. Allow the adhesive to cure for at least 24 to 48 hours before washing the garment for the first time. When laundering, always turn the garments inside out to protect the face of the transfer from friction against other clothes or the washing machine drum. Use a gentle wash cycle with cold or warm water, and avoid harsh detergents, bleach, or fabric softeners. Air drying is highly recommended; if you must use a tumble dryer, select a low-heat or delicate setting to prevent the adhesive from softening and peeling.
Finally, establish a strict stop condition. If the garment’s care label explicitly displays the “do not iron” symbol (an iron with a cross through it), or if the fabric composition is completely unknown and feels highly synthetic, halt the application immediately. In these cases, do not attempt to use a heat transfer sticker. Instead, opt for a sew-on label or a fabric-safe permanent marker to avoid destroying the garment.
What to Verify When Ordering Custom Labels Online
When sourcing custom heat transfer labels from online marketplaces or local printing services, careful evaluation of the product specifications is essential to ensure you receive a high-quality, practical product. Do not rely solely on product photos; instead, look for detailed descriptions of the materials and customization options.
First, check the customization features offered by the seller. Ensure they provide clear, highly legible fonts that remain readable even at small sizes. For younger children who cannot yet read their names, verify if the seller allows you to include a simple, recognizable icon—such as a star, an animal, or a vehicle—alongside the text. This visual cue helps early primary students identify their belongings independently. Additionally, look for high-contrast color combinations that stand out clearly against your child’s specific uniform colors.
Second, evaluate the practical purchasing details. Check the minimum order quantities (MOQ) and sheet layouts. For a single student, a sheet containing a mix of sizes (large for bags, medium for shirts, small for socks or tags) is often much more useful than a bulk order of a single size. Take note of the delivery lead times, especially during the peak back-to-school season. Custom printing and shipping can take several weeks, so order well in advance to ensure the labels arrive before the school term begins.
Lastly, verify the manufacturer’s guidance on the shelf life and storage of unused transfer sheets. Unapplied heat transfer stickers can degrade over time if exposed to heat, humidity, or direct sunlight. The adhesive backing can dry out or become brittle, leading to poor adhesion when you attempt to apply them months later. Look for suppliers who package their transfers in resealable, moisture-proof bags, and store your unused sheets in a cool, dry, dark drawer until they are needed for mid-year uniform replacements.
Frequently Asked Questions (FAQ)
Can I use heat transfer stickers on plastic water bottles or lunchboxes?
No, you cannot use heat transfer stickers on plastic water bottles, lunchboxes, or other hard surfaces. Heat transfer adhesives require porous fabric fibers to sink into and create a permanent bond. Hard materials like plastic, metal, glass, and silicone do not have these fibers. Furthermore, the high heat required to activate the transfer adhesive can easily warp, melt, or discolor plastic and silicone items, creating a safety hazard and ruining the product. For hard school items, you should use waterproof vinyl decals, permanent multi-surface markers, or professional engraving services instead.
How do I remove a heat transfer label if the uniform is passed down?
Removing a heat transfer label can be challenging, and success depends heavily on the specific adhesive formulation, the fabric type, and how long the label has been fused to the garment. Because these labels are designed to be permanent, complete removal without leaving any residue is not guaranteed. You should first check the label manufacturer’s specific removal instructions. Some adhesives can be softened by reheating the label through parchment paper and gently peeling it off with tweezers while hot. Alternatively, you can apply a specialized adhesive remover designed for fabrics, ensuring you test it on a hidden area first to check for colorfastness. Never attempt to scrape the label aggressively or use excessive heat, as this can permanently thin, tear, or scorch the uniform fibers.

Community discussion
Share your experience or ask a question. Comments are reviewed before publication.