
Starting your journey into knitting or crochet does not require a massive financial investment or a basket overflowing with specialized gadgets. In fact, attempting to buy every tool on the market when you are just learning can lead to unnecessary confusion and high upfront costs. To begin creating your first fabric loops, you only need a few basic, highly versatile tools that match your initial project. By focusing on a minimal starter kit, you can save money, reduce frustration, and master the fundamental hand movements before deciding which advanced accessories are worth your investment.
Core Knitting Tools: What You Actually Need to Start
Knitting relies on two needles to hold and manipulate active loops of yarn. While traditional straight needles are highly visible in popular culture, circular needles—which consist of two short needle tips joined by a flexible plastic cable—are often the most versatile and ergonomic choice for beginners. Circular needles allow the weight of your growing project to rest comfortably in your lap rather than pulling down on your wrists, which helps prevent early hand fatigue. Additionally, circular needles can be used to knit both flat pieces, like scarves, and seamless tubes, like hats, making them a highly adaptable single purchase.
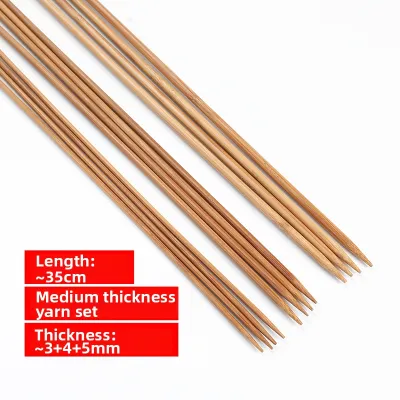
The material of your knitting needles significantly influences how your yarn behaves as you work. Wooden and bamboo needles offer a natural, textured surface that provides a gentle grip on the yarn. This friction is incredibly helpful for beginners because it prevents slippery synthetic or mercerized cotton fibers from sliding off the needle tips accidentally. On the other hand, metal needles, typically made of aluminum or brass, feature a highly polished, slick surface that allows yarn to glide rapidly. While metal needles are exceptionally durable and excellent for increasing your knitting speed, they can feel too slippery for a novice who is still learning to control stitch tension. You can verify the friction level by sliding a small loop of your chosen yarn along the needle shaft; if the loop slips off without any physical guidance, a wooden or bamboo needle will offer better initial control.
Products mentioned in this guide
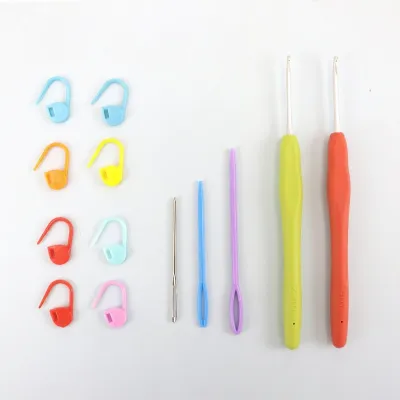
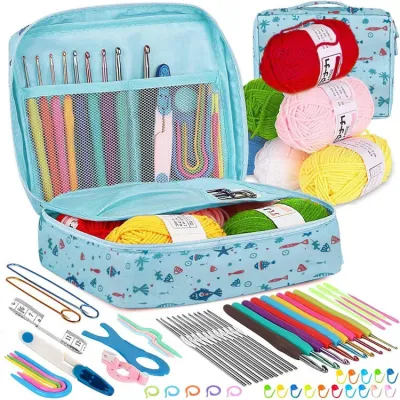
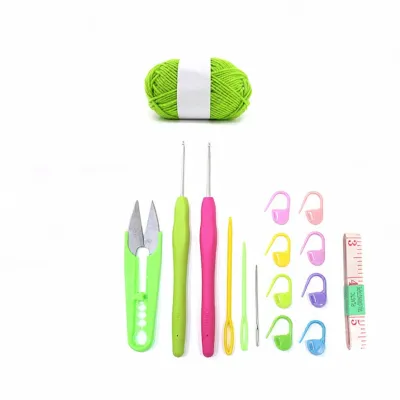
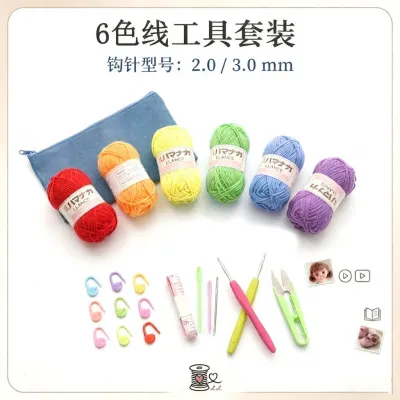
Prices are valid at publication and may change. Please refer to the product page for the latest price.
Understanding needle sizing standards is essential for ensuring your stitches match the dimensions of your chosen pattern. Needle diameters are globally standardized in millimeters (mm), though you will often see regional sizing systems, such as US numbers or UK/Canadian sizes, printed alongside the metric measurement. For your first project, look for mid-range needle sizes between 4.0 mm and 5.5 mm. These sizes are highly compatible with standard worsted weight or 8-ply yarns, which are thick enough to hold easily and allow you to see your individual stitches clearly as you learn.
Essential Crochet Hooks and Accessories
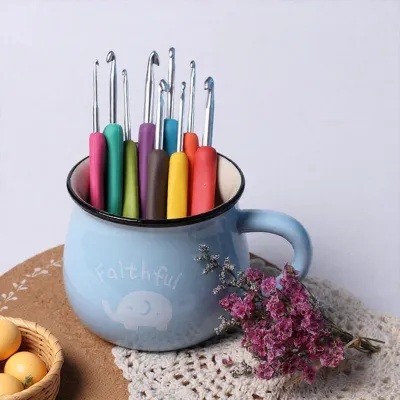
Crochet uses a single hook to pull loops of yarn through other loops, and selecting the right hook shape can dramatically improve your early experience. Hook anatomy generally falls into two categories: inline and tapered. Inline hooks feature a thumb rest and a hook head that is directly aligned with the width of the shaft, creating a deep, angular throat that helps beginners maintain consistent loop sizes. Tapered hooks have a rounded head and a shallower, smoother throat that allows for faster movement but requires slightly more manual control to prevent the yarn from slipping off. For your handle, standard metal hooks are thin and lightweight, but ergonomic handles—which feature a wider, cushioned rubber or plastic grip—provide superior hand comfort and reduce cramping during long practice sessions.

The material and finish of your crochet hook must be inspected carefully to ensure smooth crafting. Aluminum hooks are highly popular because they are lightweight, inexpensive, and exceptionally smooth. Plastic hooks are also common and budget-friendly, but they can sometimes have tiny manufacturing seams that snag delicate yarn fibers. Wooden and bamboo hooks offer a warm, lightweight feel but can occasionally develop rough spots over time. Before purchasing, run your finger along the throat and the hook tip to physically check for any rough edges, seams, or splinters that could catch on your yarn and split the fibers.
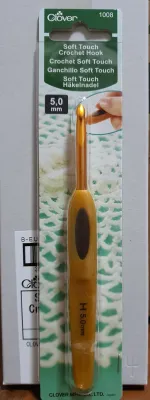
Navigating crochet hook sizes requires a quick check of the packaging, as manufacturers often list multiple sizing systems. Metric sizing in millimeters is the most reliable standard to follow, but you will frequently encounter letter and number systems, such as an H-8 or I-9 hook in the United States. A mid-range hook size, such as 5.0 mm (often labeled as H/8), is the ideal starting point for beginners. This size matches closely with medium-weight yarns, allowing you to practice basic stitches without struggling to see or hook the fibers.
Shared Notions and Measuring Tools for Both Crafts
Beyond needles and hooks, a few small, universal accessories are necessary for finishing your work, measuring your progress, and managing your stitches. A reliable cutting tool is the first shared essential. While standard household kitchen scissors can cut yarn, they often have dull or bulky blades that crush and fray the yarn ends instead of slicing them cleanly. Investing in a small pair of dedicated yarn scissors or embroidery snips with sharp, precise tips ensures clean cuts, which makes threading the yarn through needle eyes significantly easier. Always keep these sharp tools stored safely in a protective sheath when not in use.
Accurate measurement is vital for checking your project’s gauge and overall length, which requires a flexible tape measure. Avoid metal hardware tape measures, as they are rigid and can stretch or distort your knitted fabric during measurement. Look for a flexible fiberglass or fabric tape measure that does not stretch over time, and verify that it features clear, high-contrast markings in both centimeters and inches. This allows you to easily track your progress against pattern instructions regardless of the measurement system used.
Finishing your project and marking key points in your work require tapestry needles and stitch markers. Tapestry needles, also known as darning needles, feature a blunt tip and a large eye designed to accommodate thick yarn. The blunt tip is crucial because it allows you to weave in loose yarn ends between stitches without piercing and splitting the actual fibers. For marking stitches, locking stitch markers—which look like small plastic safety pins—are highly recommended for both crafts because they can be opened and secured directly onto active loops. While simple ring markers work well for sliding along knitting needles, they cannot be attached directly to crochet stitches, making locking markers the more versatile choice for a dual-craft starter kit.
How to Avoid Overspending on Unnecessary Gadgets
The craft market is filled with appealing accessories, but many of them are non-essential luxuries that can quickly inflate your budget. Items like ceramic yarn bowls, digital row counters, specialized blocking mats, and electric skein winders are convenient but entirely optional. When you are starting out, your primary goal is to master the basic movements, and these specialized tools do not change the quality of your early stitches. Focus strictly on your needles or hooks, yarn, a tape measure, and a tapestry needle to keep your initial setup costs low, often spending under S$20 to S$30 for your first project.
You can easily substitute common household items for expensive craft store gadgets during your first few projects. Instead of buying a dedicated yarn bowl to keep your ball of yarn from rolling across the floor, you can place your yarn inside a clean, heavy mixing bowl or a deep plastic container from your kitchen. Instead of purchasing specialized plastic stitch markers, you can use clean safety pins, paperclips, or even a short scrap of contrasting yarn tied in a loop. If your first project requires blocking—the process of wetting and shaping the finished fabric—you can lay your work flat on a clean, dry bath towel placed over a carpet or bed, securing the edges with standard rust-resistant sewing pins instead of buying expensive foam blocking mats.
Knowing when to upgrade from basic tools to specialized equipment depends on observable signs of physical discomfort or technical limitations. If you find that your hands or wrists ache after only ten minutes of crafting, this is a clear trigger to upgrade to ergonomic hooks or circular needles with flexible cables. If you notice that your yarn is constantly splitting or catching, and you have verified that your technique is correct, it may be time to replace a cheap plastic hook with a high-quality, polished aluminum or smooth wooden alternative. Only purchase a specialized tool when you can identify a specific obstacle in your current workflow that the new tool is designed to solve.
Building Your First Starter Kit: A Step-by-Step Checklist
Assembling your first toolkit is most successful when you build it around a single, specific project rather than buying random supplies in bulk. Follow this step-by-step checklist to create a highly functional, budget-friendly starter kit.
First, select a simple beginner pattern, such as a basic scarf or dishcloth, and purchase the yarn first. Look at the paper label wrapped around the yarn skein to find the manufacturer’s recommended needle or hook size and the expected stitch gauge. Matching your tool size directly to these recommendations ensures that your stitches will not be too tight or too loose, saving you from early frustration.
Second, purchase only the single needle or hook size specified by your yarn label. Avoid the temptation to buy a complete multi-pack set of needles or hooks. While these sets seem like a better value per item, you will likely only use one or two sizes for your first few months of crafting, leaving the rest of the set unused.
Third, add only the shared notions that are absolutely necessary to complete your chosen pattern. For a basic scarf, this typically means a single blunt-tip tapestry needle for weaving in the ends and a flexible tape measure to check the length. You can skip stitch markers and specialized cutting tools initially by using household scissors and safety pins.
Fourth, verify the return and exchange policies at your local craft stores or online marketplaces before finalizing your purchase. If you accidentally buy the wrong needle length or hook style, having the option to exchange the unused item ensures you do not waste your budget. Keeping your initial purchases focused and verified allows you to start your new hobby with confidence and minimal expense.
Frequently Asked Questions (FAQ)
Can I use the same hooks and needles for both knitting and crochet?
Knitting and crochet are structurally distinct crafts that require different tools, meaning you cannot use knitting needles for crochet or a crochet hook for knitting. Knitting requires two needles to hold a row of multiple active, open loops of yarn simultaneously, transferring them from one needle to the other to build the fabric. Crochet, conversely, uses a single hook to manage only one active loop at a time, pulling it through other loops to create individual stitches. While you cannot swap the primary tools, you can share all of your secondary notions, including tape measures, tapestry needles, scissors, and locking stitch markers, across both crafts.
How do I clean and maintain wooden or bamboo knitting needles?
In Singapore’s humid climate, wooden and bamboo tools require gentle maintenance to preserve their natural texture and prevent the wood from drying out or snagging your yarn. After each crafting session, wipe the needles down with a clean, dry microfiber cloth to remove natural oils from your hands. Never soak wooden or bamboo needles in water or use harsh chemical cleaners, as moisture can cause the wood to swell, warp, or splinter. Before you begin a new project, run your fingers along the shafts and tips to inspect the surface; if you detect any minor rough spots, you can gently smooth them using a very fine-grit sandpaper or a buffing block, followed by a tiny drop of natural beeswax rubbed into the wood to restore its smooth glide.

Community discussion
Share your experience or ask a question. Comments are reviewed before publication.