
Starting embroidery does not require a massive financial investment or a workspace filled with specialized gadgets. To begin stitching, you only need a small, highly focused set of tools: a sturdy hoop to hold your fabric taut, a set of sharp needles designed for embroidery floss, a few skeins of stranded cotton thread, a piece of non-stretch woven fabric, and a pair of sharp scissors. While craft stores and online marketplaces are filled with tempting accessories like needle minders, floor stands, and specialized lighting, these items are entirely optional for novices. Focusing on a few high-quality essentials allows you to master the basic stitches without the distraction of unnecessary gear. By selecting the right foundational tools from the start, you ensure a smoother learning curve and avoid the frustration of working with materials that fray, slip, or tear.
The Core Embroidery Tools You Must Have
An embroidery hoop is essential for keeping your fabric flat and under consistent tension while you work. Without a hoop, your stitches will pull the fabric inward, resulting in puckering that is nearly impossible to iron out later. Beginners generally find hoops measuring 5 to 6 inches (approximately 12 to 15 centimeters) in diameter the easiest to handle, as they fit comfortably in one hand and accommodate most starter patterns. Wooden hoops, often made of beechwood, offer a classic look and a natural grip, though you should inspect them for splinters or uneven gaps along the inner ring. Plastic hoops, particularly those featuring an interlocking lip or groove, provide exceptional tension control and prevent the fabric from slipping during long stitching sessions, making them a highly practical alternative.
Selecting the right needle is critical for preventing hand fatigue and protecting your embroidery thread. For general hand embroidery, you will want to look for crewel needles, which feature sharp tips to easily pierce woven fabrics and medium-to-long eyes to accommodate multiple strands of floss. Crewel needles are sized by number, with higher numbers indicating finer needles; sizes 7, 8, and 9 are highly versatile starting points for beginners. If the needle eye is too small, threading becomes a frustrating chore and the friction will shred your floss; if the needle is too large, it will leave visible holes in your fabric.
Products mentioned in this guide
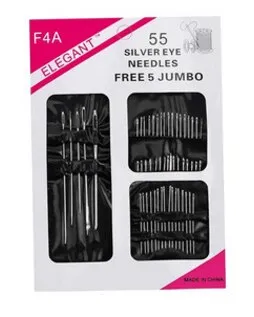
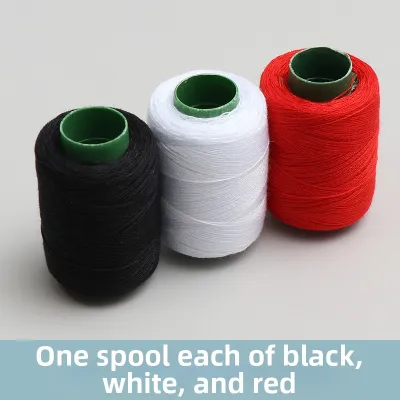
Prices are valid at publication and may change. Please refer to the product page for the latest price.
Stranded cotton embroidery floss is the standard thread used for most projects, valued for its high luster and smooth glide. A single strand of floss is actually composed of six individual thread plies twisted together, allowing you to separate them to achieve different line thicknesses. When purchasing floss, look for reputable brands that guarantee colorfastness, which prevents the dye from bleeding when the finished piece is washed or exposed to moisture. You can easily test colorfastness at home by wetting a small piece of the thread and pressing it firmly against a scrap of white fabric or a paper towel to see if any pigment transfers.
The fabric you choose serves as the canvas for your stitches, and selecting a non-stretch, woven material is key to a successful first project. Medium-weight cotton fabrics, such as calico, quilting cotton, or linen, are ideal because their stable weave supports the weight of the stitches without stretching out of shape. Avoid stretchy knit fabrics, synthetic polyesters, or loosely woven materials like burlap, which can warp under tension and make it difficult to maintain uniform stitch sizes.
Finally, a pair of small, sharp scissors is a non-negotiable sewing tool for clean thread cuts. Standard household scissors are too bulky to snip threads close to the fabric surface, which can lead to messy knots or accidental damage to your active stitches. Dedicated embroidery scissors feature narrow, pointed blades that allow you to trim floss precisely at the base of a knot, keeping the back of your work neat and manageable.
Helpful but Optional Accessories to Skip for Now
When browsing craft supplies, you will encounter pre-printed fabric patterns, but these are not strictly necessary to begin. You can easily transfer simple designs onto plain fabric using basic household items, such as taping your pattern to a window, placing your fabric over it, and lightly tracing the lines with a standard pencil or a water-soluble fabric pen. Before tracing your entire design, always test your marking tool on a small scrap of fabric to verify that the lines erase completely with water or gentle rubbing.

Specialty threads, including metallic, satin, and pure silk varieties, should be avoided until you have mastered the basic stitches. Metallic threads are notoriously stiff and prone to fraying, while satin and silk threads are highly slippery and difficult to knot securely. These materials require advanced tension control and can quickly frustrate a beginner who is still learning how to manage standard cotton floss.
It is also wise to bypass elaborate thread organization systems, magnetic needle minders, and complex storage boxes during your first few weeks. While these accessories are popular on social media, a simple paper envelope or a clear plastic zip-top bag is perfectly adequate for keeping your active threads clean and separated. Similarly, expensive equipment like light pads, magnifying glasses, and floor stands are specialized tools designed for intricate, large-scale projects and are unnecessary for small, hand-held starter designs.
How to Choose Your First Kit or Individual Sewing Tools
Deciding whether to purchase a pre-assembled embroidery kit or to source your tools individually depends on your budget and long-term interest in the craft. Pre-assembled kits are highly convenient, as they bundle the pattern, fabric, pre-sorted thread, hoop, and needles into a single package, allowing you to start stitching immediately. However, many budget-friendly kits found on online marketplaces use low-quality plastic hoops that slip easily, or include needles with rough eyes that shred the thread.
Sourcing your individual sewing tools independently often provides better long-term value and a more enjoyable stitching experience. By purchasing a high-quality wooden or plastic hoop, a pack of branded crewel needles, and a few select skeins of premium cotton floss, you build a reliable toolkit that will last through multiple projects. This approach also allows you to choose your own fabric textures and color palettes, ensuring you are not limited to the pre-selected designs found in commercial kits.
Regardless of which path you choose, always verify the material specifications and care instructions on the product labels before making a purchase. Look for fabric labeled as 100% cotton or linen to ensure ease of stitching, and check that the embroidery floss is labeled as mercerized cotton, which indicates a stronger, shinier thread that resists tangling. Taking a few moments to inspect these details prevents the disappointment of working with low-grade materials that warp or fade after your hard work is complete.
Setting Up Your Workspace and Caring for Your Tools
Establishing good maintenance habits from day one will protect your investment and keep your tools in peak working condition. Because embroidery needles are made of steel, they are highly susceptible to rust and corrosion, especially in humid climates. To prevent moisture damage, store your needles in a dry needle case, a dedicated pincushion, or their original packaging with a small silica gel packet. Never leave needles loose in cushions or fabric where they can be easily lost, posing a safety hazard to children or pets.
Proper floss organization is equally important for preventing frustrating tangles and knots. Once you open a skein of floss, wind the thread onto simple cardboard or plastic bobbins, or keep them organized in labeled loops. Store your thread collection in a dark drawer or an opaque container, as prolonged exposure to direct sunlight can cause the vibrant dyes to fade and weaken the cotton fibers over time.
Creating an ergonomic workspace is vital for preventing physical strain during long stitching sessions. Always work in a well-lit area, positioning a bright desk lamp or sitting near a window so you can see the fine details of your stitches without squinting. Choose a supportive chair that allows you to sit upright, and make a conscious effort to relax your shoulders and hands to avoid cramping. Taking regular breaks to stretch your fingers, wrists, and neck will ensure that your new hobby remains a relaxing and pain-free creative outlet.
Frequently Asked Questions (FAQ)
Can I use regular sewing needles and thread for embroidery?
While it is technically possible to use standard sewing supplies, they are not ideal for hand embroidery. Regular sewing needles have very small eyes designed for thin, single-ply thread, making them extremely difficult to thread with multi-strand embroidery floss. Standard sewing thread is also much thinner and lacks the lustrous finish of embroidery floss, meaning your stitches will look sparse and flat rather than raised and textured.
What size embroidery hoop is best for a first project?
A 5-inch or 6-inch (12 to 15 cm) hoop is the most practical size for a beginner’s first project. This size is small enough to hold comfortably in one hand without causing wrist fatigue, yet large enough to accommodate a wide variety of simple starter patterns. Smaller hoops can restrict your movement, while larger hoops make it difficult to maintain even fabric tension across the entire stitching area.
Do I need a special pair of scissors just for embroidery?
Yes, having a dedicated pair of small, sharp embroidery scissors is highly recommended. Standard kitchen or paper scissors are too large and dull to make clean cuts close to the fabric, which can lead to frayed thread ends and accidental damage to your work. Keeping your embroidery scissors reserved exclusively for cutting thread preserves their razor-sharp edge and ensures clean, precise snips every time.

Community discussion
Share your experience or ask a question. Comments are reviewed before publication.