
Starting embroidery does not require a massive financial commitment or a room full of specialized equipment. By focusing on a few high-quality essentials, you can master the basics of needlework without cluttering your home or draining your budget. Many beginners make the mistake of purchasing massive, low-quality multi-packs of thread and hoops, only to find that rough materials and blunt needles make the learning process frustrating. Instead, a thoughtful selection of basic sewing tools—often found under the category of alat jahit in local shops—will give you a much smoother start. With just a sturdy hoop, a few reliable needles, some cotton floss, and a scrap of non-stretch fabric, you can begin creating beautiful hand-stitched designs right at your desk.
Define Your First Project to Avoid Unnecessary Purchases
Before purchasing any supplies, it is crucial to identify the specific style of needlework you want to pursue. Hand embroidery is a broad category, and buying tools blindly often leads to wasted money on incompatible items. The three most common entry points for beginners are surface embroidery, cross-stitch, and punch needle. Each of these techniques requires a distinct set of materials that cannot always be used interchangeably.
Surface embroidery is highly versatile and allows you to stitch freeform designs, lines, and textures onto almost any woven fabric. Cross-stitch, on the other hand, is a structured, grid-based technique that requires a specific open-weave fabric called Aida, where you count threads to create geometric patterns. Punch needle is a completely different process that uses a hollow needle to loop yarn or thick thread through a loosely woven backing fabric like monk’s cloth. If you buy a kit designed for cross-stitch hoping to create freeform floral designs, you will find the stiff, grid-like fabric highly restrictive.
Products mentioned in this guide
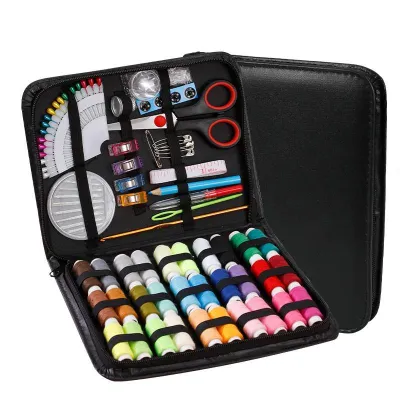
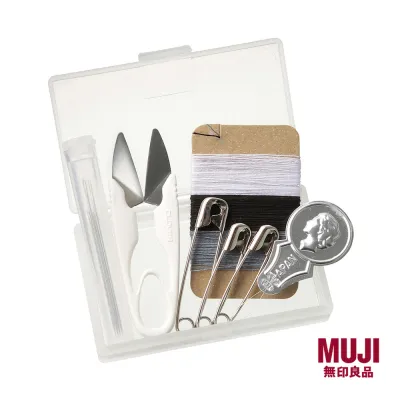
Prices are valid at publication and may change. Please refer to the product page for the latest price.
To keep your initial expenses low, set a realistic starting budget of around S$15 to S$30. Within this budget, prioritize spending on tools that directly affect your physical comfort and the quality of your stitches, such as a sturdy hoop and sharp needles. You can easily save money on fabric by repurposing old cotton shirts, linen pillowcases, or plain canvas tote bags rather than buying specialty embroidery blanks. Additionally, resist the temptation to buy massive thread assortments containing dozens of colors. Instead, select a simple pattern first and purchase only the three to five specific thread colors required for that design.
The Core Hand Embroidery Toolkit (Must-Haves)
To begin surface embroidery, you only need four core items: a hoop, needles, thread, and fabric. Selecting the right specifications for each of these tools will prevent the most common beginner frustrations, such as fabric puckering, thread shredding, and hand fatigue.

An embroidery hoop is essential for keeping your fabric taut while you stitch. Hoops are generally made of wood, bamboo, or plastic. While wooden hoops are classic and aesthetically pleasing, cheap bamboo options often have splinters or uneven rims that fail to hold fabric tension consistently. In humid climates, low-quality wood can also warp over time. Molded plastic hoops, especially those featuring a lip-and-groove design on the inner ring, are highly recommended for beginners because they lock the fabric securely in place without slipping. For your first projects, a hoop with a diameter of 12 cm to 15 cm is ideal. This size fits comfortably in one hand and provides a manageable stitching area that does not require frequent repositioning.
Embroidery needles, often sold as crewel needles, differ from standard sewing needles. They feature a medium-to-long eye that accommodates multiple strands of embroidery floss, paired with a sharp point that pierces woven fabric cleanly. Needles are sized by number; a higher number indicates a finer needle. For beginners, a variety pack containing sizes 7 through 9 is highly versatile. When selecting a needle, the shaft should be slightly thicker than the thread you are using. This design ensures the needle stretches the fabric fibers just enough for the thread to pass through smoothly, reducing friction and preventing the thread from fraying.
Standard embroidery thread, or floss, is typically made of six individual strands of cotton twisted together. This structure is designed to be separated based on the desired thickness of your lines. Beginners should avoid stitching with all six strands at once, as this creates bulky, uneven stitches that are difficult to pull through the fabric. Instead, you will typically separate the floss to use two or three strands at a time. To do this cleanly, cut a piece of floss, pinch the tip, and pull out one individual strand at a time before grouping them back together. This method prevents the remaining strands from tangling into knots.
Your fabric choice forms the foundation of your work. For surface embroidery, choose medium-weight, non-stretch woven fabrics such as cotton calico, linen, or lightweight canvas. Avoid stretchy materials like jersey or knitwear for your first project, as they distort easily under hoop tension and cause your finished design to pucker once removed from the hoop. Finally, invest in a small, dedicated pair of sharp scissors. Dull household scissors will chew through thread ends rather than cutting them cleanly, making it incredibly difficult to thread your needle.
Optional Upgrades to Add Later
Once you have mastered the basic stitches and confirmed your interest in the craft, you can gradually introduce specialized tools to your workspace. These upgrades are not necessary for your first few projects, but they can significantly improve your efficiency and comfort as your designs become more complex.
As you explore different techniques, you may want to expand your needle collection. Tapestry needles, which feature blunt tips and large eyes, are excellent for decorative whipped or woven stitches where you need to pass the needle under existing threads without piercing the background fabric. Chenille needles are sharp like crewel needles but have much larger eyes, making them perfect for thick wool threads or ribbon embroidery. To manage your growing thread collection, simple plastic or cardboard thread bobbins and a plastic compartment box will keep your floss organized and free of dust.
Transferring designs onto fabric is another area where specialized tools can help. While beginners can easily transfer patterns by taping their fabric and design template to a bright window and tracing the lines with a pencil, a dedicated light box offers a much more comfortable setup. You might also consider water-erasable fabric markers or heat-soluble pens. These tools allow you to draw detailed guidelines directly onto your fabric, which then disappear completely when misted with cold water or exposed to the heat of an iron. Always test these markers on a small scrap of your specific fabric first to verify that the lines erase cleanly without leaving a residue.
How to Source Quality Tools on a Budget
When looking for your first set of tools, you will face the choice between buying a pre-packaged beginner kit or purchasing your items individually. Understanding how to evaluate these options will help you get the best value for your money.
Pre-packaged kits are highly convenient because they provide all the necessary materials for a specific project, including the pattern, thread, fabric, and hoop. However, the quality of components in budget-friendly kits can vary wildly. Many cheap kits include low-grade wooden hoops that do not hold tension well, along with rough needles that snag the fabric. If you choose a kit, look for those that specify the use of polished hoops and smooth, stainless steel needles. Alternatively, buying your tools individually allows you to control the quality of each item. Purchasing one high-quality plastic hoop, a pack of reputable needles, and a few skeins of cotton floss individually often costs the same as a cheap kit but provides a much better stitching experience.
To source these items in Singapore, explore local haberdasheries, traditional craft shops in neighborhoods like Chinatown, or reputable online craft stores. When searching online marketplaces, using terms like alat jahit or “embroidery starter supplies” can help you locate local distributors who offer fast shipping and reliable customer service. Buying from local sellers also reduces the risk of receiving warped wooden hoops or rusted needles that have been exposed to damp transit conditions.
Before finalizing any purchase, carefully read the product specifications. Look for needles labeled as “nickel-plated” or “stainless steel” to ensure they resist tarnishing in humid environments. For hoops, look for descriptions that mention smooth, snag-free inner rims and sturdy brass or steel adjustment screws. Avoid unbranded plastic hoops that feel flimsy or flexible, as they will bow under pressure and fail to maintain the necessary fabric tension.
Setting Up Your Workspace and First Stitch
Preparing your materials correctly before you make your first stitch is the secret to a frustration-free embroidery session. Taking a few minutes to set up your hoop and thread properly will prevent uneven stitches and fabric damage.
Start by preparing your fabric. If your fabric is prone to fraying along the cut edges, you can bind the edges with masking tape or use pinking shears to cut them. To mount the fabric in the hoop, loosen the adjustment screw and separate the two rings. Lay the inner ring flat on a clean table, place your fabric over it, and then press the outer ring down over the fabric and inner ring. Gently pull the edges of the fabric so it is taut, then tighten the screw. Continue to pull the fabric edges lightly around the perimeter while tightening the screw until the fabric is as tight as a drum skin. When you tap the center of the fabric with your finger, it should produce a clear, hollow sound. If the fabric is loose or sags, your stitches will puckered once you remove the hoop.
Next, prepare your thread. Cut a length of embroidery floss that is roughly the distance from your fingertips to your elbow (about 30 cm to 45 cm). Using thread that is too long will lead to frequent tangles and knots as you pull it through the fabric. Separate the strands as needed, thread your needle, and leave a short tail of about 10 cm hanging from the eye. To secure the thread at the start of your work, you can tie a small knot at the long end of the thread, or use a beginner-friendly “waste knot” technique where you start from the front of the fabric and stitch over the tail on the backside to secure it without bulky knots.
As you practice your first stitches, focus on maintaining consistent tension. Pull each stitch until the thread rests flat against the fabric, but do not pull so hard that the fabric puckers or gathers around the stitch. Keep your hands relaxed and take regular breaks to prevent eye strain and hand fatigue. If you notice your needle bending, you are likely using too much force to push it through a fabric weave that is too tight; in this case, switch to a finer needle. If the fabric begins to tear or show large holes where the needle enters, your needle is too thick for the weave, and you should adjust your tool combination accordingly.
Frequently Asked Questions (FAQ)
Can I use regular sewing thread instead of embroidery floss?
Regular sewing thread is not recommended for surface embroidery. It is much thinner, has a tighter twist, and lacks the lustrous sheen of cotton embroidery floss. Because of its fine gauge, using sewing thread to fill a design requires significantly more stitches and time, resulting in a flat, sparse texture. Embroidery floss is specifically structured to be separated into strands, allowing you to easily adjust the thickness and dimension of your stitches to suit different parts of your design.
What size embroidery hoop is best for a beginner?
An embroidery hoop with a diameter of 12 cm to 15 cm (approximately 5 to 6 inches) is the best size for a beginner. This size fits comfortably in one hand without causing muscle strain, and it allows your thumb to easily reach the center of the stitching area to help guide the thread. It also accommodates most beginner-friendly patterns without requiring you to move the hoop across the fabric, which can crush existing stitches.
How do I keep my embroidery floss from tangling?
To prevent tangling, always cut your embroidery floss to a manageable length of no more than 45 cm. Before you begin stitching, separate the individual strands completely and then smooth them back together; this releases the natural twist of the manufacturing process. While stitching, let your needle hang freely every few stitches to allow the thread to untwist naturally. Finally, store your unused floss on flat cardboard or plastic bobbins rather than leaving them in loose skeins.

Community discussion
Share your experience or ask a question. Comments are reviewed before publication.