
Starting your embroidery journey does not require a massive financial investment or a room full of specialized equipment. To make your very first stitch, you only need four fundamental items: a sturdy hoop to hold your fabric taut, a needle designed for hand embroidery, some versatile embroidery floss, and a piece of non-stretch fabric. While craft stores and online marketplaces are filled with tempting accessories, focusing on these core essentials allows you to master basic stitches without feeling overwhelmed by unnecessary gear. This sewing guide will help you navigate the initial choices, avoid common purchasing pitfalls, and set up a comfortable, budget-friendly workspace.
Core Embroidery Supplies You Actually Need
To begin hand embroidery, you must understand how your primary tools interact. The relationship between your hoop, needle, thread, and fabric determines how smoothly your needle glides and how neat your finished stitches will look.
Embroidery hoops keep your fabric flat and under consistent tension while you work. Hoops are typically made of wood, bamboo, or plastic. Wooden and bamboo hoops are lightweight and classic, but you must inspect them to ensure the inner and outer rings fit together snugly without gaps. Plastic hoops often feature a molded ridge on the inner ring that locks the fabric securely in place, preventing slippage during long stitching sessions. For your first project, a hoop diameter of 12 to 15 centimeters is highly manageable, as it fits comfortably in one hand while providing enough surface area for a beginner-friendly pattern.
Products mentioned in this guide
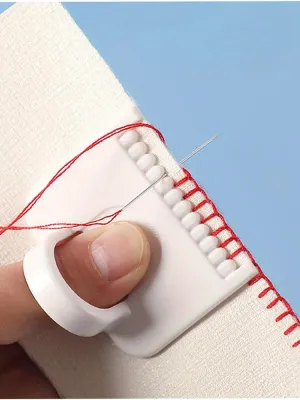
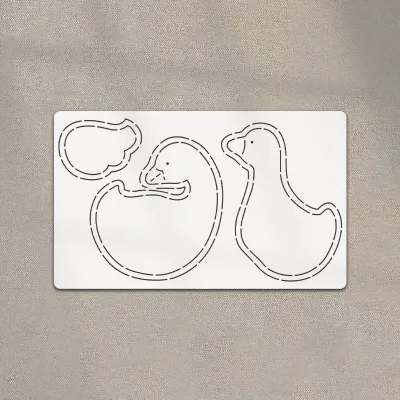
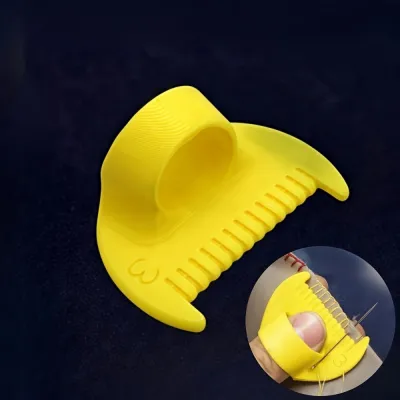
Prices are valid at publication and may change. Please refer to the product page for the latest price.
Your choice of needle directly impacts how easily you can pull thread through your fabric without leaving unsightly holes. Embroidery needles, sometimes called crewel needles, feature a medium-to-long eye that accommodates multiple strands of floss, paired with a sharp point to pierce woven fabrics cleanly. Needles are sized by number; a higher number indicates a finer needle. For beginners working with standard medium-weight fabrics, a size 7 or 8 needle is an excellent starting point. If your needle is too small, threading it becomes frustrating; if it is too large, it will stretch the fabric fibers permanently, leaving visible gaps around your stitches.
Embroidery floss is the thread that brings your design to life. The most common type is six-strand cotton floss, which is designed to be separated into individual strands depending on the desired thickness of your lines. This adaptability allows you to use a single skein for both delicate, fine details and bold, thick outlines. When starting out, you do not need to buy hundreds of colors. Selecting a basic palette of five to eight versatile shades—such as a reliable black, a soft white, and a few primary or pastel tones—gives you plenty of creative freedom without cluttering your workspace.
The fabric you choose acts as the foundation for your entire project. For absolute beginners, tightly woven, non-stretch natural fabrics like medium-weight cotton, linen, or cotton-linen blends are the most reliable choice. These materials hold their shape under tension and support the weight of your stitches without puckering. Avoid stretchy fabrics like jersey knits, as well as loosely woven materials like burlap, which can cause your stitches to slip, sag, or distort as you work.
Helpful Accessories to Improve Your Workflow
Once you have secured your core supplies, a few secondary tools can significantly improve your stitching experience. While you can start with household items, investing in a few dedicated accessories will save time and reduce physical frustration.

A pair of dedicated embroidery scissors is one of the most valuable additions to your sewing kit. Unlike bulky household kitchen scissors, embroidery scissors are small, lightweight, and feature extremely sharp, fine-pointed blades. This design allows you to snip threads cleanly and incredibly close to the back of your fabric without accidentally cutting adjacent stitches or damaging the surrounding weave. Keeping these scissors reserved strictly for thread and fabric ensures they remain sharp and functional for years.
Transferring your design onto fabric requires a reliable marking tool. Water-soluble pens and heat-erasable markers are highly popular because they allow you to draw your pattern directly onto the fabric and erase the lines completely once your stitching is finished. Water-soluble markings disappear when dabbed with a damp cloth, while heat-erasable ink fades away under the heat of a household iron or a hair dryer. Always test your marking tool on a scrap piece of your project fabric first to verify that the lines erase completely without leaving a shadow. If you prefer a low-tech approach, you can use a bright window as a makeshift light box to trace your pattern using a soft lead pencil, which is easily covered by your stitches.
As your collection of threads grows, simple organization aids will keep your workspace orderly. Floss bobbins—small plastic or cardboard cards—allow you to wind up loose skeins to prevent tangling and knotting. You can store these bobbins in a simple plastic compartment box, which keeps your colors visible and dust-free. Additionally, a simple wire loop needle threader is an inexpensive tool that saves your eyes from strain when threading multiple strands of cotton floss through a narrow needle eye.
When deciding whether to buy a dedicated accessory or use a household alternative, consider how often you plan to stitch. You do not need to buy a specialized storage box immediately; a clean biscuit tin or a small zip-top bag works perfectly for holding your current project. However, tools that directly affect the quality of your work, such as sharp scissors or a reliable fabric marker, are worth acquiring early because they directly prevent mistakes that could ruin hours of careful handiwork.
How to Build Your First Starter Kit on a Budget
Assembling your first set of tools does not have to be expensive, but it does require a strategic approach to ensure you purchase materials that are satisfying to use. You have two main paths: buying a pre-made beginner kit or sourcing your items individually from local stationery shops and online craft stores.
Pre-made embroidery kits are highly convenient because they bundle all necessary materials—including a pre-printed fabric pattern, matching threads, needles, and a hoop—into a single package. This is an excellent option if you want to try the craft without committing to long-term supplies. However, many mass-produced, low-cost kits found on online marketplaces contain low-quality components. When evaluating these kits, read customer reviews carefully to verify that the wooden hoop is smooth and splinter-free, and that the included needles are sharp rather than dull or bent.
Sourcing your tools individually often yields a higher-quality setup that lasts through multiple projects. When shopping at local stationery or craft stores, look for reputable thread brands that offer smooth, mercerized cotton floss, which resists fraying and tangling. Avoid ultra-cheap, unbranded thread bundles, as these threads are often brittle, prone to knotting, and may bleed color when washed. For hoops, look for sturdy plastic options or well-sanded wooden hoops with robust metal adjustment screws that tighten smoothly.
A realistic initial budget for a functional, frustration-free beginner setup in Singapore is around S$15 to S$30. This modest investment is sufficient to purchase a high-quality 15-centimeter hoop, a pack of assorted hand embroidery needles, four to six skeins of reliable cotton floss, and a half-meter of plain cotton fabric. By focusing your budget on quality basics rather than a massive quantity of cheap materials, you will avoid the common frustrations that lead many beginners to abandon the craft prematurely.
Setting Up Your Workspace and Preparing Your Materials
Before you make your first stitch, taking the time to prepare your materials properly will ensure a smooth, enjoyable crafting session. Proper preparation prevents fabric puckering, thread tangling, and physical discomfort.
To set up your hoop, loosen the outer ring’s screw and separate the two rings. Lay your fabric flat over the inner ring, then press the outer ring down over the fabric and the inner ring. Gently pull the edges of the fabric outward while tightening the screw. Your goal is to achieve a drum-like tension, where the fabric sounds hollow when tapped with a finger. Be careful to pull the fabric evenly along the grain to avoid distorting the weave, which can cause your finished design to warp once it is removed from the hoop.
Preparing your embroidery floss is another critical step. Standard floss consists of six individual strands twisted together. Cut a length of thread about 45 to 50 centimeters long; anything longer is highly prone to tangling as you stitch. To separate the strands, pinch the thread near one end, grasp a single strand, and gently pull it straight up and out while holding the remaining strands. Once you have separated the number of strands required by your pattern—usually two or three for beginner designs—recombine them and smooth them out before threading your needle.
Transferring your design onto the fabric should be done before you place the fabric in the hoop if you are using a flat surface. Lay your printed pattern on a flat table, place your fabric directly over it, and secure both with low-tack tape. If the pattern is difficult to see through the fabric, tape both sheets to a bright window to let the natural light illuminate the lines. Trace the design carefully using your water-soluble pen or heat-erasable marker, ensuring your lines are thin and precise so they can be easily covered by your stitches.
Finally, pay close attention to your physical environment. Choose a workspace with bright, direct lighting—such as near a sunny window or under a flexible desk lamp—to prevent eye strain when working with fine threads. Sit in a supportive chair that allows you to keep your back straight and your shoulders relaxed. Take regular breaks every 30 to 45 minutes to stretch your hands, wrists, and neck, ensuring your new hobby remains a relaxing and pain-free creative outlet.
Frequently Asked Questions (FAQ)
Can I use regular sewing thread instead of embroidery floss?
While you can technically stitch with regular sewing thread, it is not recommended for traditional hand embroidery. Regular sewing thread is much thinner, has a tighter twist, and lacks the lustrous sheen of dedicated embroidery floss. Because it is designed for sewing machine tension and structural seams, it cannot be separated into individual strands to adjust line thickness. Using it for embroidery will result in flat, thin lines that require many repetitive stitches to fill a shape, which can easily warp your fabric. Regular thread is best reserved for delicate details on very fine fabrics, while standard six-strand cotton floss remains the ideal choice for learning basic embroidery stitches.
What size embroidery hoop is best for a first project?
A mid-sized hoop with a diameter of 12 to 15 centimeters is the best choice for a beginner’s first project. This size balances handling comfort and design scale perfectly. It is small enough to hold comfortably in one hand without causing wrist fatigue, yet large enough to accommodate a wide variety of simple, beginner-friendly patterns. Larger hoops can be heavy and difficult to grip, and they make it harder to maintain even fabric tension across the entire surface. Smaller hoops, such as those under 10 centimeters, limit your design options and require you to reposition your fabric frequently, which can crush existing stitches.
Do I need a special fabric for beginner embroidery?
You do not need an expensive or highly specialized fabric, but you must choose one with the correct structural characteristics. The ideal fabric for a beginner is a medium-weight, non-stretch woven material made from natural fibers, such as 100% cotton calico, linen, or a cotton-linen blend. These fabrics have a stable, visible weave that allows your needle to pass through smoothly while holding the tension of your stitches without puckering. Avoid stretchy fabrics like jersey or polyester knits, as they distort easily under hoop tension. You should also avoid loosely woven fabrics like burlap or heavy canvas, which can be difficult to pierce or fail to support fine details.

Community discussion
Share your experience or ask a question. Comments are reviewed before publication.