
Selecting your first sketch pad for architectural drawing requires moving beyond general-purpose art pads to find a tool that supports precision, clean lines, and structural accuracy. A highly suitable starting point is a medium-to-heavyweight, smooth-surface sketch pad (typically between 120 and 150 GSM) featuring a lay-flat binding like wire-o or thread sewing. This combination ensures that technical fineliners glide without feathering, graphite erases cleanly without tearing the surface, and perspective lines can be drawn continuously across a two-page spread. By focusing on observable physical traits—such as paper texture, binding style, and dimensions—you can find a reliable companion for your initial drafting exercises, whether you are sketching in a studio or capturing urban structures on-site.
Why Architectural Drawing Requires Specific Sketch Pad Features
Architectural sketching is fundamentally different from expressive figure drawing or landscape painting. While general art practices often rely on textured paper to grab charcoal or pastel pigments, technical drawing demands absolute precision. When you are practicing orthographic projections, isometric views, or multi-point perspective grids, even a minor bump in the paper’s texture can cause a technical pen to skip or deflect. A smooth, stable surface is essential for maintaining consistent line weights, which is the primary visual language used to convey depth and material boundaries in architectural plans.
Furthermore, the physical construction of the pad directly influences your daily drafting workflow. Architectural drawings frequently require long, uninterrupted strokes that span the entire width of the page or even cross over the central gutter. If a sketch pad does not lie completely flat, your ruler or scale barrier will wobble, leading to distorted angles and inaccurate measurements. Additionally, the paper must withstand repeated erasing and drafting adjustments. Beginners often need to modify guidelines multiple times, and low-grade paper will quickly pill, tear, or lose its surface sizing under the friction of a firm eraser.
Products mentioned in this guide
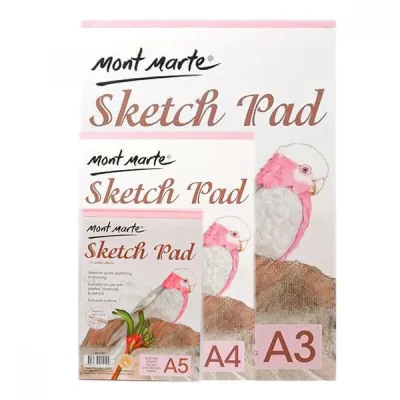
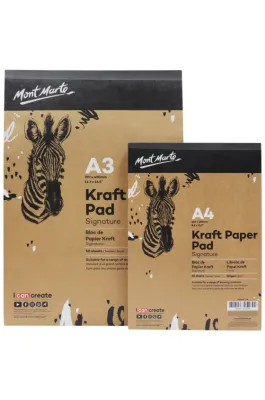
Prices are valid at publication and may change. Please refer to the product page for the latest price.
Core Specifications to Evaluate for Your First Sketch Pad
Before purchasing your first sketch pad, it is helpful to understand the technical specifications listed on the cover or product description. Rather than relying on generic marketing terms like “premium” or “professional grade,” you can make an objective decision by evaluating three core physical dimensions. These are the paper’s weight and surface texture, the structural binding style, and the overall physical dimensions of the pad.

Paper Weight, Texture, and Tooth
Paper weight is typically measured in grams per square meter (GSM) or pounds (lbs), indicating the density and thickness of the sheets. For architectural sketching with technical fineliners, gel pens, or light markers, look for paper rated between 120 GSM and 150 GSM. This weight range provides sufficient density to resist ink bleed-through and prevents the paper from buckling when you apply pressure. If you plan to use heavy ink washes or markers, you may need to step up to mixed-media paper of 200 GSM or higher, though these pads generally offer fewer pages per book.
The texture, or “tooth,” of the paper determines how your drawing tools interact with the surface. Highly textured papers, such as cold-pressed watercolor sheets, have a rough surface that scatters ink and causes fine-tipped pens to wear down prematurely. For architectural work, a smooth or “hot-pressed” finish is highly desirable. You can visually check this by holding the paper at an angle to a light source; a suitable sheet will appear flat and uniform, allowing your pen to glide effortlessly. If you prefer using graphite pencils for initial layouts, a very slight tooth is acceptable, as it helps shave off the graphite to leave a clear, dark line without requiring excessive downward pressure.
Binding Styles and Lay-Flat Performance
The binding of your sketch pad dictates how easily you can access the entire drawing surface and how the book behaves on a flat desk. Wire-o and spiral bindings are highly popular among beginners because they allow the book to open a full 360 degrees. This feature is incredibly useful when working on cramped desks or during site visits where space is limited. However, the metal or plastic coils can sometimes get in the way of your hand or drafting tools when drawing near the edge of the page.
Thread-bound or Smyth-sewn pads offer a traditional book feel and can lie completely flat across a two-page spread when opened. This seamless transition across the gutter is perfect for wide perspective drawings or panoramic site elevations. Glued or pad-bound options allow for easy page removal, which is convenient if you want to scan your work or pin it to a presentation board, but they lack long-term durability if you prefer to keep your sketches bound together. Additionally, consider the cover material: a rigid hardcover provides a built-in drawing board for sketching outdoors in Singapore’s urban environments, while a flexible softcover reduces weight when carried in a backpack.
Size, Format, and Portability
Selecting the right size for your first sketch pad involves balancing the physical space required for detailed drawings with the practicalities of transport. Standard ISO sizes like A4 and A5 are the most common entry points for beginners. An A5 pad is highly portable, fitting easily into a small bag for quick sketches on the MRT or while sitting in a local cafe. However, the limited surface area can make it challenging to practice complex multi-point perspective drawings that require distant vanishing points.
An A4 pad is often considered the sweet spot for architectural students and beginners. It offers ample space to lay out floor plans, elevations, and detailed construction joints side by side, while still fitting comfortably into a standard backpack. For larger studio projects or expansive site analyses, an A3 pad provides a generous canvas, but its bulk makes it cumbersome to carry around and use without a dedicated drafting table. Consider where you will do the majority of your drawing before choosing your format.
Matching Paper to Your Architectural Drawing Tools
The performance of a sketch pad is not an absolute quality; rather, it depends entirely on how the paper interacts with your specific drawing instruments. To ensure your tools perform as expected, you can conduct a few simple, observable checks on a single sheet or a test pad before committing to a major project.
When working with graphite pencils, the primary concern is smudging and erasability. Draw a series of parallel lines using different pencil grades (such as 2H, HB, and 2B) and run a clean finger across them to observe how easily the graphite smears. Next, use a high-quality plastic eraser to clear a section of the lines. The paper should return to its original color without leaving ghost images or showing signs of surface pilling. If the paper fibers begin to fray or tear during erasing, the paper is too delicate for technical practice.
For technical fineliners and felt-tip pens, line crispness is the key metric. Draw a series of rapid, intersecting lines and inspect the edges under bright light. If the ink spreads outward into the paper fibers—a phenomenon known as feathering—the paper is too absorbent. To test for bleed-through, turn the page over to see if the ink has penetrated to the reverse side. If you plan to use alcohol-based markers for rendering materials like concrete, timber, or glass, check the manufacturer’s specifications to ensure the paper has an ink-resistant barrier or is rated for mixed-media use, as standard sketch paper will quickly absorb and bleed these solvents.
Pre-Purchase Checklist for Beginners
To make an informed decision and avoid wasting money on incompatible materials, use this practical checklist when evaluating your first sketch pad:
- Check the Paper Weight: Ensure the label specifies a weight of at least 120 GSM for general pen and pencil work, or higher if you plan to apply light washes.
- Verify the Surface Finish: Look for terms like "smooth," "hot-pressed," or "vellum" on the packaging, avoiding "rough" or "cold-pressed" textures.
- Assess the Binding: Choose wire-o or thread-bound designs if you need the pad to lie completely flat on your desk, or glued pads if you plan to remove sheets frequently.
- Confirm the Dimensions: Opt for an A4 size as a versatile starting point, or A5 if portability is your absolute priority.
- Look for Acid-Free Labels: Acid-free paper resists yellowing and degradation over time, ensuring your early architectural studies remain preserved.
- Test Before Committing: If possible, purchase a single sheet of the paper type or a small, inexpensive pocket pad of the same brand to run your tool compatibility tests before investing in a large, premium sketchbook.
Frequently Asked Questions (FAQ)
Can I use a standard drawing pad for architectural drafting?
Standard drawing pads designed for general art often feature textured paper that is optimized for charcoal, pastels, or heavy graphite blending. While you can use them for rough conceptual brainstorming, they are generally unsuitable for precise architectural drafting. The textured surface causes technical fineliners to skip, leads to uneven line weights, and wears down fine pen tips quickly. Additionally, standard paper may not withstand the repeated, firm erasing required when correcting precise technical layouts.
How do I prevent ink from bleeding through my sketch pad pages?
To prevent ink bleed-through, always check the paper weight label before purchasing and aim for a minimum of 120 GSM. If you are using heavy alcohol-based markers or wet ink washes, place a loose, thick sheet of cardstock or a plastic blotter sheet directly behind your active page. This simple barrier absorbs any excess solvent that penetrates the paper, protecting the clean sheets underneath from accidental staining and preserving the rest of your sketchbook.

Community discussion
Share your experience or ask a question. Comments are reviewed before publication.