
Selecting the right paper stamp cutter for your child’s school year in Singapore depends on matching their physical coordination and school project requirements with the tool’s mechanical design. For lower primary students (Primary 1 to 2), simple handheld punches with fully enclosed blades prevent pinches while building fine motor skills. For middle and upper primary students (Primary 3 to 6), more complex lever-action border punches and manual die-cutting machines support advanced art projects and thicker materials. By aligning the tool’s complexity with your child’s developmental stage, you can foster creativity while maintaining a safe crafting environment.
Key Factors for Matching Cutters to Grade Levels
When choosing paper stamp cutters, parents must look beyond aesthetic designs and focus on the mechanical and cognitive demands of each tool. A tool that is too difficult to press or too complex to align can lead to frustration, while an under-powered punch will tear rather than cleanly cut the paper.
Grip Strength and Lever Mechanics
Products mentioned in this guide
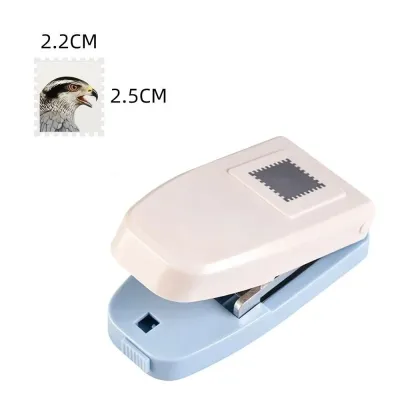
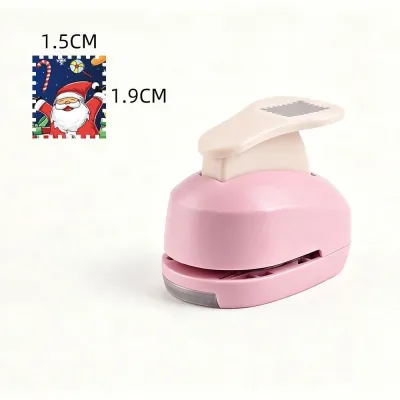
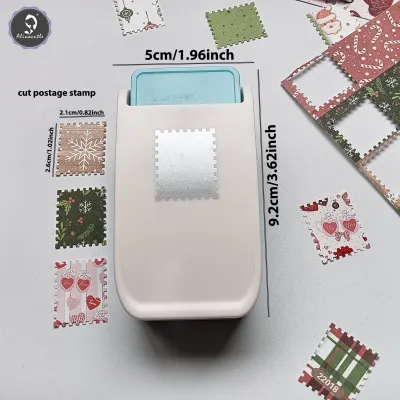
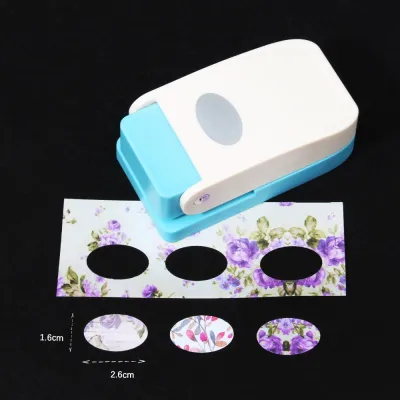
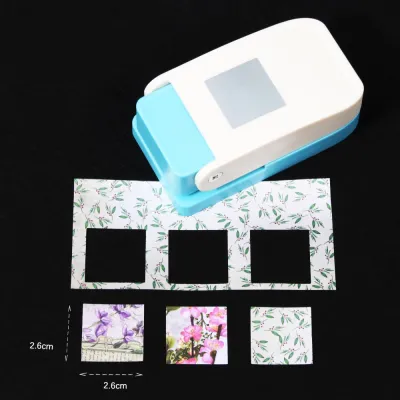

Prices are valid at publication and may change. Please refer to the product page for the latest price.
Children’s hand strength develops gradually. Lower primary students often struggle with traditional squeeze punches that require high grip strength. Lever-action punches, which allow students to use their palm or body weight to press down, reduce the physical effort required. Understanding the mechanical advantage of a tool helps ensure your child can use it independently without straining their hands or wrists during long art sessions.
Essential Safety Features
Safety is the primary concern when introducing cutting tools to young children. Look for stamp cutters with fully enclosed cutting heads where the blade is recessed deep within a plastic housing. This design prevents small fingers from making contact with the sharp metal edges. Additionally, check for rounded plastic edges on the exterior casing and secure locking mechanisms that keep the lever flush against the body when the tool is not in use.
Alignment Complexity and Cognitive Load
Simple shape punches require minimal alignment; the child simply slides the paper in and presses. However, border punches and corner rounders require precise positioning to create a continuous pattern. This task demands higher spatial awareness and visual-motor integration. Matching the alignment complexity to your child’s grade level ensures they can complete projects with minimal adult intervention.
Paper Thickness and Material Compatibility
Different stamp cutters are engineered for specific paper weights, measured in grams per square meter (GSM). Standard school drawing paper typically ranges from 80 to 120 GSM, while construction paper and cardstock can exceed 200 GSM. Using a lightweight punch on heavy cardstock can jam the mechanism or dull the blade, while using a heavy-duty cutter on thin origami paper may cause the edges to tear. Always verify the tool’s material compatibility before starting a project.
Lower Primary (Primary 1–2): Safe and Simple Handheld Punches
For children in Primary 1 and Primary 2, the focus of art and craft activities is on developing fine motor skills, hand-eye coordination, and basic shape recognition. The ideal tools for this age group are simple, highly visual, and exceptionally safe.

Recommended Tool Categories
Squeeze-action punches with large, ergonomic handles or flat, easy-press lever punches are ideal for younger hands. These designs allow children to use either a two-handed squeeze or a simple palm-press motion on a flat table surface. Ensure the cutting head is completely enclosed in a durable plastic shell, leaving only a narrow slit just wide enough for a single sheet of paper to slide through.
Skill Focus and Project Types
At this stage, projects typically involve basic shape recognition, color sorting, and simple scrapbooking. Handheld punches that cut out basic geometric shapes—such as circles, squares, stars, and hearts—help reinforce these concepts. Children can practice punching shapes from colored origami paper or standard 80 GSM drawing paper and pasting them onto construction paper to create mosaic-style art.
What to Avoid
Avoid heavy-duty metal punches, rotary cutters, or complex multi-shape dial punches. Tools that require significant downward force or precise finger placement can cause hand fatigue and frustration. Additionally, steer clear of tools with small, detachable parts or interchangeable cartridges, as these present choking hazards and are easily lost in a busy classroom or home environment.
Ergonomic and Usability Checks
Before sending a stamp cutter to school in your child’s stationery kit, perform a quick ergonomic check. Have your child operate the punch on a flat surface. The handle should fit comfortably within their palm without forcing their fingers to stretch too wide. Additionally, check the paper scrap ejection tray at the bottom; it should slide open smoothly but remain secure enough that it does not accidentally spill paper confetti across the classroom floor.
Middle and Upper Primary (Primary 3–6): Advanced Cutters and Die-Cutting Machines
As children progress to Primary 3 and beyond, their school projects become more detailed, requiring precise borders, layered designs, and a wider variety of crafting materials. Older students have the coordination and strength to handle more sophisticated tools.
Recommended Tool Categories
For this age group, consider lever-action border punches, corner rounders, and interchangeable cartridge systems. These tools allow students to create continuous patterns along the edges of cards or posters. For advanced crafters, entry-level manual die-cutting machines offer unparalleled versatility. These machines use a crank-and-roller system to press metal dies through paper, cardstock, or thin craft foam.
Skill Focus and Advanced Projects
Students in upper primary school often tackle complex science posters, history dioramas, and personalized holiday cards. They need tools that can handle multi-layer cutting and precise alignment. Border punches with printed alignment grids on the base help students line up the pattern step-by-step. Manual die-cutting machines allow them to cut intricate silhouettes, letters, and numbers that would be impossible to achieve with standard scissors.
Workspace and Storage Requirements
Advanced cutting tools require more physical space and organization. Manual die-cutting machines need a stable, flat desk surface to prevent tipping while turning the crank. Because these systems use thin metal dies, safe storage is essential. Encourage your child to store dies on magnetic sheets inside a dedicated binder, keeping them organized and preventing accidental cuts when searching through a drawer.
Supervision and Safety Guidelines
While older children are more independent, transitioning to advanced tools still requires guidance. When introducing a manual die-cutting machine, teach your child how to construct the “sandwich” (the combination of plastic plates, paper, and die) correctly. Emphasize the importance of keeping fingers away from the roller entry point (pinch points) while turning the crank. Establish a rule that any tool requiring a utility blade or sharp, exposed die must only be used under direct adult supervision.
Matching Cutter Types to School Project Requirements
To help you select the most appropriate tool without overbuying, use the following comparison framework. This table matches grade levels with recommended tool categories, ideal paper weights, typical projects, and key safety checks.
| Grade Level | Recommended Tool Category | Ideal Paper Weight (GSM) | Typical Project Examples | Primary Safety Check |
|---|---|---|---|---|
| Lower Primary (P1–P2) | Easy-press lever punches, squeeze-action shape punches | 70 to 120 GSM (Origami paper, standard drawing paper) | Basic shape mosaics, simple scrapbooking, card decoration | Fully enclosed cutting head, no small detachable parts |
| Middle Primary (P3–P4) | Border punches, corner rounders, cartridge punches | 120 to 200 GSM (Construction paper, light cardstock) | Poster borders, custom bookmarks, layered card designs | Alignment guides, secure locking levers |
| Upper Primary (P5–P6) | Manual die-cutting machines, heavy-duty lever punches | 160 to 250+ GSM (Heavy cardstock, thin craft foam) | Dioramas, 3D paper models, intricate school presentations | Pinch-point awareness, safe storage for metal dies |
Using this framework helps prevent the common mistake of purchasing an overly complex tool that your child cannot operate independently. For instance, while a manual die-cutting machine is highly versatile, a Primary 1 student will likely lack the coordination to feed the plates and turn the crank simultaneously, leading to parent fatigue as you end up doing all the work. Stick to simple, high-quality handheld punches for early grades, and upgrade only when school projects demand more robust materials.
Pre-Purchase and Safety Verification Checklist
Before purchasing a paper stamp cutter from an online marketplace or local stationery store, run through this verification checklist to ensure the tool is safe, durable, and fit for purpose.
- Verify the Manufacturer Age Rating: Always check the packaging or product description for age recommendations. Ensure there are no warnings regarding small parts if the tool is intended for a younger child.
- Check the GSM Capacity: Look for the maximum paper weight capacity printed on the packaging. If you plan to cut heavy cardstock for school posters, ensure the tool is rated for at least 200 GSM to prevent internal jamming and blade dulling.
- Inspect the Build Quality Upon Delivery: Before handing the tool to your child, inspect it yourself. Run your fingers along the plastic edges to check for sharp flashing or rough seams. Press the lever a few times to ensure the internal spring is responsive and returns the blade smoothly to its starting position.
- Test on Scrap Paper: Perform a trial cut on a piece of scrap paper of the same weight your child will use. The cut should be clean and effortless, without tearing, fraying, or leaving paper fibers stuck in the die.
- Know When to Stop: If a tool requires your child to stand up, lean their entire body weight on the lever, or use a heavy object to force the mechanism down, stop immediately. Excessive force indicates either a paper jam, an incompatible paper weight, or a dull blade. Forcing the tool can break the internal springs or cause the plastic housing to shatter, risking injury.
Frequently Asked Questions (FAQ)
Can my Primary 1 child use a manual die-cutting machine with supervision?
While it is physically possible for a Primary 1 child to use a manual die-cutting machine under close supervision, it is generally not recommended as an independent tool. Operating these machines requires a high level of bilateral coordination—one hand must hold the machine stable while the other turns the crank smoothly. Additionally, the roller mechanism presents pinch-point risks, and the thin metal dies can have sharp edges. If your younger child wants to use these designs, a safer alternative is to have them select the paper and layout, while you operate the crank mechanism.
How do I clear a paper jam in a handheld stamp cutter?
Paper jams usually occur when the paper is too thick, damp, or if multiple sheets are punched at once. To clear a jam safely, first release any locking mechanisms. If the lever is stuck down, do not force it upward. Instead, gently slide a thin, stiff piece of cardstock into the paper slot to push out any trapped fibers. If the paper remains stuck, use a pair of plastic tweezers to carefully pull the torn pieces out from the bottom scrap tray. Never use metal screwdrivers, needles, or scissors inside the cutting slot, as these can easily nick, dull, or permanently misalign the delicate metal cutting dies.

Community discussion
Share your experience or ask a question. Comments are reviewed before publication.