
Choosing the right scissors for your child is more than a matter of picking a favorite color from the stationery aisle. The ideal pair must match your child’s physical development, hand size, and specific classroom requirements to ensure safety, comfort, and precision. Using the wrong tool can lead to hand fatigue, frustration, and jagged cuts, while the correct pair builds confidence and supports the development of essential fine motor skills.
From early childhood training scissors with safety blades to high-carbon steel shears used in secondary school design projects, matching the tool to the grade level is key. Understanding how hand anatomy and school curricula evolve helps you select a tool that is both safe and effective for your child’s classroom needs.
Why Your Child's Grade Level Dictates Their Scissor Needs
Children undergo rapid physical and cognitive development during their school years, and their stationery must adapt accordingly. In early childhood, the muscles in the hands and wrists are still developing. Toddlers typically use a palmar grasp, using their entire hand to hold objects, before progressing to a digital-pronate grasp and eventually the mature tripod grasp required for writing and cutting. Standard scissors require a high degree of finger isolation and bilateral coordination—using one hand to steer the paper while the other operates the blades. Introducing advanced or heavy scissors too early can strain these developing muscles, leading to poor cutting posture and hand fatigue.
Products mentioned in this guide
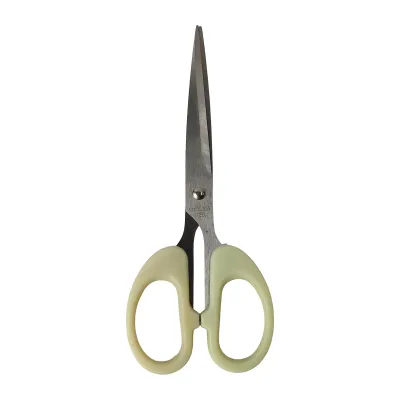
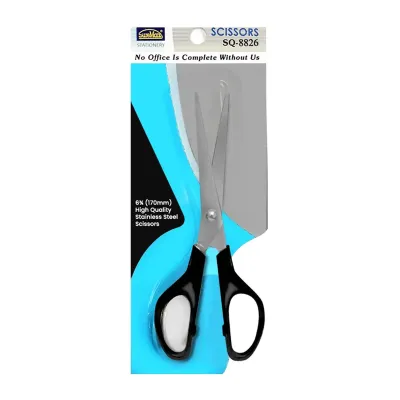
Prices are valid at publication and may change. Please refer to the product page for the latest price.
As students progress through school, their academic and creative tasks become more demanding. Preschoolers focus on simple, straight-line snips to build basic hand strength. By lower primary school, students are expected to cut precise curves, circles, and geometric shapes for mathematics and art. Upper primary and secondary school curricula introduce heavier materials such as thick cardstock, felt, fabric, and balsa wood. These diverse materials require sharper edges and stronger blade pivots to slice through cleanly without tearing.
Using mismatched tools poses both ergonomic and safety risks. Scissors that are too large force a child’s hand to stretch uncomfortably, reducing their control and increasing the likelihood of accidental slips. Conversely, scissors that are too small for an older student’s hand restrict movement, causing painful pressure points on the fingers. Selecting grade-appropriate tools ensures the size, weight, and blade sharpness align perfectly with your child’s physical capabilities and classroom tasks.
Key Features to Evaluate Before Buying School Scissors
Before purchasing any school scissors, parents should evaluate several design features to ensure the tool is safe, durable, and comfortable for daily use.

- Blade Tip and Edge: Blunt-tip scissors feature rounded ends that minimize the risk of accidental puncture wounds, making them the standard choice for early childhood classrooms. Pointed-tip scissors allow for detailed piercing and cutting in tight spaces, which is necessary for older students. While most school scissors feature straight edges, some early learning models use micro-serrated or plastic edges that cut paper but resist cutting skin or hair.
- Handle Ergonomics: Symmetrical handles have two identical, round loops and are common in basic safety scissors. Asymmetrical handles feature a smaller, round loop for the thumb and a larger, elongated loop that accommodates multiple fingers. This asymmetrical design distributes the cutting force across the hand, offering superior leverage, control, and comfort during extended crafting sessions. Look for handles lined with soft-grip thermoplastic rubber (TPR) to cushion fingers against friction.
- Blade Material: Stainless steel is the industry standard for school scissors due to its durability, edge retention, and resistance to rust—a crucial factor in Singapore's humid climate. For toddlers and preschoolers, plastic safety blades are an alternative, as they cut paper but will not slice through skin or fabric.
- Handedness: True left-handed scissors are essential for left-handed children. Avoid relying solely on "ambidextrous" handles, as these often feature standard right-handed blade configurations that still obstruct a left-handed child's view of the cutting line.
- Assistive Features: Spring-loaded loops or automatic-rebound levers are designed to push the handles open after each squeeze. These are highly beneficial for young children who are still learning the open-and-close rhythm of cutting, as well as students with motor coordination challenges.
Recommended Scissor Types by Grade Level
To help you navigate back-to-school shopping, we have categorized the most suitable scissor types based on developmental milestones and the typical progression of school activities.
Preschool and Kindergarten (Ages 3-6): Safety and Blunt-Tip Scissors
At the preschool and kindergarten level, the primary goal of cutting activities is to build hand strength, bilateral coordination, and spatial awareness. Scissors designed for this age group prioritize safety above all else, utilizing materials and designs that minimize the risk of injury while children experiment with paper crafts.
For children taking their first steps with scissors, look for models with plastic safety blades. These blades are physically incapable of cutting skin, hair, or clothing, providing peace of mind during unsupervised play or busy classroom activities. If your child is ready to transition to metal, choose blunt-tip stainless steel blades wrapped in protective plastic casings. These provide a cleaner cut on paper while keeping the sharp edges shielded from curious fingers.
Many preschool models feature built-in training mechanisms, such as a small spring or lever that can be flipped into place. This spring automatically reopens the blades after a cut, allowing the child to focus entirely on the squeezing motion. Dual-finger loop designs, which feature an extra set of loops for an adult’s fingers, are also excellent for guided practice, allowing you to help your child navigate the opening and closing motion.
Keep in mind that these safety scissors are designed almost exclusively for thin construction paper, playdough, and yarn. They lack the sharpness and leverage to cut through thicker materials like cardboard or felt, and they will struggle with tight curves. As your child’s hand strength improves and they demonstrate a consistent grasp of safety rules, they should be phased out in favor of transitional primary school models.
Lower Primary (Grades 1-3): Transitional and Standard Pointed Scissors
Entering primary school marks a significant shift in both fine motor control and academic expectations. Students in Primary 1 to Primary 3 are introduced to structured art lessons, basic geometry, and science projects that require clean, precise cuts along curved lines and intricate patterns.
During this transitional stage, children should move on to standard 5-inch (approximately 13 cm) stainless steel scissors. While still compact enough to fit small hands, these scissors feature metal blades that cut cleanly through paper, light cardstock, and thin craft foam. To maintain safety in active classrooms, opt for semi-pointed or rounded-tip blades rather than sharp, needle-like points.
This is also the ideal stage to transition from symmetrical handles to asymmetrical designs. An asymmetrical handle allows the index and middle fingers to sit comfortably in the lower loop, giving the child significantly more leverage and control. This improved grip helps them guide the scissors smoothly around curves and corners, reducing jagged edges and torn paper.
Before purchasing, consult your child’s school booklist or stationery requirements. Many primary schools in Singapore enforce strict guidelines regarding the length and tip shape of scissors permitted in the classroom. Standardizing on a 5-inch, semi-pointed pair with a protective sheath is generally the safest and most compliant choice for lower primary students.
Upper Primary (Grades 4-6): Precision and Craft Scissors
By Primary 4, students have developed excellent fine motor control and are capable of handling more complex, multi-step creative projects. Art and science curricula at this level involve heavier materials, detailed modeling, and the frequent use of adhesives like glue and tape.
For upper primary students, look for 6-inch to 7-inch (approximately 15 to 18 cm) pointed-tip scissors. The longer blades allow for longer, smoother cuts with fewer strokes, which is highly beneficial when working on large poster boards or science displays. The pointed tips enable students to pierce the center of a sheet of paper to cut out internal shapes, a task that is difficult and unsafe to attempt with blunt-tip models.
Because students at this stage cut a wider variety of materials, blade quality becomes increasingly important. High-quality stainless steel blades resist bending and misalignment when cutting through thick cardboard, felt, or multiple layers of paper. If your child’s art projects involve a lot of tape or adhesive sheets, consider scissors with non-stick or fluorine-coated blades. This coating prevents sticky residue from building up on the metal, ensuring the blades do not gum up or tear the paper during use.
Ergonomics remain a key factor as homework and project volumes increase. Ensure the handles feature generous soft-grip cushioning to prevent blisters and hand strain during long crafting sessions. A sturdy pivot screw, rather than a cheap plastic rivet, is also essential, as it allows the blades to maintain the correct tension over years of heavy use.
Secondary School (Grades 7+): Heavy-Duty and Specialty Scissors
In secondary school, students encounter specialized subjects such as Design & Technology (D&T), Food & Consumer Education (FCE), and advanced visual arts. These subjects require tools capable of cutting through diverse, heavy-duty materials with professional-grade precision.
For general schoolwork and advanced art, secondary students require full-sized 7-inch to 8-inch utility scissors. Look for premium blades made from titanium-coated or high-carbon steel. Titanium coating increases blade hardness and edge retention, ensuring the scissors remain sharp even after repeatedly cutting through tough materials like thick corrugated cardboard, plastic sheets, and leather.
Specialized subjects often require dedicated cutting tools. For example, students taking textile-focused modules in FCE or art will benefit from dedicated fabric shears. These shears feature a bent-handle design that allows the lower blade to slide flat along the table surface, ensuring smooth, undistorted cuts through cotton, canvas, and synthetic fabrics. Pinking shears, which cut a zigzag pattern, are also useful for preventing fabric edges from fraying.
At this level, it is critical to teach students the rule of tool separation: never use fabric or specialty craft scissors to cut paper. Paper contains abrasive wood fibers and clay fillers that quickly dull fine fabric blades. Maintaining separate, clearly labeled scissors for paper and textiles preserves the integrity of the blades and ensures clean, effortless cuts every time.
Left-Handed Scissors: Why True Left-Handed Design Matters
One of the most common mistakes parents make when buying school stationery is purchasing “ambidextrous” scissors for a left-handed child. While these scissors feature symmetrical handles that fit comfortably in either hand, they do not address the physical mechanics of cutting, often leading to frustration and poor results for left-handed students.
To understand why, consider the physical design of standard scissors. Right-handed scissors are assembled with the top blade on the right side. When a right-handed person squeezes the handles, their thumb naturally pushes outward while their fingers pull inward, forcing the two blades tightly together. This physical force creates the shear tension required to slice through paper cleanly. Furthermore, because the top blade is on the right, a right-handed user has an unobstructed view of the cutting line.
When a left-handed child uses right-handed or ambidextrous scissors, the mechanics are reversed:
- Blade Separation: The natural squeezing motion of the left hand pulls the blades apart rather than pushing them together. This leaves a tiny gap between the blades, causing the paper to fold, bend, or tear instead of cutting.
- Obstructed Line of Sight: The top blade sits on the right side, completely blocking the left-handed child's view of the cutting line. To see where they are cutting, the child must lean over awkwardly, leading to poor posture and crooked cuts.
True left-handed scissors solve these issues by reversing the blade alignment entirely. The top blade sits on the left side, allowing left-handed users to see their cutting line clearly. The physical squeezing motion of the left hand naturally pushes the blades together, ensuring a clean, effortless cut every time.
When shopping for left-handed scissors, do not rely solely on handle shapes or packaging claims. You can visually verify a true left-handed pair by holding the scissors in front of you: the blade on the left side should be the one that rises to the top when the scissors are opened. Many reputable stationery brands stamp an “L” on the metal blade or use distinct, high-contrast handle colors to identify their left-handed models.
Scissor Safety, Maintenance, and School Compliance
Investing in a quality pair of scissors is only the first step; proper care, safety habits, and adherence to school guidelines ensure the tool remains safe and functional throughout the academic year.
- Safe Storage: Teach your child to store their scissors safely when not in use. Always purchase scissors that come with a protective blade sheath or cap, especially for pointed-tip models. When packing their school bag, students should store their scissors in a dedicated, secure compartment of their pencil case rather than letting them lie loose, which can damage other stationery or cause accidental cuts when searching for a pen.
- Cleaning and Maintenance: Craft projects often leave scissors coated in tape adhesive, glue, or paint. To clean general dirt, wipe the blades with a damp cloth and mild soapy water, then dry them immediately with a clean towel. For stubborn, sticky residue, apply a small drop of cooking oil or a specialized adhesive remover to a soft cloth, rub the affected area gently (always wiping away from the sharp edge), and wipe clean. Never leave scissors wet, as even high-quality stainless steel can develop surface rust in humid environments.
- School Compliance: Always check your school's specific stationery guidelines before the start of the term. While some schools allow pointed-tip scissors from Primary 3 onwards, others strictly mandate blunt-tip models for all primary levels to maintain a safe classroom environment. If your child's school has strict safety rules, look for compact, blunt-tip stainless steel models that offer excellent cutting performance without violating campus policies.
- Knowing When to Replace: Inspect your child's scissors periodically. If the blades become nicked, loose at the pivot screw, or dull to the point of folding paper, it is time for a replacement. Forcing dull blades to cut requires excessive hand pressure, which increases the risk of the tool slipping and causing injury.
Frequently Asked Questions (FAQ)
Can my child use adult scissors for school projects?
No, children should not use adult scissors for schoolwork. Adult scissors feature much larger handle loops that do not provide a secure grip for smaller hands, leading to poor control and rapid hand fatigue. Additionally, adult scissors have longer, sharper blades that are difficult for a child to maneuver safely, significantly increasing the risk of accidental cuts and injuries in a busy classroom environment.
How do I clean sticky residue off my child's craft scissors?
To remove sticky tape or glue residue, start by wiping the blades with warm, soapy water and a soft cloth. For stubborn adhesive, apply a tiny amount of cooking oil or a dedicated adhesive remover to a cloth and gently rub the sticky spots, always wiping from the pivot toward the tip of the blade to avoid cuts. Once the residue is gone, wipe the blades completely clean and dry them thoroughly with a towel to prevent rust.
Are spring-loaded scissors only for children with special needs?
No, spring-loaded scissors are highly beneficial for any early learner. While they are excellent tools for children with dyspraxia, low muscle tone, or coordination challenges, they are also perfect for toddlers and preschoolers who are still developing hand strength. The automatic-rebound mechanism reduces the physical effort required to cut, allowing young children to focus on steering the paper and mastering the basic mechanics of cutting without experiencing hand fatigue.
Community discussion
Share your experience or ask a question. Comments are reviewed before publication.