
Selecting the right name tag for your child’s school items is a practical strategy to prevent loss and ensure belongings return home safely. The ideal labeling method depends entirely on the material composition of the item, its surface texture, and the specific environmental stresses it will encounter daily. From the high-temperature wash cycles of school uniforms to the constant moisture exposure of water bottles, each scenario demands a specific attachment mechanism to remain secure and legible throughout the academic year.
Choosing the wrong type of label can lead to peeling, fading, or even permanent damage to expensive school gear. By understanding how different materials interact with heat-activated, adhesive, sew-in, and mechanical tags, you can make informed decisions that save time and money. This guide breaks down the best labeling practices for uniforms, books, and bottles, helping you prepare your child for the school year with confidence.
Compare Name Tag Materials and Attachment Methods
To select the most effective label, you must first evaluate the core characteristics, adhesion mechanisms, and limitations of the primary name tag categories available. Each type of tag relies on a distinct physical or chemical bond to stay in place, making them suitable for specific surfaces while entirely impractical for others.
Products mentioned in this guide
![[Express Service] 3pcs School Name Tag Iron On / Sew on Childcare Primary Nursery Kindergarten Embroidery 1.5CM HEIGHT](https://img.lazcdn.com/g/p/04bdef05347e95e19064a915eedd0f2f.jpg_400x400q80.jpg_.webp)
![[SG Seller] Customised Name Tag with Velcro](https://img.lazcdn.com/g/p/2015d7630b9ee97789d30cf0fe8825c7.jpg_400x400q80.jpg_.webp)
Prices are valid at publication and may change. Please refer to the product page for the latest price.
Heat-Activated (Iron-On) Labels Heat-activated labels utilize a dry, solid thermoplastic adhesive backing that melts when subjected to the heat of a household iron or heat press. Once liquefied, the adhesive flows directly into the fibers of the fabric, creating a strong mechanical and chemical bond as it cools and solidifies. This integration makes iron-on labels highly resistant to the agitation and water exposure of washing machines. However, they are semi-permanent and can be difficult to remove without leaving residue, and they can damage heat-sensitive synthetic fabrics.
Adhesive Labels (Stickers) Adhesive stickers rely on pressure-sensitive adhesives (PSAs) that form a bond when physical pressure is applied to force the adhesive into the microscopic valleys of a smooth surface. They require no heat or solvents to activate, making them incredibly fast and easy to apply to plastic, glass, and laminated paper. The primary trade-off is that their longevity depends heavily on surface preparation and exposure to friction, oils, or extreme temperatures, which can cause the adhesive to degrade over time.
Sew-In and Woven Labels Sew-in labels represent the traditional method of physically stitching a fabric tag into a garment. Because they do not rely on chemical adhesives, they are completely unaffected by wash temperatures, harsh detergents, or fabric softeners. They are exceptionally durable and highly comfortable against the skin when made from soft materials like satin or cotton. While they require more time and effort to install, they are easy to remove with a seam ripper when passing clothes down to siblings.
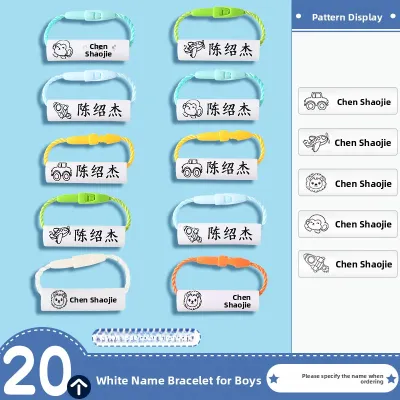
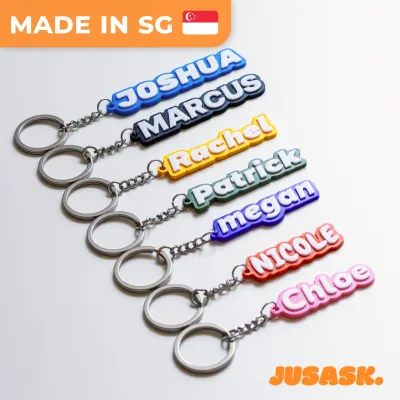
Mechanical Labels (Clip-On and Zip Tags) Mechanical tags use physical fasteners such as plastic snaps, metal rings, or elastic loops to secure themselves to an item. They are ideal for backpacks, pencil cases, and shoes where adhesives might fail or damage the material. Because they do not bond chemically to the surface, they are entirely reusable and can be swapped between items instantly. However, their physical profile means they can catch on external objects, and they are not suitable for flat surfaces like books.
Note on Durability: Specific durability claims, such as dishwasher safety, microwave compatibility, or exact wash-cycle limits, vary significantly by brand. Always check the manufacturer’s product specifications to verify these performance limits before purchasing.
Choose the Best Labels for Uniforms and Fabric Gear
School uniforms, physical education (PE) kits, and fabric bags are subjected to intense daily wear, sweat, and frequent washing, especially in warm, humid climates like Singapore. This demanding cycle requires a labeling method that can withstand regular agitation and detergent exposure without peeling, curling, or fraying.

When comparing iron-on and sew-in labels for daily garments, iron-on labels offer a swift, convenient solution for busy households. When applied correctly to cotton or cotton-polyester blends, they fuse seamlessly with the fabric, presenting a flat profile that does not irritate the skin. However, if the uniform is made of delicate synthetic materials, the high heat required to melt the adhesive can scorch or melt the fabric. For these delicate garments, sew-in labels are the safest choice, ensuring the integrity of the fabric remains intact while providing a permanent identification mark.
For items where heat application is entirely unsafe or impractical—such as nylon raincoats, windbreakers, or synthetic footwear—alternative labeling methods must be used. Adhesive fabric stickers designed to grip textile fibers without heat can work for short-term use, but mechanical shoe tags or clip-on labels attached to eyelets or zippers offer a more reliable, long-term solution. These mechanical options bypass the risk of heat damage entirely and can be easily transferred when the child outgrows the footwear.
Before applying any heat-activated tag, always inspect the garment’s care label. Note the maximum recommended ironing temperature and the fiber content. If the care label displays a “do not iron” symbol or indicates a highly heat-sensitive synthetic composition, avoid iron-on labels entirely and opt for sewing or mechanical attachments to prevent irreversible damage to the uniform. Additionally, for labels placed inside clothing that directly contacts the skin, check that the label material is certified skin-safe and free from harsh chemical adhesives that could cause irritation.
Select Durable Tags for Books, Bottles, and Hard Surfaces
Water bottles, lunchboxes, and textbooks require labels that can handle frequent contact, moisture, and physical friction without peeling or leaving a sticky, difficult-to-clean residue. The key to success on hard surfaces is matching the adhesive’s strength to the surface texture and the item’s typical environment.
Water bottles and lunchboxes face unique challenges, including daily exposure to water, dishwashing detergents, and physical friction inside school bags. To ensure labels remain intact, select high-performance vinyl or plastic stickers explicitly designated by the manufacturer as waterproof and scratch-resistant. These labels typically feature a protective laminate overlay that shields the printed ink from fading due to handling or washing. If you plan to wash these items in a dishwasher, verify that the labels are rated for high-temperature dishwasher cycles.
When applying labels to school-issued textbooks or library books, it is crucial to respect school policies regarding property preservation. Applying permanent adhesive stickers directly to the cover of a borrowed book can result in damage or sticky residue when the label is eventually removed, potentially leading to replacement fees. Instead, consider wrapping the book in a protective plastic cover first, then applying the adhesive name tag directly to the plastic wrap rather than the book itself. For personal books, a mild, removable adhesive label or a personalized ink stamp on the inside cover is a safer alternative.
For items like backpacks, lunch bags, and pencil cases, mechanical attachments offer a highly durable alternative to adhesive labels. Heavy-duty plastic snap-on tags, engraved metal tags, or custom zipper pulls can be securely fastened to loops, rings, or zipper tracks. These mechanical tags easily withstand the rough handling of daily school life, do not peel off when wet, and can be removed instantly without leaving any sticky residue behind when it is time to upgrade or replace the gear.
Apply and Maintain Labels to Prevent Peeling and Fading
Proper surface preparation is the single most critical factor in determining how long an adhesive label will stay attached. Before applying any sticker, clean the target surface thoroughly with isopropyl alcohol or mild soap and water to remove dirt, dust, and manufacturing residues. Ensure the surface is completely dry; even microscopic moisture barriers can prevent the pressure-sensitive adhesive from forming a complete bond with the substrate.
For heat-activated labels, achieving a permanent bond requires strict adherence to the manufacturer’s heating instructions. Use a dry iron—steam will interfere with the adhesive’s chemical bonding process—and apply firm, even pressure for the exact duration specified. Crucially, allow the label to cool completely before touching or testing the edges. This cooling period allows the thermoplastic adhesive to fully recrystallize and lock into the fabric fibers; disturbing it while warm can permanently weaken the bond.
If you are using write-on labels rather than pre-printed ones, verify the ink compatibility and drying speed before application. Use a permanent, waterproof marker and allow the ink to dry completely to prevent smudging or bleeding when the label comes into contact with water or sweat. Conducting a quick smudge test on a spare label is an excellent way to verify that the ink has bonded properly to the label material.
Regularly inspect labeled items for early signs of wear, such as lifting corners, bubbling, or fading text. If a sticker’s edge begins to curl, dirt will quickly accumulate underneath, destroying the remaining adhesive and causing the label to fail. Address these warning signs promptly by trimming loose edges, reapplying heat to iron-on labels if permitted by the manufacturer, or replacing the tag entirely before it detaches completely and the item is lost.
Match Your School Items to the Right Name Tag
To simplify your back-to-school preparations, use the structured decision matrix below to map common school supplies to the most suitable name tag category based on material and use case.
| School Item | Recommended Tag Type | Key Application Conditions & Limitations |
|---|---|---|
| Uniforms & PE Kits | Iron-on or Sew-in | Check garment care label; avoid high heat on delicate synthetics. |
| School Shoes | Shoe Tags or Adhesive Fabric Stickers | Place stickers inside the heel arch to minimize friction wear. |
| Textbooks & Library Books | Removable Stickers or Cover Labels | Apply to protective plastic wraps to avoid damaging book covers. |
| Water Bottles & Lunchboxes | Waterproof Vinyl Stickers | Apply to smooth, clean surfaces; verify dishwasher compatibility. |
| Backpacks & Pencil Cases | Mechanical Tags or Zipper Pulls | Attach securely to metal loops or zipper tracks to prevent snagging. |
By auditing your child’s school list against this matrix, you can determine exactly how many iron-on labels, waterproof stickers, and mechanical tags you need to purchase. Whether you are budgeting S$15 for a basic set of mixed labels or investing in custom-engraved tags, this systematic approach prevents over-purchasing and ensures you have the correct labeling medium ready for every item before the school term begins.
Frequently Asked Questions (FAQ)
How do I safely remove heat-activated name tags from school uniforms?
To safely remove an iron-on name tag, you must temporarily re-liquefy the thermoplastic adhesive using heat. Place a sheet of parchment paper over the label to protect the surrounding fabric, then press a hot, dry iron over the area for a few seconds. While the adhesive is still warm and soft, use tweezers to carefully peel the label away from the fabric. Never attempt to pull the label off while it is cold, as this can tear the textile fibers. Always check the garment’s care label first to ensure the fabric can tolerate the heat required for removal.
Are waterproof stickers safe for all types of plastic and metal water bottles?
High-quality waterproof stickers generally bond exceptionally well to smooth, non-porous surfaces like standard plastics and stainless steel. However, their performance can vary on specialized surfaces. Bottles with textured powder coatings, silicone sleeves, or highly curved profiles may not provide enough flat surface contact for pressure-sensitive adhesives to grip effectively. Before applying a label to an expensive insulated bottle, test a small, inconspicuous area to check for adhesion strength and ensure the adhesive does not damage or discolor the bottle’s finish upon removal.

Community discussion
Share your experience or ask a question. Comments are reviewed before publication.