
Selecting the right crochet pin depends entirely on the thickness of your yarn and the specific stage of your project. For active crocheting, lightweight stitch markers prevent your stitches from unraveling without stretching the delicate fibers. During the final shaping stage, robust, rust-proof blocking pins hold your damp fabric securely to a blocking mat to set its final dimensions. Matching these tools to your yarn weight ensures your stitches remain uniform, your yarn undamaged, and your finished project beautifully proportioned.
Understanding Crochet Pins: Stitch Markers vs. Blocking Pins
Crocheting requires two distinct types of pins at different stages of the creative process: stitch markers and blocking pins. While both are commonly referred to as crochet pins, they serve entirely different purposes and cannot be used interchangeably. Understanding their unique functions is the first step toward protecting your yarn and maintaining clean stitch definition.
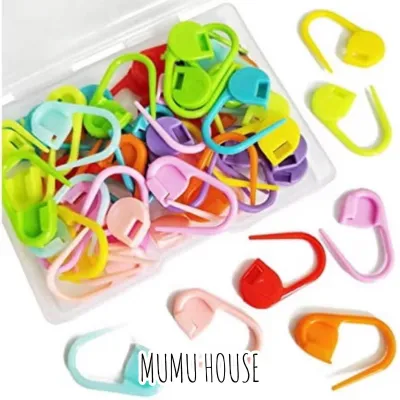
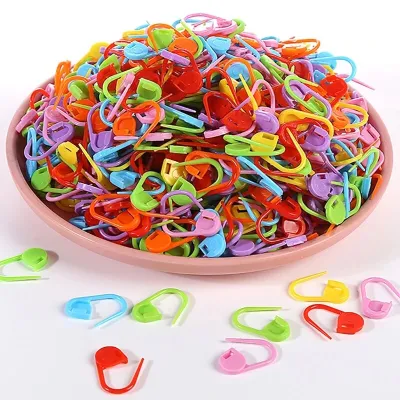
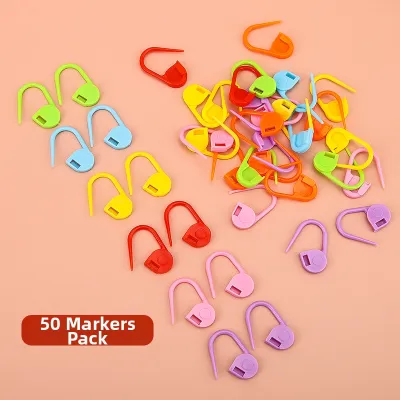
Stitch markers are temporary guides placed directly into active stitches or loops while you crochet. They help you track the beginning of rounds, identify pattern repeats, and mark specific increase or decrease points. These markers come in two primary designs: locking markers, which open and close like safety pins, and split ring markers, which feature a small gap allowing them to slip onto a loop easily. Because they travel with the fabric as you work, they must be exceptionally lightweight and smooth.
Products mentioned in this guide
Prices are valid at publication and may change. Please refer to the product page for the latest price.
Blocking pins, on the other hand, are heavy-duty pins used exclusively during the finishing stage of a project. Once your crocheted piece is complete, you wet or steam the fabric and stretch it to its final measurements on a foam mat. Blocking pins secure the edges of the damp fabric to the mat while it dries, ensuring straight lines, crisp corners, and open lace patterns. Common varieties include classic T-pins, double-pronged U-pins, and specialized fork pins.
Using the wrong tool for these tasks can quickly ruin hours of careful work. Inserting a thick, sharp blocking pin into active stitches can split the yarn plies, leave permanent holes, or snag delicate fibers. Conversely, attempting to block a heavy blanket using flimsy plastic stitch markers will fail to hold the necessary tension, resulting in warped edges and uneven dimensions. Selecting the correct pin for the job preserves the structural integrity of your yarn.
Matching Stitch Markers to Your Yarn Weight
The physical size and weight of your stitch marker must always correspond to the thickness of your working yarn. If a marker is too heavy, it will drag down the active loop, distorting the surrounding stitches and creating unsightly gaps in your fabric. If the marker is too small, it will pinch the yarn, causing the fibers to compact or fray as you slide the marker in and out of place.

Locking stitch markers, often shaped like small plastic safety pins or metal pear-shaped bulbs, offer the most secure hold. They are ideal for projects that undergo significant movement, as they cannot slip out of the stitch accidentally. Split ring markers, which resemble open spirals, allow for rapid insertion and removal with one hand. However, because they do not lock, they rely on the friction of the yarn to stay in place, making them better suited for stationary work or denser stitch patterns.
The gap size of the marker—the space available inside the loop when closed—must accommodate the yarn without compressing it. A tight fit restricts the natural movement of the stitch, leading to uneven tension in subsequent rows. Additionally, the weight of the marker itself must be minimal; heavy metal markers can pull down on delicate lace, while ultra-light plastic markers might feel too flimsy when working with thick, bulky cords.
To help you select the ideal tool for your current project, refer to this decision matrix matching standard yarn weight categories to their optimal marker types:
| Yarn Weight Category | Common Yarn Types | Recommended Marker Style | Key Marker Characteristics |
|---|---|---|---|
| Weights 0–2 (Fine) | Lace, Fingering, Sport | Fine-wire locking, small split rings | Ultra-lightweight, seamless, narrow gap |
| Weights 3–4 (Medium) | DK, Worsted, Aran | Standard locking, medium split rings | Highly visible, smooth plastic or metal |
| Weights 5–7 (Thick) | Bulky, Super Bulky, Jumbo | Jumbo locking, large split rings | Wide opening, thick gauge, high contrast |
Fine, Lace, and Fingering Yarns (Weights 0–2)
Delicate yarns require an equally delicate touch when it comes to marking stitches. When working with lace or fingering-weight yarns, prioritize ultra-fine wire locking markers or very small split rings. These tools slide effortlessly between tiny loops without forcing the plies apart or leaving behind permanent, stretched-out gaps in your intricate lace patterns.
Before placing any marker onto fine yarn, run your fingers along its entire surface to check for manufacturing seams, burrs, or rough edges. Even a microscopic imperfection on a plastic marker can snag fine merino, silk, or mohair fibers, causing immediate pilling or structural damage to the strand. Metal bulb pins with a completely smooth, seamless finish are often the safest choice for these delicate projects.
Avoid heavy, decorative markers adorned with charms or beads when working with lightweight fabrics. The cumulative weight of these embellishments can pull down on the active row, distorting your stitch tension and creating uneven drape. Keep your markers as simple, lightweight, and unobtrusive as possible to allow the natural beauty of the fine stitches to shine through.
DK, Worsted, and Aran Yarns (Weights 3–4)
Medium-weight yarns are the most common choices for everyday crochet projects like sweaters, scarves, and blankets. For these versatile yarns, standard plastic or metal locking markers are the most practical and widely available option. They provide excellent visibility against the fabric and offer enough structural strength to stay secure without bending.
When working tight stitch patterns, such as amigurumi or dense textured stitches, balance is key. You need a marker that is large enough to spot quickly but small enough that it does not interfere with your hook placement. Standard-sized locking markers allow you to secure the stitch without crowding your workspace, ensuring your hook can glide smoothly into adjacent loops.
If you are working a project with dense, fast-paced stitch patterns, you may find that opening and closing locking clasps slows down your rhythm. In these cases, switching to medium-sized split rings can save time. The split ring slides easily into the stitch and stays put due to the natural friction of the medium-weight yarn, allowing for quick transitions between rounds.
Bulky, Super Bulky, and Jumbo Yarns (Weights 5–7)
Thick, cozy yarns require heavy-duty markers that can handle substantial bulk without popping open or snapping under pressure. Standard-sized markers are entirely inadequate here; attempting to force a small plastic clasp around a strand of super bulky yarn will either stretch the marker to its breaking point or compress the yarn fibers, leading to localized felting.
Instead, opt for jumbo-sized locking markers or large-diameter split rings specifically designed for thick roving or tubed yarns. These markers feature wide opening gaps that easily span the thickness of the yarn, allowing the active loop to sit naturally without compression. The thicker gauge of these tools also ensures they can withstand the physical tension of heavy, dense fabrics.
Visibility is another crucial factor when working with highly textured or chunky yarns. Small markers can easily get lost or buried deep within the plush texture of a jumbo stitch. Choose jumbo markers in bright, high-contrast colors that stand out clearly against your yarn, making them easy to locate and remove when you complete a round.
Choosing Blocking Pins for Finished Fabric
Once your crocheting is complete, blocking is the essential final step that transforms a crumpled, uneven piece of fabric into a professional, polished masterpiece. The pins you choose for this process must be strong enough to hold the damp fabric under tension and completely resistant to environmental moisture.
Standard T-pins are the traditional workhorse of the blocking process. Featuring a T-shaped head that is easy on the fingers, these pins are ideal for general use on medium to heavy fabrics. They can be pushed into foam blocking mats at an angle to resist the pull of the stretched fabric, making them highly effective for squaring off blankets, sweaters, and scarves.
For delicate edges, lace borders, or fine scalloped details, U-pins or fork pins offer a gentler alternative. U-pins feature two parallel prongs that distribute tension across a wider area of the fabric, preventing the “scalloped” or pointed distortion that can occur when using single T-pins on lightweight lace. Fork pins, which have angled prongs, are excellent for securing heavy, dense fabrics or aligning matching panels before seaming.
The physical length and wire thickness of your blocking pins must match the depth of your project. Thick, heavy blankets require longer, thicker pins that can penetrate deep into your blocking mats to anchor the substantial weight of the wet fabric. Conversely, thin lace shawls require fine-gauge pins that leave virtually invisible entry points in the delicate fibers.
The most critical requirement for any blocking pin is that it must be absolutely rust-proof. Because blocking involves exposing the pins to wet or steam-heated yarn for hours—or even days—any trace of rust will permanently stain your finished project. Always verify that your pins are made from high-quality stainless steel or nickel-plated steel, and perform a quick test on a scrap piece of light-colored yarn before pinning down your main project.
In-Store and Online Quality Checks Before Buying
With countless crochet pins and markers available on the market, knowing how to evaluate their quality before making a purchase ensures you invest in tools that protect your yarn and last for years. Whether shopping at a local craft store in Singapore or browsing an online marketplace, a few simple checks can save you from frustrating snags and ruined projects.
First, inspect the locking mechanisms of any locking stitch markers. Open and close several markers to ensure the hinge operates smoothly without sticking, and verify that the clasp snaps shut securely. A weak clasp will pop open mid-project, leading to lost markers and dropped stitches, while a stiff hinge can be painful to operate repeatedly during long crafting sessions.
Next, carefully examine the surfaces of both metal and plastic pins. Run your fingertips along the edges to check for sharp burrs, rough manufacturing seams, or uneven plastic molding. High-quality markers should be completely smooth to prevent catching and splitting delicate yarn plies. If shopping online, zoom in on product photos to inspect the seam lines and read customer reviews specifically looking for mentions of snagging.
For blocking pins, always read the product packaging or online specifications to verify the exact material composition. Look for explicit labels stating “rust-proof,” “stainless steel,” or “nickel-plated.” Avoid generic “metal” pins that do not specify their rust resistance, as these are highly likely to corrode when exposed to moisture during wet blocking.
Finally, assess the flexibility and material memory of split ring markers. Gently stretch a split ring open to see if it springs back to its original shape. High-quality split rings should possess excellent memory, retaining their tight spiral even after being stretched over thick yarn. If a marker remains permanently warped or stretched out after a single use, it will easily slip out of your stitches and should be avoided.
Frequently Asked Questions (FAQ)
Can I use safety pins instead of dedicated crochet stitch markers?
While standard safety pins can serve as a temporary emergency substitute, they are not recommended for regular use in crochet projects. The primary risk lies in the exposed coil hinge at the base of a standard safety pin. Yarn plies easily slide into this coil and become trapped, leading to severe snagging, splitting, and tearing when you attempt to remove the pin. Dedicated crochet locking markers feature a completely smooth, coil-free design that eliminates this risk entirely.
How do I keep my locking stitch markers from accidentally opening?
To prevent your locking markers from opening during work, always test the tension of the clasp before placing it on a critical stitch. If the clasp feels loose or slides open with minimal pressure, set it aside. Store your markers in secure, compartmentalized containers rather than letting them float loose in your project bag, where they can catch on other items and warp. Regularly inspect your collection and retire any markers with weakened hinges or bent clasps to avoid accidental loss.
Do I need to remove stitch markers before blocking my crochet project?
Yes, you must completely remove all active stitch markers from your fabric before beginning the wet or steam blocking process. Stitch markers are designed solely for tracking active stitches, and leaving them in place can distort the fabric as it stretches and dries. Furthermore, exposing plastic markers to the high heat of steam blocking can cause them to melt, warp, or transfer color onto your yarn, permanently damaging your hard work. Always transition from stitch markers to dedicated blocking pins for the finishing stage.

Community discussion
Share your experience or ask a question. Comments are reviewed before publication.