
When preparing stationery for lower primary students, choosing the right clear tape is more important than it might seem. The ideal sellotape for young children balances safety, ease of use, and task-specific adhesion. For book covering, a wide, low-tack, or repositionable tape is essential to prevent frustrating bubbles and torn covers. For daily classroom crafts, a hand-tearable, non-toxic clear tape paired with a stable, weighted desk dispenser allows children to work independently without the safety hazards of sharp scissors. Selecting the correct tape type not only saves time during the busy back-to-school season but also fosters confidence as young learners develop their fine motor skills.
Essential Tape Features for Young Students' Safety and Ease of Use
Safety is the primary consideration when selecting any adhesive product for lower primary students. Children in this age group frequently touch their faces, rub their eyes, or handle food shortly after completing craft projects. Parents should look for clear tapes explicitly labeled as non-toxic and acid-free. Acid-free adhesives are safer for skin contact and prevent the tape from yellowing, drying out, or degrading paper over time. Checking the packaging for safety certifications ensures the adhesive formulation is free from harmful solvents and strong chemical odors that can cause discomfort in a classroom.
Ease of use is directly linked to a child’s physical development. Lower primary students, typically aged seven to nine, are still refining their fine motor skills. Tapes that require scissors can introduce safety risks and slow down the creative process. Hand-tearable tapes, featuring micro-serrated edges or specialized backing materials, allow children to tear off precise lengths using only their fingers. Additionally, the choice of dispenser plays a critical role. A lightweight plastic dispenser often slides across the desk, leading to tangled tape. A weighted, non-slip desk dispenser keeps the tape stable, allowing the child to pull and tear a piece with one hand while holding their project with the other.
Products mentioned in this guide
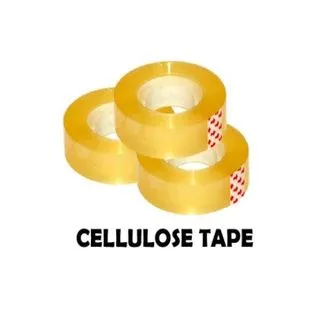
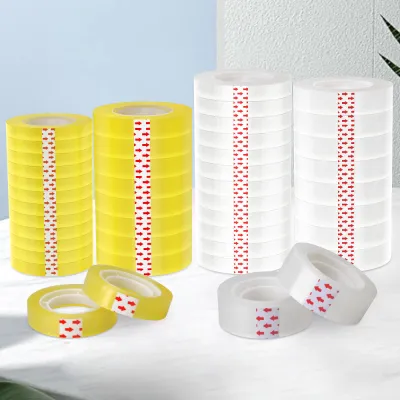
![[SG] Royal Clear Tape / Adhesive Tape /Masking Tape / OPP Tape/ Cutter / Carton Box Tape/ Transparent Tape (6 Rolls)](https://img.lazcdn.com/g/p/ecef5f292c5d32608f6ea58979cfaa99.png_400x400q80.png_.webp)
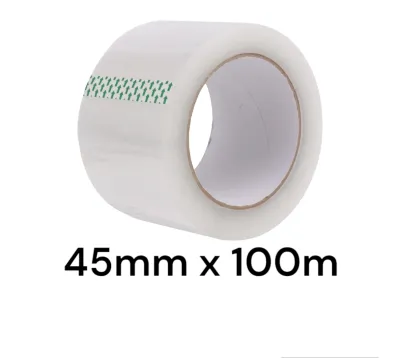
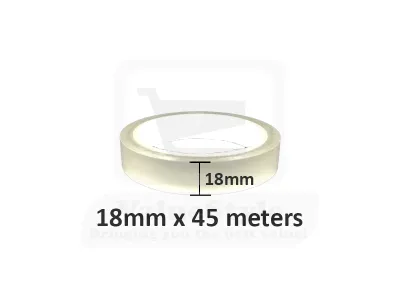
Prices are valid at publication and may change. Please refer to the product page for the latest price.
Adhesion strength must be carefully balanced against the risk of damaging school materials. While industrial-strength tapes offer permanent bonding, they are highly unsuitable for school projects. The ideal student tape should have a moderate adhesive grip that holds paper, cardboard, and plastic book covers securely without oozing adhesive from the sides, which can attract dirt and stick adjacent books together.
Matching the Right Tape Type to Specific School Tasks
Not all school tasks require the same type of tape, and matching the adhesive to the specific activity prevents wasted materials and ruined projects. Parents should evaluate whether the task demands long-term protection, such as wrapping textbooks at the start of the school year, or temporary flexibility, such as assembling three-dimensional paper models in class. Understanding the physical demands of each task helps in selecting a tape that accommodates a child’s current motor skills, balancing precise alignment against forgiving, repositionable application.

Selecting Tape for Book Covering and Textbook Wrapping
Wrapping school textbooks and exercise books is an annual ritual that requires a specific set of tape characteristics to ensure durability throughout the academic year. The clarity and finish of the tape are important considerations. Glossy clear tape is excellent for matching the shiny finish of plastic book covers, making the seams almost invisible. However, matte-finish tape, often referred to as invisible tape, is highly effective for paper covers or when parents want a non-reflective surface that does not glare under classroom lights.
The width of the tape is a critical factor that is often overlooked. Standard 12mm narrow tape is inefficient for book wrapping, as it requires multiple overlapping strips to secure the corners and edges. This overlapping creates thick seams that easily trap dirt and peel over time. A wider tape, such as 18mm or 24mm, provides a larger surface area to grip the plastic wrap and the inside cover, securing the fold in a single, clean application. This reduces the overall amount of tape used and ensures a flatter, more professional finish.
Repositionability is the ultimate safeguard against mistakes during the wrapping process. Standard high-tack clear tape bonds instantly, meaning any misalignment, wrinkle, or trapped air bubble can result in a torn book cover if you attempt to correct it. Choosing a low-tack or repositionable tape allows parents and children to gently lift the tape, smooth out any imperfections, and reapply it without damaging the underlying paper or plastic. Once pressed firmly into place, these tapes cure to form a secure, long-lasting bond.
Choosing Tape for Daily Crafts and Paper Projects
Daily classroom crafts and art projects require a tape that supports creativity and independent work. Hand-tearable or easy-tear tapes are the gold standard for this application. These tapes are designed with built-in tear lines or are made from materials like acetate or paper that split easily across the width when pulled at an angle. This design eliminates the need for scissors, reducing classroom hazards and allowing children to focus entirely on their designs.
Another valuable feature for craft tape is a writable surface. Matte-finish tapes allow students to write directly on the adhesive surface using standard pencils, ballpoint pens, or felt-tip markers. This is incredibly useful for labeling project parts, writing names on shared school supplies, or creating custom tabs for folders. Standard glossy tape repels ink, causing it to smudge and transfer onto hands and clothing, whereas a writable matte tape absorbs the ink or graphite cleanly.
Finally, dispenser compatibility and safety must be addressed. When purchasing tape refills, parents must verify the core size of the tape roll—typically either a 1-inch small core or a 3-inch large core—to ensure it fits their existing desk dispenser. The dispenser itself should feature a plastic or highly recessed metal cutting blade. This design provides enough friction to cut the tape easily when pulled downward, but minimizes the risk of accidental finger cuts during active, fast-paced craft sessions.
Practical Techniques for Taping and Wrapping with Children
Teaching children the correct way to apply tape can prevent wasted stationery and reduce frustration. When wrapping books, the best technique is to secure the plastic wrap tightly around the book cover first, holding it in place with temporary weights or paperclips. Apply the tape starting from the center of the seam and smooth it outward toward the edges using a flat tool, such as a plastic ruler or a clean plastic card. This action pushes out trapped air, preventing the formation of unsightly bubbles and ensuring a tight, professional seal.
Safe handling and storage of tape are essential for maintaining its quality. Tape rolls should be stored in a cool, dry drawer away from direct sunlight and heat, which are common in tropical climates. Excessive heat can melt the adhesive, making the tape gummy, difficult to unwind, and prone to leaving a sticky residue. Children should be taught to store their tape dispensers with the loose end of the tape folded over slightly to form a small tab. This simple habit prevents the tape from snapping back onto the roll, saving them from the tedious task of searching for the lost edge during class.
Before applying tape to any important school document, textbook, or delicate craft, it is highly recommended to perform a quick test. Apply a small piece of the tape to a scrap sheet of the same paper material, press it down, and then gently peel it off. This trial allows you to observe how the adhesive behaves: whether it tears the paper fibers, leaves a greasy residue, or lifts cleanly. It also lets you verify if the ink on the paper smudges when the tape is applied over it, ensuring there are no unpleasant surprises on the final project.
Common Tape Mistakes to Avoid for Lower Primary Kids
One of the most common mistakes parents make is purchasing heavy-duty utility or industrial tapes for school use. Tapes like packaging tape, duct tape, or heavy-duty mounting tape are designed for permanent bonding and construction tasks. They possess extremely high tack and tensile strength, making them impossible for young children to tear by hand. If applied to school books or homework, these tapes will permanently bond to the paper fibers, causing severe tearing and damage if any attempt is made to adjust or remove them.
Another pitfall is buying cheap, unbranded tape multipacks from discount stores. These products often use low-quality solvent adhesives that emit a strong, unpleasant chemical smell. Over time, the adhesive on these cheap tapes tends to degrade rapidly, turning yellow and brittle, or worse, liquefying into a sticky, gooey mess that can ruin school bags, pencil cases, and neighboring books. Investing in reputable stationery brands ensures consistent adhesive quality and safety compliance.
Lastly, parents should avoid buying tapes that are overly narrow, highly static, or prone to longitudinal splitting. Extremely thin or cheap films tend to split down the middle when pulled from the roll, creating thin, unusable shreds that frustrate young children. High-static tapes will curl back and cling to themselves or the child’s fingers the moment they are cut, leading to tangled knots of wasted tape. Choosing a high-quality tape with a balanced thickness and low-static properties ensures a smooth, frustration-free experience for small hands.
Frequently Asked Questions (FAQ)
Can I use double-sided tape for lower primary school projects?
While double-sided tape is excellent for creating clean, invisible joints in paper crafts, it is generally not recommended for independent use by lower primary students. Peeling the backing paper requires a high level of fine motor control and patience, which can be frustrating for young children. Additionally, once the backing is removed, both sides are instantly sticky, making alignment mistakes difficult to correct without tearing the paper. Double-sided tape is best reserved for projects where a parent or teacher is actively assisting, or for securing flat layers of paper where standard tape would look untidy.
How do I remove sticky residue from a book cover if the wrong tape was used?
If an unsuitable tape has left a sticky residue on a book cover, it is crucial to proceed with caution to avoid damaging the printed design. First, perform a test on an inconspicuous corner of the cover. For plastic-coated covers, you can try gently rubbing the residue with a clean plastic eraser, which often rolls the adhesive into small, easily removable clumps. Alternatively, apply a tiny drop of mild cooking oil or eucalyptus oil to a microfiber cloth and gently dab the sticky area. Never pour liquids directly onto the book. If the cover is made of uncoated paper or if you notice any ink bleeding or paper softening during the test, stop immediately and consult the book’s care guidelines, as further moisture will ruin the cover.

Community discussion
Share your experience or ask a question. Comments are reviewed before publication.