
Assembling a thoughtful beginner’s knitting tools set is the most effective way to build confidence and avoid early frustrations. Having the right combination of needles, notions, and yarn prevents common mistakes that often cause new crafters to abandon their first projects. By focusing on versatile, user-friendly tools and forgiving materials, you can master the basic stitches with ease.
A complete starter set does not require a massive investment, but it does require selectivity. The core of your kit should consist of medium-sized circular or straight needles, locking stitch markers, a blunt tapestry needle, a flexible measuring tape, and a simple row counter. When paired with a smooth, light-colored, medium-weight yarn, these tools allow you to clearly see your stitches, track your progress, and correct mistakes without straining your eyes or hands.
Essential Components of a Beginner Knitting Tools Set
When selecting your first knitting tools set, the needles you choose will have the greatest impact on your learning experience. Circular needles consist of two needle tips connected by a flexible plastic cable. While traditionally used for knitting in the round, they are highly recommended for flat projects like scarves or blankets. The cable allows the weight of the growing fabric to rest in your lap rather than on your wrists, reducing physical fatigue. Straight needles are classic and easy to understand, but they can feel unbalanced as your project grows heavier.
Products mentioned in this guide
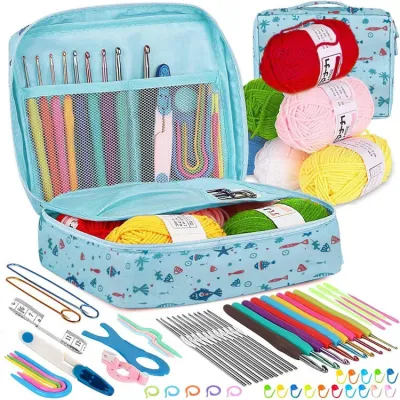
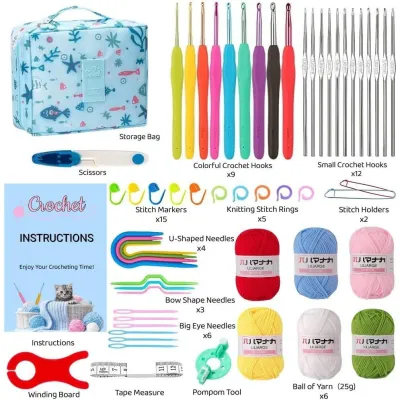
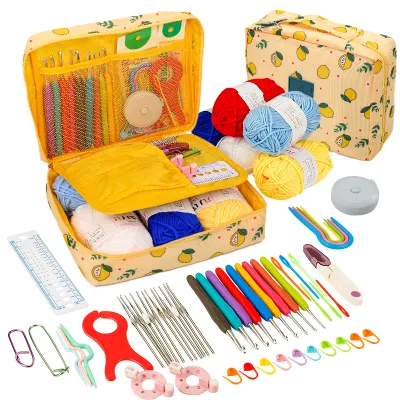
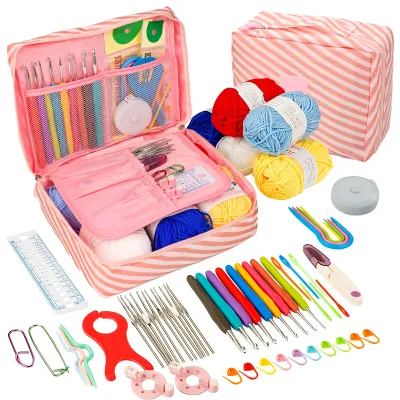
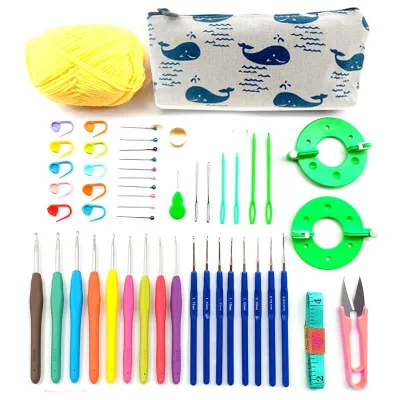
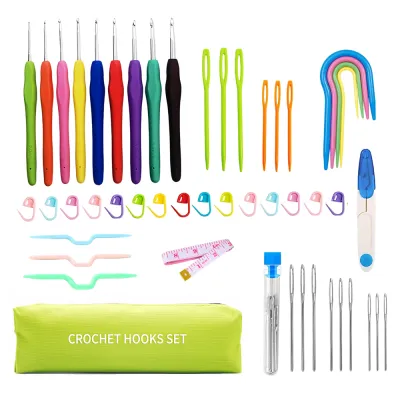
Prices are valid at publication and may change. Please refer to the product page for the latest price.
The material of your needles also plays a crucial role in stitch control. Bamboo and wooden needles are excellent for beginners. They possess a natural, subtle texture that provides just enough grip to keep slippery yarn from sliding off the tips unexpectedly. This friction gives you greater control as you learn to form stitches. Metal needles, made from aluminum or brass, are exceptionally smooth and allow yarn to glide effortlessly. While experienced knitters use them for speed, beginners may find that stitches slip off too easily, leading to dropped stitches. Plastic needles are lightweight and slightly flexible, offering a middle ground, though some budget options can feel slightly sticky with certain synthetic yarns.
Beyond needles, a few essential notions are required to complete your knitting tools set. Stitch markers are small rings that slide onto your needles or clip directly onto your stitches. Locking stitch markers, which resemble tiny plastic safety pins, are the most versatile option for beginners. They allow you to mark specific rows, highlight pattern repeats, or secure a dropped stitch before it unravels down your work.
A blunt tapestry needle, also known as a yarn needle, is essential for finishing your projects. Unlike sewing needles, tapestry needles have a blunt tip and a large eye to accommodate thick yarn. The blunt tip is critical because it glides between the strands of your knitted fabric rather than piercing and splitting the yarn fibers, ensuring a clean finish when weaving in loose ends.
A flexible measuring tape is indispensable for tracking your progress. Knitting tension can change depending on your mood, posture, or fatigue level, so relying solely on row counts can lead to sizing discrepancies. Measuring your work periodically ensures your project matches the dimensions specified in your pattern.
A row counter is a simple mechanical or digital device that helps you keep track of which row you are currently knitting. It is easy to lose count when interrupting your work, and a row counter eliminates the need to constantly recount your stitches from the beginning.
For those looking to expand their kit, a needle gauge and a yarn bowl are helpful additions. A needle gauge is a flat tool with precisely sized holes used to identify the size of your needles. Because needle sizes printed on the shafts can wear off over time, a gauge tool is a reliable way to double-check your equipment. A yarn bowl is a heavy ceramic, wooden, or plastic bowl with a curved slot that guides the yarn as it unrolls, preventing your yarn ball from rolling across the floor and collecting dust.
Selecting the Right Yarn for Your First Project
The visual characteristics of your first yarn play a massive role in how quickly you learn. Smooth, light-colored yarns are highly recommended for beginners. Light shades like cream, pastel blue, or soft grey reflect light well, making it easy to distinguish the front and back of each stitch. Dark colors like black, navy, or deep charcoal absorb light, making it incredibly difficult to see where to insert your needle, especially during evening crafting sessions.

Avoid highly textured novelty yarns, such as boucle, chenille, faux fur, or eyelash yarns, for your first few projects. While they look cozy, their uneven textures completely hide stitch definition. This makes it nearly impossible to count your rows, identify dropped stitches, or understand the anatomy of the knit and purl stitches you are creating.
Medium-weight yarns, specifically worsted weight, Aran weight, or 8-ply yarns, are the ideal starting point. They are thick enough to hold comfortably and allow you to see your progress quickly, which is highly motivating. They are also widely compatible with medium-sized needles (typically 4.5mm to 5.5mm), which are the most comfortable sizes for learning hand movements.
Wool blends and high-quality acrylic yarns are excellent choices for beginners due to their natural elasticity. Elasticity refers to the yarn’s ability to stretch and spring back into shape. This property helps even out minor tension inconsistencies, making your finished fabric look neater. Acrylic is also highly durable, budget-friendly, and easy to care for, making it a low-stress option for practice swatches.
Fibers to avoid initially include 100% cotton, linen, and hemp. These plant-based fibers lack elasticity, meaning they do not stretch or give as you knit. This lack of play can make your hands tire quickly and will highlight every single tension irregularity in your stitches. Extremely slippery fibers like pure silk or bamboo can also be frustratingly difficult to control on your needles.
The paper band wrapped around a skein of yarn contains vital information. It lists the fiber content, weight category, care instructions, and recommended needle sizes. It also displays the dye lot number. When yarn is dyed in large vats, subtle variations in temperature and chemical balance can create slight color differences between batches. Always ensure that all the skeins you purchase for a single project share the exact same dye lot number to avoid visible color bands in your finished work.
Matching Yarn Weight to Needle Size
To achieve the best results, you must pair your yarn with the correct needle size. The yarn label features a standardized graphic—usually a small square with knitting needles crossed over it—that indicates the recommended needle size in both millimeters and US sizes. It also shows the expected gauge, which is the number of stitches and rows that should fit into a 10-centimeter by 10-centimeter (4-inch by 4-inch) square of knitted fabric.
Using needles that are too large for your yarn results in a loose, flimsy, and highly open fabric. The stitches will look like a net, and the finished item may stretch out of shape easily and fail to hold its structure. While this open structure is sometimes used intentionally for lightweight summer shawls, it makes it difficult for beginners to maintain consistent tension.
Conversely, using needles that are too small for your yarn creates a dense, stiff, and rigid fabric. The stitches will be packed tightly together, making it physically difficult to insert your needle tip into the loops. This tight fabric can cause significant hand strain and fatigue, turning what should be a relaxing hobby into a frustrating chore.
Before diving into your main project, always knit a small gauge swatch. This is a test square of about 12 by 12 centimeters using your chosen yarn and needles. Because everyone knits with a slightly different level of tension—some naturally knit tightly, while others knit loosely—the recommended needle size on the label is merely a starting point. Knitting a swatch allows you to measure your stitches and determine if you need to adjust your needle size. If your swatch has more stitches per centimeter than the pattern requires, your knitting is tight, and you should switch to a larger needle. If you have fewer stitches, your knitting is loose, and you should switch to a smaller needle.
Sourcing Knitting Supplies in Singapore
Finding quality knitting tools and yarn in Singapore is a straightforward process if you know where to look. Visiting local brick-and-mortar craft and fabric stores is highly recommended for your very first purchase. Being able to physically touch the yarn allows you to evaluate its softness and ensure it will not feel scratchy against your skin. It also lets you hold different needle materials to see which weight and texture feel most comfortable in your hands.
For convenience and variety, online craft marketplaces and ecommerce platforms offer a wide selection of starter kits and bundle deals. These digital channels are excellent for comparing different brands of knitting tools sets and reading user reviews from other crafters. Many online stores offer comprehensive beginner packages that bundle needles, stitch markers, tape measures, and basic yarn together at an affordable price point.
When purchasing online, it is crucial to verify the seller’s ratings and read product descriptions carefully. Ensure that the knitting needles in the set use standard metric sizing (in millimeters) so they match international patterns. Check that the yarn descriptions explicitly state the fiber content and weight, and look for sellers who guarantee matching dye lot numbers when you order multiple skeins of the same color.
Frequently Asked Questions (FAQ)
How do I keep my wooden knitting needles from drying out or splintering?
Perform regular visual and tactile inspections of your wooden or bamboo needles. Run your fingers along the shafts and tips to check for snags, rough patches, or slight bending.
To maintain wooden or bamboo needles, periodically apply a tiny amount of manufacturer-approved wax or natural oil (such as beeswax or food-grade mineral oil) using a soft cloth, following the specific product instructions. Let them dry completely before sliding yarn over them.
If a needle develops a deep splinter, crack, or permanent bend that catches the yarn fibers, it is time to retire it to prevent damage to your projects.
What should I do if my yarn keeps splitting while I knit?
First, inspect your needle tips. If they are too sharp or have rough, damaged edges, they can easily pierce the yarn plies instead of sliding smoothly under the loop.
Adjust your knitting technique. Ensure you are inserting the needle fully into the center of the stitch loop and catching all the individual strands of the yarn before pulling the loop through.
If the yarn has a very loose twist, it is naturally more prone to splitting. In this case, switching to a needle with a slightly blunter tip or a smoother surface can help keep the plies together.

Community discussion
Share your experience or ask a question. Comments are reviewed before publication.