
The Beginner's Struggle: Why Embroidery Needles Demand a Good Threader
Embroidery is a deeply satisfying and meditative craft, but the initial step of getting your thread through the needle’s eye can test the patience of even the most enthusiastic beginner. Unlike standard sewing needles, embroidery needles must accommodate multiple strands of textured thread, yet their eyes remain relatively narrow to prevent leaving large, unsightly holes in your fabric. For many beginners, this physical limitation leads to a frustrating cycle of squinting, licking thread ends, and dealing with split cotton.
A dedicated needle threader (穿针线器) transforms this tedious chore into a seamless, one-second task. Having a reliable tool on hand means you can spend your energy on perfecting your satin stitches and French knots rather than struggling with preparation. Especially in Singapore’s humid climate, where embroidery floss can lose its stiffness and become limp or split easily, a threader is not just a luxury—it is a fundamental necessity for a smooth crafting experience.
Beyond simply saving time, using a threader significantly reduces eye strain and hand fatigue. When you are not constantly struggling to align a microscopic thread tip with a tiny metal eye, your hands remain relaxed, preventing the early onset of cramping. This simple addition to your sewing kit keeps your focus entirely on the joy of stitching, making your early embroidery projects much more enjoyable.
Products mentioned in this guide
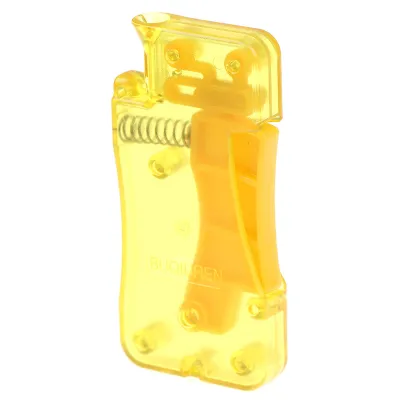
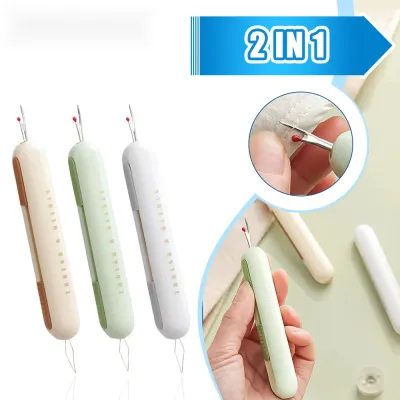
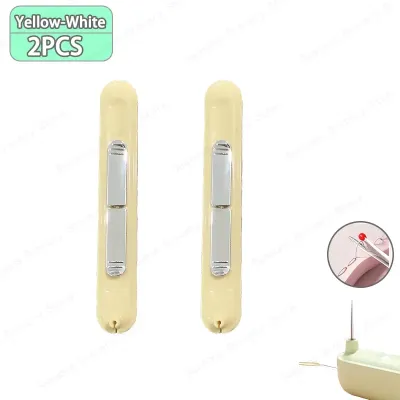
![[SG 🚚] 1PC Needle Threader Stitch Insertion Tool with Thread Cutting Knife Line DIY Sewing](https://img.lazcdn.com/g/p/e447af15ae0911f074393d90062be7de.jpg_400x400q80.jpg_.webp)
Prices are valid at publication and may change. Please refer to the product page for the latest price.
What Makes a Needle Threader (穿针线器) Truly Beginner-Friendly?
Selecting the right needle threader requires looking past basic aesthetics and focusing on a few key structural elements. The ideal tool must balance delicacy with structural integrity, ensuring it can perform consistently without damaging your needles or threads. Understanding these criteria will help you avoid the frustration of buying tools that break after only a few uses.

Wire Thickness and Flexibility
The heart of any classic needle threader is its wire loop. For embroidery, this wire must strike a delicate balance: it needs to be incredibly fine to slip through the narrow eyes of crewel or sharps needles, which are commonly used for detailed surface embroidery. However, if the wire is too soft, it will bend permanently out of shape when encountering the slightest resistance. Look for high-tensile steel or alloy wires that retain their springy, diamond shape even after multiple uses.
Handle Ergonomics
Holding a tiny, slippery piece of metal can be incredibly tiring, particularly during long crafting sessions or for individuals dealing with joint stiffness, shaky hands, or limited dexterity. A beginner-friendly threader should feature a substantial, textured handle. Flat, wide plastic tabs or contoured rubber grips provide the leverage needed to guide the tool steadily. A comfortable grip reduces hand fatigue and prevents the tool from slipping out of your fingers.
Durability and Build Quality
One of the most common complaints among novice stitchers is that cheap threaders break almost instantly. The point of failure is almost always the connection where the wire loop meets the handle. High-quality options reinforce this joint with solder or secure it deep within a molded plastic casing. When shopping, avoid the ultra-cheap, wafer-thin aluminum threaders that often come in bulk sewing kits, as these are notorious for snapping on their first use.
Stability vs. Portability
Before choosing a tool, consider where you plan to do most of your stitching. If you love working on your hoops while commuting or sitting in a local cafe, a compact, lightweight handheld threader is ideal. These portable options easily fit into a small sewing pouch. Conversely, if you have a dedicated crafting table at home, a heavier, desk-standing threader offers unmatched stability. These stationary devices allow for hands-free operation, letting you focus entirely on guiding the needle and thread.
Top Types of Needle Threaders for Embroidery (And Who They Suit Best)
Different embroidery styles and physical needs call for different tools. By understanding the primary types of threaders available on the market, you can choose the style that aligns perfectly with your budget, workspace, and physical comfort.
Wire Loop Threaders (Classic & Portable)
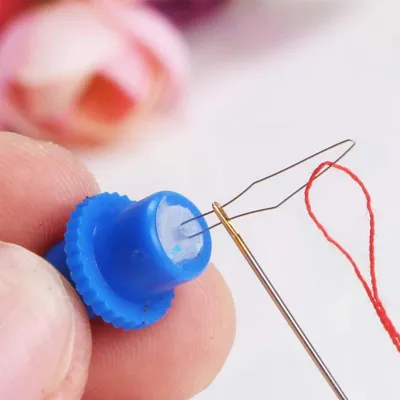
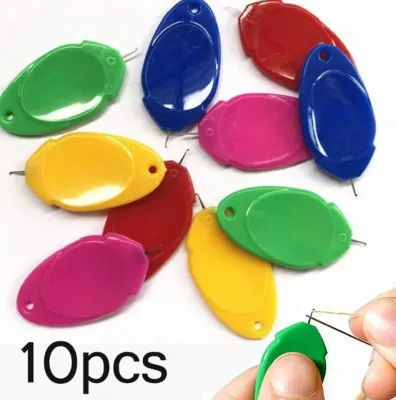
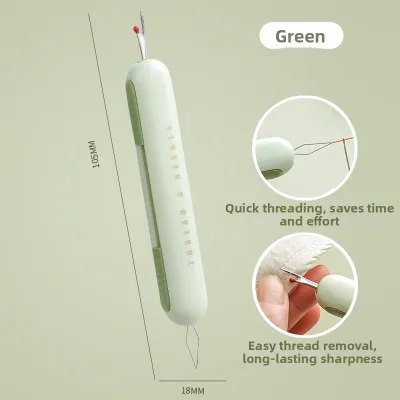
This is the most recognizable style of needle threader, consisting of a thin, flexible wire folded into a diamond shape and attached to a small handle. To use it, you pass the wire loop through the eye of the needle, slide your embroidery thread through the large wire loop, and then pull the wire back out of the needle eye. The wire collapses temporarily as it passes through the eye, carrying the thread along with it.
These classic tools are exceptionally budget-friendly, often costing less than S$2 for a multi-pack, and are small enough to store anywhere. They are best suited for standard stranded cotton embroidery floss and medium-sized needles. However, their primary limitation is fragility. If you attempt to force a wire loop through an eye that is too small, or if you try to pull too many strands of thread through at once, the wire can easily bend, warp, or snap completely away from its handle.
Automatic or Push-Button Threaders
For those who find manual coordination challenging, automatic or push-button threaders offer a mechanical solution. These devices feature a small slot where you insert your needle, eye-side down. By pressing a lever or button, a microscopic metal hook emerges, passes through the needle’s eye, catches the thread you have laid across the slot, and pulls it back through as you release the button.
This design is incredibly helpful for beginners with low vision or limited finger dexterity, as it eliminates the need to align a wire loop with a tiny needle eye visually. The primary limitation of automatic threaders is their lack of universal compatibility. Because the internal mechanism relies on precise alignment, these tools usually only work with a specific range of needle sizes and cannot accommodate very thick threads, textured wool, or extremely fine beading needles.
Desk-Standing Threaders with Magnifiers
Desk-standing threaders are designed to sit securely on your work surface, providing a stable, hands-free platform for threading. Many of these premium tools integrate a built-in magnifying glass and sometimes even a small LED light to illuminate the needle’s eye. You place the needle into a designated holder, which keeps it perfectly still while you guide the thread through the eye under magnification.
This setup is ideal for long, detailed embroidery projects, stitchers working with incredibly fine silk threads, or anyone experiencing age-related vision changes. By magnifying the workspace and stabilizing the needle, these tools dramatically reduce eye strain and physical frustration. The trade-off is that they are not portable, requiring a dedicated spot on your crafting desk, and they are generally more expensive, typically ranging from S$15 to S$30.
Flat Metal or Slot Threaders
Flat metal threaders, sometimes called slot or hook threaders, are crafted from a single, solid piece of thin sheet metal. Instead of a flexible wire loop, they feature a tiny, rigid hook or a specialized slot cut directly into the metal. You insert the hook through the needle’s eye, catch the embroidery thread in the hook’s notch, and pull it back through the eye.
Because there are no delicate wires to snap, flat metal threaders are exceptionally durable and can last for years. They are the perfect choice for heavier embroidery materials, such as pearl cotton, tapestry wool, or silk ribbon, and work beautifully with larger-eyed needles like chenille or tapestry needles. However, their rigid nature means they are usually too thick to fit through the tiny eyes of fine crewel, sharps, or beading needles, limiting their usefulness for delicate, high-count fabrics.
How to Match Your Threader to Embroidery Needles and Threads
Choosing the right needle threader is only half the battle; you must also ensure it matches your specific needle and thread combination. Embroidery needles come in several distinct varieties. Crewel and sharps needles feature long, narrow eyes designed to hold multiple strands of floss while maintaining a slim profile. For these delicate needles, a fine wire loop threader is almost always necessary.
In contrast, chenille needles have much larger eyes and sharp points, while tapestry needles feature large eyes and blunt tips. These larger eyes easily accommodate flat metal hook threaders or even some mechanical push-button models. Attempting to use a thick flat metal threader on a fine crewel needle will only result in bent metal and damaged needle eyes.
Thread preparation also plays a critical role in how smoothly your threader functions. Always cut your embroidery floss with sharp, dedicated embroidery scissors rather than tearing or biting the thread. A clean, angled cut prevents the individual cotton plies from splaying out. Frayed ends are highly prone to catching on the edges of the needle eye or the threader itself, which can cause the thread to bunch up and jam inside the eye.
Additionally, consider using a thread conditioner or natural beeswax before threading. Running your embroidery floss gently across a wax block coats the loose fibers, laying them flat and reducing static electricity. This conditioning process makes the thread significantly slicker, allowing it to glide effortlessly through both the threader’s loop and the needle’s eye without snagging or fraying.
Common Threading Mistakes and How to Fix Them
Even with the best tools, beginners often encounter difficulties due to a few common threading mistakes. Understanding these pitfalls will protect your equipment and keep your project moving forward smoothly.
Forcing the Tool
The most frequent error is forcing a threader through an eye that is simply too small. If you feel significant resistance when trying to push a wire loop or metal hook into a needle eye, stop immediately. Forcing the tool can permanently bend the wire, break the internal hook of an automatic device, or even warp the needle’s eye itself. If it does not slide in smoothly, you need to switch to a finer threader or a needle with a larger eye.
Pulling Too Fast
Another common pitfall is pulling the thread through too quickly or aggressively. When you yank the threader back through the needle eye, the sudden friction can shred delicate cotton floss or snap a wire loop. Instead, practice a slow, steady, and continuous pulling motion. This gentle approach allows the thread to compress naturally as it passes through the narrow eye, preserving both your threader and your embroidery floss.
Safety and Maintenance
Finally, prioritize safety and maintenance by regularly inspecting your tools. Wire loop threaders are consumable items that will eventually wear out. If you notice that a wire has become bent, frayed, or has started to detach from the handle, discard it immediately. Using a damaged wire threader can result in sharp metal splinters that cause painful finger pricks, or worse, snag and ruin the delicate linen or silk fabric of your embroidery project.
Frequently Asked Questions (FAQ)
Can I use a sewing machine needle threader for hand embroidery?
Generally, sewing machine needle threaders are not suitable for hand embroidery. Machine threaders are specifically engineered to align with the unique, front-to-back eye orientation of needles mounted inside a sewing machine’s needle bar. Hand embroidery needles have different eye shapes, thicknesses, and orientations. Attempting to use a machine threader on a hand needle is highly awkward, often fails to catch the thread, and can easily damage the delicate mechanical parts of the machine tool.
How do I clean a needle threader if it gets sticky?
If your needle threader accumulates residue from thread conditioners, beeswax, or natural hand oils, it can become sticky and catch on your threads. To clean it safely, gently wipe the handle and the wire loop with a dry microfiber cloth. For stubborn buildup, lightly dampen a cotton swab with rubbing alcohol (isopropyl alcohol) and carefully clean the surfaces, ensuring you do not apply heavy pressure to the wire. Avoid using water, oils, or heavy lubricants, as these can rust the metal components or transfer to your embroidery threads, leaving permanent stains on your fabric.

Community discussion
Share your experience or ask a question. Comments are reviewed before publication.