
When you are new to sewing, garment repair, or crafting, threading a drawstring or elastic band through a narrow fabric casing can quickly become a test of patience. The most forgiving and reliable tools for beginners to start with are safety pin style threaders and flexible wire loop threaders. These tools are specifically designed to hold onto your cord securely while navigating the dark, narrow channels of waistbands, hoods, and bags. Unlike makeshift household items, dedicated threaders minimize the risk of losing the cord halfway through or damaging the fabric.
Choosing the right drawstring threader depends on the specific project you are tackling. The three primary types of threaders available on the market are wire loop threaders, safety pin style threaders, and hook and latch threaders. Each design has unique mechanical properties that make it suitable for different fabric weights, casing widths, and cord thicknesses. By understanding how these tools function, you can avoid common frustrations like mid-channel slippage, fabric snags, and broken casings.
Which Drawstring Threader Type Should a Beginner Choose?
To make an informed decision, it is helpful to examine the specific design, benefits, and limitations of each threader type. Beginners should look for tools that offer a secure grip on the cord and a smooth outer profile that will not catch on internal seams. Let’s break down the three main categories of drawstring threaders to help you identify the best starting point for your sewing kit.
Products mentioned in this guide
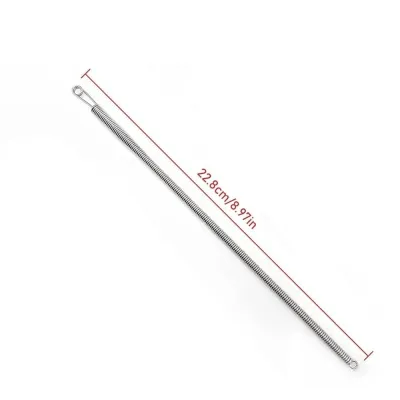
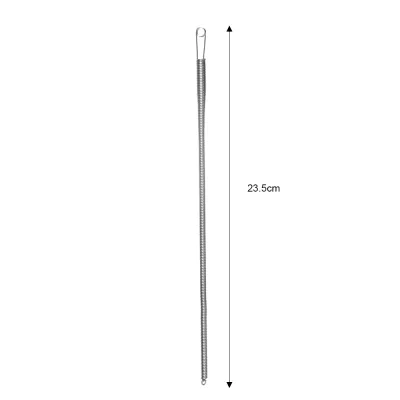
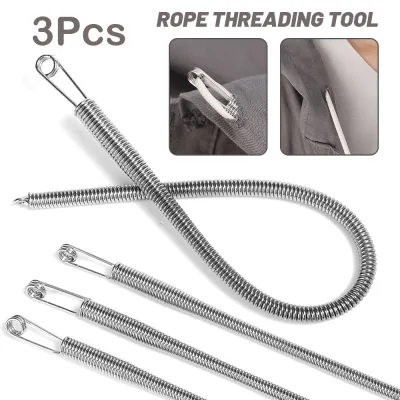
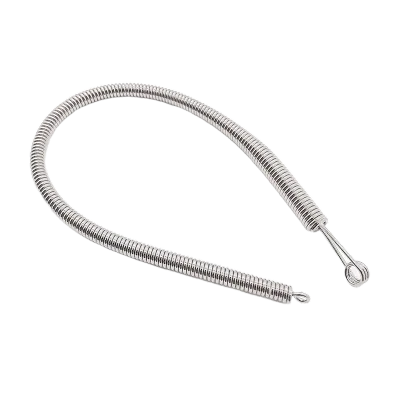
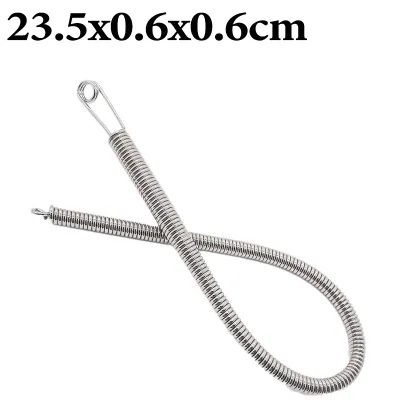
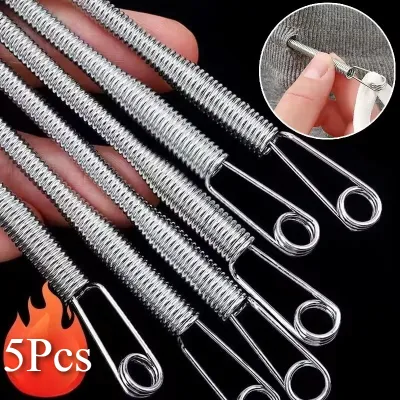
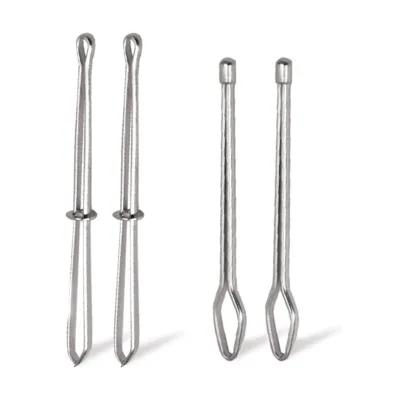
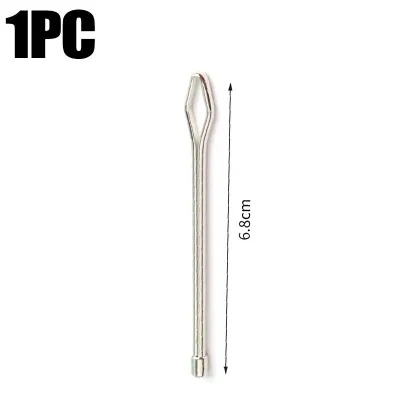
Prices are valid at publication and may change. Please refer to the product page for the latest price.
Wire Loop Threaders
Wire loop threaders consist of a long, flexible plastic or metal shaft with a wide wire loop at one end. To use this tool, you simply pass the end of your drawstring or elastic through the wire loop, fold it over, and pull the shaft through the casing. The primary advantage of the wire loop design is its exceptional flexibility.
The thin, springy wire can easily navigate tight, curved, or highly gathered casings without getting stuck or catching on internal fabric edges. This makes it an excellent choice for curved waistbands on activewear or children’s clothing. However, wire loop threaders do have limitations when it comes to heavy-duty projects.
Because the cord is held in place by being threaded through a simple loop, very thick cords, bulky braided elastic, or heavy fabrics can cause the loop to deform or the cord to slip out if there is too much resistance. When shopping for a wire loop threader, it is important to check the product specifications for wire flexibility and the maximum loop diameter. Opt for high-quality spring steel or durable nylon shafts that can bend without snapping, ensuring the tool can withstand repeated use across various fabric weights.
Safety Pin Style Threaders
Safety pin style threaders, often made of sturdy metal or rigid plastic, feature a locking clamp or a specialized pin mechanism at the tip. This design allows you to pierce or clamp the end of the drawstring or elastic and lock it securely in place before feeding it through the casing. For beginners, this locking mechanism provides immense peace of mind.
Because the cord is physically locked onto the tool, the risk of the drawstring slipping off and getting lost inside the casing mid-way is virtually eliminated. This style is highly recommended for standard cotton cords, flat ribbons, and medium-weight fabrics commonly found in hoodies, sweatpants, and laundry bags.
The rigid or semi-rigid body of the safety pin style threader allows you to push the tool through the casing with excellent control. Before purchasing, however, you must verify the pin’s thickness and overall length against the width of your fabric casing. If the threader is too wide or too long, it will struggle to navigate tight corners or narrow channels, potentially stretching or tearing the fabric.
Hook and Latch Threaders
Hook and latch threaders, sometimes referred to as loop turners or latch hooks, feature a long metal rod with a small hook and a hinged latch at the working end. To secure a cord or elastic band, you slip the hook through the material and close the latch over it. This mechanical closure creates a highly secure, low-profile connection that is incredibly strong.
It is particularly effective for pulling wide, thick elastic bands or bulky drawstrings through heavy-duty fabrics, such as those used in outdoor gear, winter coats, or upholstery. While highly secure, hook and latch threaders require a bit more care and practice from beginners.
The metal latch mechanism, if not fully closed or if used in a very narrow casing, can catch on internal raw seams or delicate fibers. This makes them less suitable for lightweight or delicate fabrics like chiffon, silk, or fine knits, where a snag can ruin the entire garment. If you plan to work with thick, heavy materials, a hook and latch threader is an invaluable tool, but you should always proceed slowly and ensure the latch remains fully closed during the entire passage.
How to Match the Threader to Your Fabric and Cord
Selecting the perfect drawstring threader is not just about choosing a type; it is about matching the tool’s physical dimensions to the specific requirements of your fabric and cord. The first step in this decision matrix is measuring the width of the fabric casing. The casing is the hollow channel sewn into the garment that houses the drawstring or elastic.

To ensure a smooth pass, the maximum diameter of your threader must be significantly smaller than the internal width of the casing. If the tool is too snug, it will bunch the fabric excessively, making it difficult to slide the tool forward and increasing the risk of bursting the seams.
Next, you must match the threader’s attachment mechanism—whether it is an eye, a pin, or a hook—to the thickness and material of your cord. For thin cotton strings or delicate ribbons, a fine wire loop or a small safety pin style threader is ideal because it will not distort the cord’s shape.
For wide, flat elastic bands, a wider safety pin style or a hook and latch threader is necessary to hold the elastic flat and prevent it from twisting inside the casing. If elastic twists during insertion, it will bunch uncomfortably against the body and lose its elasticity over time.
Fabric weight and fiber content also play a critical role in your choice of tool. Delicate materials, such as silk, chiffon, or lightweight polyester, require a threader with a completely smooth, snag-free surface. Rigid metal hooks or sharp pins can easily pull threads or create runs in these sensitive fabrics.
For delicate projects, a smooth, flexible plastic wire loop threader is the safest option. Conversely, heavy-duty fabrics like denim, canvas, or thick fleece can handle more rigid, robust metal threaders, which provide the leverage needed to push through dense fabric layers.
Before making a purchase, always check product labels, packaging specifications, or online marketplace listings for details on maximum cord capacity and material compatibility. Look for clear measurements of the threader’s width, length, and the size of its eye or clamp. Many manufacturers provide guidelines on the maximum thickness of elastic or cord their tools can accommodate. Taking a few moments to verify these specifications before checkout will save you from the frustration of owning a tool that is either too bulky for your casing or too small for your drawstring.
How to Use Your Drawstring Threader Without Snags
Using a drawstring threader efficiently requires a systematic approach to prevent snags, tears, and lost cords. Before you even insert the tool, you must prepare the fabric casing. Inspect the entry and exit openings of the channel for any loose threads, lint, or fabric debris that could catch on the threader.
If you are working on a handmade garment, ensure that the internal seam allowances within the casing are pressed flat and, if possible, stitched down. Bulky, unpressed seams are the most common obstacles that cause threaders to get stuck mid-way.
Once the casing is prepared, attach your cord or elastic to the threader using its specific mechanism. If you are using a safety pin style threader, pierce the cord about half an inch from the end and lock the clamp securely. For a wire loop threader, pass the cord through the loop and, if the cord is slippery, tie a loose but secure knot to prevent it from sliding out.
For a hook and latch threader, pierce the elastic with the hook and ensure the latch is completely closed and flush against the metal shaft. A secure attachment at this stage prevents the cord from detaching inside the dark channel.
To feed the threader through the casing, use a gentle \”gather and push\” motion. Hold the front end of the threader through the fabric with one hand, and use your other hand to bunch or gather the fabric casing onto the body of the tool.
Once the fabric is gathered, hold the rear end of the threader and pull the gathered fabric backward, sliding the tool forward into the clear section of the channel. Avoid the temptation to force or pull the tool aggressively if you encounter resistance. Instead, gently wiggle the threader to navigate past internal seams or tight spots.
Once the threader emerges from the exit opening of the casing, pull it through completely until the trailing cord or elastic is fully threaded. Carefully detach the threader from the cord. To prevent the newly threaded cord from immediately slipping back into the casing, secure the ends immediately.
You can do this by tying a temporary knot at each end, attaching plastic or metal aglets, or sewing the elastic ends together if you are completing a waistband. This simple final step ensures your hard work is not undone the moment the garment is stretched.
Common Threading Mistakes and How to Fix Them
Even with the right tool, beginners often encounter a few common hurdles during the threading process. One of the most frustrating issues is when the cord slips off the threader inside the casing. If this happens, do not panic or try to force the empty threader out.
Carefully slide the threader out of the casing, then use your fingers to gently massage the lost cord back toward the nearest opening. To prevent this from happening on your next attempt, ensure you are using a threader with a locking mechanism, or tie a more secure knot if using a wire loop style.
Another frequent problem is the threader getting stuck on internal seams or raw fabric edges inside the casing. When you feel resistance, forcing the tool forward will only tighten the snag and potentially rip the fabric. Instead, back the threader up slightly, about half an inch.
Use your fingers from the outside of the garment to manipulate the internal seam allowance, pressing it flat or pushing it out of the way. Gently wiggle the tip of the threader upward or downward to guide it over the seam barrier before continuing forward.
Finally, many beginners make the mistake of using a rigid, straight threader for highly curved waistbands or contoured bags. A rigid tool cannot bend around tight curves, causing it to poke against the outer fabric and get stuck.
If you find yourself struggling with a curved channel, switch to a highly flexible wire loop threader or a flexible plastic threading tape. These tools are designed to bend and conform to the shape of the casing, allowing you to navigate curves smoothly without putting unnecessary stress on the fabric or the seams.
Frequently Asked Questions (FAQ)
Can I use a regular safety pin instead of a dedicated drawstring threader?
While a standard household safety pin can work in an emergency, it is far less efficient and secure than a dedicated drawstring threader. Standard safety pins are short and rigid, requiring a tedious, repetitive pinching motion to move them through a casing.
More importantly, standard safety pins run a high risk of popping open inside the casing due to the pressure of the fabric. If a pin opens mid-way, the sharp point can easily snag, tear, or ruin your fabric, and retrieving an open pin from inside a narrow channel can be incredibly difficult and painful.
What is the easiest way to thread a thick elastic band?
The easiest way to thread a thick elastic band is to use a hook and latch threader or a wide, heavy-duty safety pin style threader. These tools provide the strong grip necessary to hold bulky elastic without slipping.
Before you begin, always verify that the casing width is wide enough to allow the elastic to pass through without folding or jamming. If the casing is too tight, the elastic will bunch up and resist movement; ensuring the casing is at least a quarter-inch wider than the elastic will make the process much smoother.

Community discussion
Share your experience or ask a question. Comments are reviewed before publication.