
Finding the right crotchet needle is the most critical first step for any aspiring crafter embarking on their fiber arts journey. The ideal beginner crochet needle is a medium-sized aluminum hook, specifically in the 5.0mm to 6.0mm range, equipped with a soft ergonomic handle and a slightly rounded, tapered head. This specific configuration provides the ultimate balance of smooth yarn glide, comfortable hand support, and easy stitch insertion, allowing you to focus entirely on mastering your tension and stitch patterns without fighting your tools.
While the sheer variety of materials, shapes, and sizes available in craft stores can feel overwhelming, selecting your first tool does not have to be a guessing game. By understanding how the physical attributes of a hook interact with your hands and your yarn, you can easily avoid the common pitfalls that lead to hand fatigue, split yarn, and dropped stitches. Investing a small amount of time to understand these mechanics will set you up for a frustrating-free and highly rewarding learning experience.
Understanding Crochet Needle Anatomy and Terminology
Before stepping into a craft store or browsing online marketplaces, it is essential to understand the anatomy of a crochet hook. Every hook is divided into distinct functional zones: the point, the lip, the throat, the bowl, the shaft, the grip, and the handle. The point or tip is the very end of the tool that pierces the stitches, while the lip is the actual hook shape that catches the yarn. The throat and bowl guide the yarn down onto the shaft, which is the uniform cylindrical section of the needle.
Products mentioned in this guide
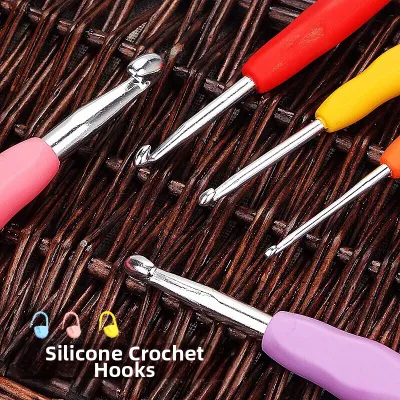
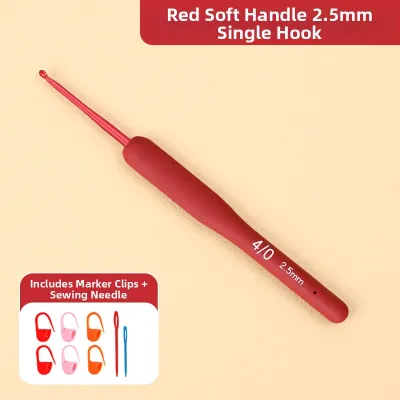
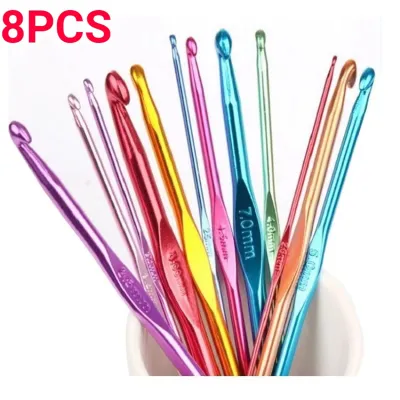
Prices are valid at publication and may change. Please refer to the product page for the latest price.
The shaft is the most critical part of the tool because its diameter determines the exact size of your stitches. When a pattern calls for a 5.0mm hook, it means the shaft of the needle measures exactly 5.0mm in diameter. The grip or thumb rest is the flat, depressed section where you place your fingers to control the angle of the hook, leading directly into the handle, which rests against your palm.
When shopping for these tools, you will frequently encounter different terms used interchangeably. In retail listings and casual search queries, terms like “crotchet needle” and “crochet hook” refer to the exact same tool. While the term “needle” is technically reserved for sewing or knitting tools that pass entirely through fabric or loops, “crochet hook” is the standard term used within the crafting community. Recognizing this terminology will help you navigate product descriptions and tutorials with confidence.
Key Factors for Choosing Beginner-Friendly Crochet Needles
Selecting the perfect first hook requires balancing three main physical attributes: the material of the hook, the design of the handle, and the shape of the hook head. Each of these elements directly influences how the tool behaves in your hands and how smoothly it interacts with different types of yarn fibers.

Your personal grip style—whether you hold the tool like a pencil or a dinner knife—and the specific texture of your starter yarn will dictate the best combination of these three attributes. By evaluating these factors systematically, you can choose a tool that feels like a natural extension of your hand.
Material: Aluminum vs. Bamboo vs. Plastic
Aluminum is widely considered the gold standard material for beginner crochet hooks due to its exceptional durability and slick surface. The smooth finish of polished aluminum allows yarn to slide effortlessly over the shaft, which is incredibly helpful when working with standard acrylic or wool yarns that tend to cling. This low friction helps beginners maintain a fluid rhythm and prevents the yarn from snagging. However, when buying budget-friendly aluminum hooks, always run your fingers along the throat and tip to check for any sharp metal burrs or manufacturing seams that could catch and damage delicate yarn fibers.
Bamboo and wooden hooks offer a completely different tactile experience, characterized by a natural warmth and a slightly matte surface texture. This organic material provides more physical grip, which is highly advantageous for beginners who struggle with stitches slipping off the hook too quickly. The natural friction of bamboo helps keep your loops secure on the shaft while you form your stitches. In humid climates like Singapore, bamboo hooks are also highly comfortable to hold because they do not feel cold or slippery if your hands sweat. Before purchasing, inspect the wood carefully to ensure it has a smooth, sealed finish free of splinters.
Plastic and acrylic hooks are incredibly lightweight and highly affordable, making them popular choices for budget-conscious beginners. They are particularly useful in very large sizes (9.0mm and above) where a metal hook would be too heavy and cause wrist strain. However, smaller plastic hooks can flex or bend under the tight tension typical of beginner stitches. This flexibility can make it difficult to maintain uniform stitch sizes. Additionally, plastic can develop static electricity in dry, air-conditioned rooms, causing synthetic yarns to cling awkwardly to the tool.
Handle Design: Ergonomic vs. Inline
Ergonomic handles are designed with a thick, soft, contoured grip made of rubber, silicone, or dense foam. This design significantly increases the surface area of the handle, reducing the muscular force required to grip the tool securely. Ergonomic hooks are highly recommended for beginners who use a “pencil grip” (holding the hook between the thumb and index finger like a pen), as the padded handle prevents the fingers from cramping during long practice sessions. The added comfort allows you to practice for longer periods without experiencing hand fatigue or joint strain.
Standard or straight handles feature a traditional, slim design where the handle is simply a continuation of the metal, wood, or plastic shaft. These hooks are often preferred by crafters who use a “knife grip” (holding the hook overhand, like a dinner knife) because the slim profile allows for quick, rotating movements of the wrist. While standard hooks are highly durable and easy to store, their thin profile can cause hand cramping for beginners who tend to hold their tools with excessive tension while learning.
To find the style that suits you best, it is highly recommended to visit a local craft shop to physically hold both ergonomic and standard hooks before making a purchase. If you are shopping online, look for starter sets that offer a few of each style, or begin with a single, moderately priced ergonomic hook to test how it feels in your hand over an extended crafting session.
Hook Head Shape: Tapered vs. Inline
Tapered hook heads feature a rounded, sloping throat and a slightly pointed tip, with the head of the hook being narrower than the shaft. This streamlined shape makes it incredibly easy to push the hook into tight stitches, which is a common challenge for beginners who tend to crochet with high tension. However, because the throat is shallow and rounded, it requires a bit more manual control to keep the yarn from slipping off the hook during the pull-through phase. Additionally, the pointed tip can occasionally split multi-ply yarns if it is not inserted at a perfect angle.
Inline hook heads are characterized by a thumb rest and a hook head that is perfectly aligned with the outer edges of the shaft. The throat is cut deeply at a sharp, consistent angle, and the tip is flatter and blunter. This deep, angular throat is excellent for beginners because it locks the yarn securely in place, preventing dropped stitches and helping to maintain consistent tension. The blunter tip also reduces the likelihood of splitting the yarn fibers. The trade-off is that the wider, blunter head can be slightly more difficult to push into very tight stitches.
For most beginners, starting with a standard tapered hook that features a slightly rounded tip offers the best of both worlds. This hybrid shape balances the ease of inserting the tool into tight stitches with adequate protection against splitting the yarn, making the learning process much smoother.
Recommended Sizes for Beginner Crochet Projects
When learning to crochet, matching your hook size to your yarn weight is essential for achieving neat, even stitches. For absolute beginners, medium-weight yarn—often labeled as worsted weight, Aran, or 8-ply—is the absolute best material to start with. This yarn is thick enough that you can easily see the structure of your stitches, making it simple to count your rows and identify any mistakes you might make along the way.
To work with worsted weight yarn, you should select a hook in the 5.0mm (often labeled H-8 in US sizing) to 6.5mm (K-10.5) range. These medium sizes are highly forgiving; they are large enough to handle comfortably without causing hand cramps, yet small enough to create a cohesive, structured fabric. Working with a hook that is too small (such as a 2.0mm lace hook) will frustrate you with tiny, hard-to-see stitches, while a jumbo hook (such as a 12.0mm hook) can be physically exhausting for a beginner to maneuver.
To verify the correct hook size for your project, always check the paper label wrapped around your skein of yarn. Manufacturers print a small square icon on the label containing a picture of a crochet hook, alongside a recommended size range in millimeters. As a beginner, it is wise to start with the exact millimeter size recommended on the yarn label, and then adjust up or down by 0.5mm if you find your stitches are consistently too tight or too loose.
Building Your First Crochet Needle Kit
Instead of purchasing a massive, expensive 50-piece kit filled with sizes you may not use for years, it is much more practical and cost-effective to build a small, curated starter kit. A highly functional beginner kit should consist of three to five essential hook sizes: 4.0mm, 5.0mm, 5.5mm, and 6.0mm. This compact range will allow you to complete almost any beginner-friendly project, from simple dishcloths and warm winter scarves to basic beanies and amigurumi plush toys.
When assembling your kit, look for sets that include a physical size gauge. This is a flat plastic or metal card featuring precisely calibrated holes labeled with millimeter measurements. Over time, the printed size markings on cheap hook handles can rub off due to friction and hand oils; having a physical gauge allows you to quickly verify the size of any hook in your collection. Your kit should also include a few basic accessories, such as plastic locking stitch markers to keep track of your rows, and a blunt tapestry needle for weaving in loose yarn ends.
When purchasing your starter kit, look for reputable online marketplaces or local specialty craft stores that offer clear return policies and transparent customer reviews. Avoid buying the cheapest unbranded sets available, as these often suffer from poor quality control, resulting in rough plastic seams or misaligned hooks that can snag your yarn and ruin your crafting experience.
Common Beginner Mistakes to Avoid When Buying Hooks
One of the most common mistakes beginners make is purchasing extremely small lace hooks or excessively large jumbo hooks before mastering basic stitch tension. Small steel hooks (under 3.0mm) require incredibly fine thread and intense visual focus, which can quickly lead to eye strain and frustration. Conversely, giant jumbo hooks require large arm movements that can tire out your shoulder and wrist muscles before you have even finished a single row.
Another frequent pitfall is ignoring the relationship between material friction and yarn texture. For example, using a highly polished, slippery aluminum hook with a slippery, silky synthetic yarn can make it nearly impossible to keep your stitches on the hook. On the other hand, using a rough, unsealed wooden hook with a grabby, rustic wool yarn will create so much friction that pulling the hook through the loops becomes a physical struggle. Always try to pair slippery yarns with grippier bamboo hooks, and textured yarns with smooth aluminum hooks.
Beginners also frequently fall into the trap of prioritizing aesthetic designs over physical comfort. It can be tempting to buy novelty hooks featuring heavy, elaborate decorative handles shaped like cartoon characters or filled with flowing glitter. However, these decorative elements often throw off the physical balance of the tool, making it top-heavy or bottom-heavy, which quickly leads to severe hand fatigue. Stick to simple, ergonomically balanced designs that prioritize hand health over visual novelty.
Finally, avoid buying unbranded, ultra-cheap hook sets that lack standardized sizing. In cheap manufacturing, a hook marked as a 5.0mm might actually measure 4.6mm or 5.4mm, which will completely throw off the gauge of your project and make it impossible to follow pattern instructions accurately. Investing a few extra dollars in a reputable, standardized brand ensures that your tools are accurate and built to last.
Frequently Asked Questions (FAQ)
Can I use knitting needles for crochet?
No, knitting needles and crochet hooks are entirely different tools designed for completely different techniques, and they cannot be used interchangeably. Crochet requires a single tool with a hook at the end to pull active loops of yarn directly through other loops, building the fabric one stitch at a time. Knitting, by contrast, uses two pointed needles to hold an entire row of active, open loops simultaneously, transferring them from one needle to the other to create fabric. Attempting to crochet with a knitting needle is physically impossible because the needle lacks the hook head required to catch and pull the yarn through the existing stitches.
Why does my yarn keep splitting when I crochet?
Yarn splitting is a common frustration that usually stems from a combination of hook choice and technique. Physically, if your hook has a very sharp, pointed tip or a rough manufacturing seam along the throat, it can easily pierce and separate the individual plies of the yarn rather than gliding smoothly around them. Technically, splitting also occurs if your stitch tension is too tight, forcing you to wedge the hook aggressively into the stitch, or if you are inserting the hook at an incorrect angle. To resolve this, inspect your hook tip for physical snags, try relaxing your grip to loosen your stitches, or switch to a hook with a slightly blunter tip or an inline head shape.
Are expensive crochet needles worth it for beginners?
For absolute beginners, high-end artisan or premium specialized hooks are generally not necessary, as a mid-range ergonomic hook or a budget-friendly aluminum set from a reputable brand offers excellent value and comfort. When you are first learning, you are still discovering your personal preferences, such as whether you prefer a pencil or knife grip, and whether you work better with tapered or inline heads. Spending a large amount of money on a premium set before establishing these preferences can lead to wasted investment. Once you have mastered the basic stitches and know exactly what style of hook you prefer, upgrading to a premium, high-comfort ergonomic hook is highly worthwhile for long-term crafting comfort.

Community discussion
Share your experience or ask a question. Comments are reviewed before publication.