
Choosing the right embroidery needle is the single most important step in setting up a successful needlework project. For beginners, the sheer variety of needle shapes, eye sizes, and point styles can feel overwhelming, but the selection process becomes straightforward once you understand how your tools interact with your fabric and thread. The ideal needle allows your thread to pass through the fabric smoothly without causing friction, fraying, or leaving unsightly holes.
Your choice of needle depends entirely on the specific stitching technique you plan to use and the structure of your background fabric. By matching the physical characteristics of the needle to your materials, you can prevent common frustrations like split threads, puckered fabric, and hand fatigue. This guide will help you identify the essential needle types, match them to your projects, and master the art of threading needles with ease.
Understanding Embroidery Needle Anatomy and Sizing
To choose the right tool, you must first understand the anatomy of an embroidery needle, which consists of the point, the eye, and the shaft. The point is the very tip of the needle, and it comes in two primary styles: sharp and blunt. Sharp points are designed to pierce tightly woven fabrics cleanly, while blunt points are meant to slide between the threads of open-weave fabrics without splitting them.
Products mentioned in this guide
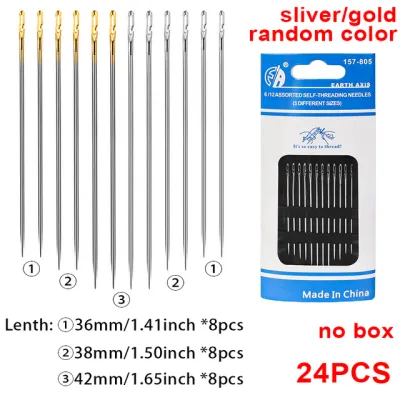
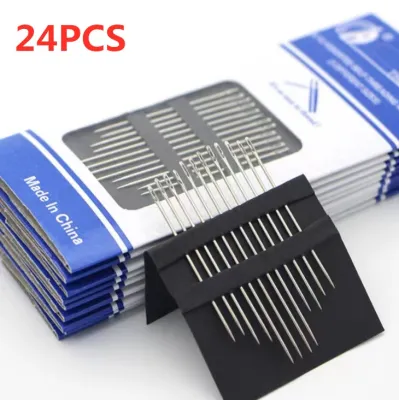
Prices are valid at publication and may change. Please refer to the product page for the latest price.
The eye is the opening at the top of the needle where the thread is inserted. Embroidery needles feature elongated eyes to accommodate thicker threads or multiple strands of embroidery floss without causing friction. If the eye is too small for your thread, the constant rubbing as you pull the needle through the fabric will quickly wear down and fray the fibers.
The shaft is the main body of the needle, and its thickness determines the size of the hole made in your fabric. Ideally, the shaft should be slightly thicker than your thread so that it clears a path for the thread to pass through easily, but not so thick that it leaves permanent, visible holes in your weave.
Needle sizing can be confusing for beginners because it operates on an inverse scale. As the size number increases, the needle actually becomes smaller, thinner, and shorter. For example, a size 5 embroidery needle is much thicker and longer than a size 10 needle. When purchasing needles, check the manufacturer’s label to verify the size range, which is typically sold in assorted packs to give you several options for different thread weights.
Matching Needle Types to Common Beginner Stitches
As a beginner, you do not need to collect dozens of specialized needles; instead, you can focus on three primary categories that cover almost every common stitching technique. These are crewel needles, tapestry needles, and milliner needles. Each category is engineered to solve specific mechanical challenges associated with different embroidery styles and fabric structures.

Before starting any project, it is highly recommended to check your pattern instructions or kit contents for recommended needle specifications. Designers usually specify the exact needle type and size that matches the provided thread and fabric.
If you decide to substitute the thread or fabric from the original pattern, you must adjust your needle choice accordingly. For instance, replacing standard six-strand cotton floss with a thicker pearl cotton thread requires a needle with a larger eye and a thicker shaft to prevent the thread from bunching up at the fabric surface.
Crewel Needles for Surface Embroidery
Crewel needles, which are often sold simply as “embroidery needles,” are the most versatile and widely used needles for general surface embroidery. They are characterized by a sharp point and a medium-to-long eye that easily accommodates multiple strands of standard embroidery floss.
This needle type is ideal for classic surface stitches such as satin stitch, backstitch, stem stitch, and French knots. Because these stitches are worked freely across the fabric surface rather than following a strict grid, the sharp point is necessary to pierce the fabric cleanly wherever you guide it.
Crewel needles pair best with tightly woven fabrics like cotton calico, linen, and denim. When working with these materials, always secure your fabric tightly in an embroidery hoop to maintain even tension, which allows the sharp crewel needle to glide through the fibers with minimal resistance.
Tapestry Needles for Counted Thread Work
Tapestry needles are designed specifically for grid-based embroidery techniques where you do not want to pierce the fabric fibers. They feature a blunt point and a large, elongated eye that easily holds thick threads, wool, or multiple strands of floss.
These needles are the standard choice for cross-stitch, needlepoint, and blackwork. In these techniques, your goal is to guide the thread through the pre-existing holes of an open-weave fabric rather than creating new holes.
The blunt tip of a tapestry needle is essential because it prevents you from accidentally splitting the fabric threads or piercing adjacent stitches. Tapestry needles pair perfectly with open-weave fabrics such as Aida cloth, evenweave, and canvas, allowing you to maintain clean, uniform stitches across your grid.
Milliner Needles for Wrapped Stitches
Milliner needles, also known as straw needles, are specialized tools that are incredibly helpful for beginners attempting dimensional or textured embroidery. They feature a sharp point and a long, uniform shaft where the eye is the exact same width as the shaft itself.
This unique design is ideal for wrapped and knotted techniques, including bullion knots, cast-on stitches, and drizzle stitches. In these techniques, you wrap the thread around the needle multiple times before pulling the needle through the center of the wraps.
On a standard crewel needle, the eye bulges outward, creating a bump that catches on the wrapped threads as you try to pull the needle through. Because a milliner needle has a completely uniform shaft, the wrapped thread slides smoothly off the needle and onto the fabric without snagging, resulting in neat, perfectly formed dimensional stitches.
How to Thread Needles Efficiently Without Frustration
Mastering the art of threading needles is essential for maintaining a relaxing and enjoyable embroidery practice. One of the most common mistakes beginners make is trying to force frayed, uneven thread ends through a tiny needle eye. To prevent this, always use sharp embroidery scissors to cut your thread at a clean, 45-degree angle, which creates a pointed end that enters the eye easily.
If you struggle to thread your needles manually, mechanical aids like wire needle threaders are highly effective. To use one, insert the flexible wire loop through the eye of your needle, pass your thread through the large wire loop, and then gently pull the wire threader back out of the needle eye. Be careful not to pull too hard; if the wire resists, your thread may be too thick for that specific needle size, and forcing it can bend or break the threader.
For manual threading, the “pinch” method is often the most reliable technique. Instead of holding the thread far from the end and trying to push it through the eye, pinch the thread between your thumb and forefinger until only a tiny sliver of the tip is visible. Bring the needle eye down onto the pinched thread, slowly releasing your grip as the eye catches the fiber.
Additionally, pay attention to the natural twist of your embroidery thread. Threading the needle in the direction of the fiber twist helps keep the individual strands together, preventing them from separating and bunching up as they pass through the eye.
Testing Your Needle and Thread Combination
Before committing to your final project, it is always wise to perform a quick test on a scrap piece of your project fabric. This simple step allows you to verify that your needle, thread, and fabric are working together harmoniously before you invest hours of stitching time.
Set up your test by securing a small scrap of your project fabric in a hoop and threading your chosen needle with the exact number of strands you plan to use. Stitch a short line of your intended stitch technique and observe how the materials interact.
Watch for visual cues that indicate an incorrect needle size. If you notice your thread fraying, fuzzing, or snapping near the eye of the needle, your needle eye is too small, or the needle has a rough internal edge that is damaging the fibers.
Evaluate the impact of the needle on your fabric. If the needle leaves large, permanent holes that do not close up around the thread, the needle shaft is too thick. Conversely, if you have to pull hard to get the needle through the fabric, the shaft is too thin, which will cause excessive wear on your thread and strain your hands. Adjust your needle size up or down based on these observations to ensure a smooth, professional finish.
Frequently Asked Questions (FAQ)
Can I use a standard sewing needle for embroidery?
Standard sewing needles, often called sharps, are not ideal for embroidery because they have very small, round eyes designed for thin sewing thread. Trying to force multi-strand embroidery floss through a standard sewing needle will cause the thread to shred and fray, making your stitching experience frustrating and damaging your materials.
Why does my embroidery thread keep fraying near the eye?
Thread fraying is usually caused by using a needle eye that is too small for your thread thickness, creating excessive friction as you pull the needle through the fabric. It can also occur if you are using low-quality needles with rough metal burrs inside the eye, or if you are pulling your thread at an extreme angle while stitching.
How often should I replace my embroidery needle?
You should replace your embroidery needle as soon as you notice physical signs of wear, such as a dull point that resists piercing the fabric, a bent shaft, or a rough eye that snags your thread. Working with a worn needle can damage your fabric and make stitching significantly more difficult.

Community discussion
Share your experience or ask a question. Comments are reviewed before publication.