
Selecting the right writing board as an architecture student in Singapore requires balancing precision, material durability, and portability. While general stationery brands offer basic clipboards, technical drafting demands specialized surfaces that resist warping in high humidity and provide absolute flatness. Instead of relying on generic brand promises, the most reliable approach is to evaluate boards based on their material specifications, edge tolerances, and compatibility with your specific drafting tools. By understanding how different materials and designs interact with your media, you can build a reliable toolkit that supports your design education from foundation year to graduation.
In Singapore’s competitive architectural programs, students must frequently transition between digital modeling and hand-drafting. A high-quality writing or drafting board serves as the foundation for this physical work, ensuring that your technical drawings meet the rigorous standards of academic reviews. Rather than viewing a board as a simple backing sheet, successful students treat it as a precision instrument that directly influences the quality of their creative output.
Why Architecture Students Need a Dedicated Writing Board
Standard desks in student hostels, home study corners, or communal university studios often feature micro-textures, scratches, or joint lines that can ruin a technical drawing. When you lay a thin sheet of tracing paper or vellum directly onto an unprepared wooden or laminate desk, any surface imperfection will telegraph directly through the paper as you draw. A dedicated writing board acts as a portable, pristine micro-environment, isolating your work from the unpredictable textures of shared workspaces.
Products mentioned in this guide
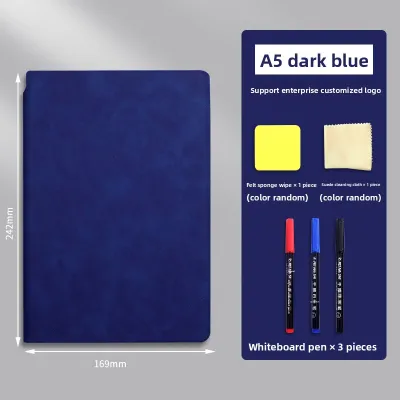
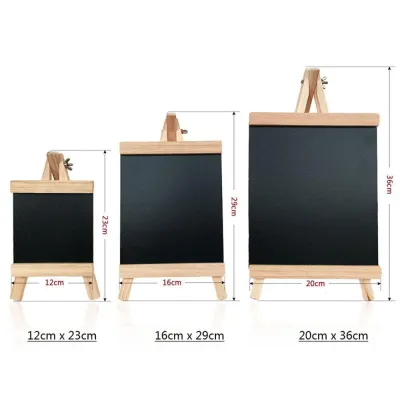
Prices are valid at publication and may change. Please refer to the product page for the latest price.
Line weight consistency is the foundation of technical architectural drafting, where varying line thicknesses communicate depth, materials, and structural hierarchy. If your pencil, lead holder, or fineliner encounters a soft spot, a grain boundary, or a microscopic dent on a standard table, the line thickness will vary unpredictably. A professional-grade board provides a uniform density across its entire surface, allowing you to maintain consistent hand pressure and achieve clean, sharp lines that do not feather or break.
Furthermore, delicate media such as tracing paper, vellum, and drafting film are highly sensitive to physical stress and environmental moisture. A high-quality board prevents these expensive sheets from creasing or tearing when you lean on them during long drawing sessions. In Singapore’s humid climate, paper can quickly absorb moisture from the air and sag; a sealed, non-porous board surface helps shield your media from absorbing additional moisture from the desk underneath, preserving the tension and flatness of your paper.
Ergonomics play a vital role during the intense, multi-hour design sessions common in architecture school. Working flat on a standard desk forces you to hunch over your work, leading to neck, shoulder, and lower back strain. Many dedicated drafting boards feature integrated stands, bevels, or adjustable legs that elevate the working surface to a comfortable angle. This elevation improves your line of sight, reduces parallax error when measuring with a scale ruler, and promotes a healthier posture during overnight design charrettes.
Essential Features to Look for in an Architecture Writing Board
When evaluating writing boards for technical work, edge straightness is a critical specification to verify. If you plan to use a T-square or a parallel ruler, the left and right edges of the board must be perfectly straight and free of any bowing or manufacturing defects. Even a deviation of a fraction of a millimeter along the board’s edge can translate to a noticeable alignment error when projected across an A2 or A1 sheet of paper, compromising the accuracy of your floor plans and sections.

Surface smoothness and tooth are equally important, as they dictate how your drawing tools interact with the paper. The ideal board surface has a subtle matte finish that provides just enough friction to prevent your pencil from slipping, while remaining smooth enough to prevent ink from bleeding or feathering. If a board is too polished, technical pens may fail to feed ink consistently; if it is too rough, the texture will transfer to your paper, causing your lines to look fuzzy and unprofessional.
Securing mechanisms must be low-profile and highly secure to prevent your paper from shifting during drafting. Standard bulky metal clips can dent or tear delicate tracing paper and often obstruct the smooth movement of parallel rulers or set squares. Look for boards that utilize flush magnetic clamping zones, low-profile spring clips, or surfaces that are highly compatible with drafting tape. The securing mechanism should hold the top margin of your paper firmly without warping the sheet or interfering with your drawing tools.
Comparing Board Materials and Surfaces for Drafting
Hardboard and medium-density fibreboard (MDF) are highly popular, budget-friendly choices for students entering architecture school. These wood-based materials offer excellent rigidity and a comfortable weight for studio use, but they require careful inspection before purchase. In Singapore’s humid tropical climate, unsealed MDF or hardboard can absorb atmospheric moisture over time, leading to swelling, edge flaking, and warping. If you select a wood-based board, verify that all edges are fully sealed, lacquered, or banded to prevent moisture penetration.
Plastic and acrylic surfaces offer a modern, highly durable alternative to traditional wood boards. High-density plastic and acrylic are virtually immune to humidity-induced warping, making them exceptionally stable over years of use. They are also lightweight and easy to wipe clean if ink or markers spill on them. However, acrylic boards can build up static electricity, which attracts dust, hair, and eraser shavings to your drawing area. They are also more susceptible to permanent scratching from sharp compass points or utility knives, requiring a disciplined approach to tool safety.
To find the perfect match for your workflow, perform an hands-on test of surface hardness and friction using your specific tools. Place a sheet of your preferred drafting paper onto the board and draw a series of parallel lines using different hand pressures with your lead holders, fineliners, and markers. Observe whether the board’s surface allows the pen tip to glide smoothly without snagging, and check the back of the paper to ensure the board provides enough support to prevent the pen from puncturing or deeply embossing the fibers.
Matching Board Size and Portability to Your Workspace
Architecture coursework in Singapore typically utilizes standard ISO paper sizes, with A3 being common for conceptual sketchbooks and A2 or A1 reserved for formal presentation drawings and detailed construction plans. Your writing board must be slightly larger than the paper size you intend to use. For example, an effective A2 drafting board should have at least three to five centimeters of extra margin on all sides, providing ample space for securing drafting tape and allowing your parallel ruler to glide past the edges of the paper without snagging.
Because architecture students must constantly move between home, university design studios, and site visits, portability is a major consideration. Carrying a large, heavy board on the MRT or public buses during peak hours can be physically exhausting and risks damaging the board’s edges. Look for boards that feature integrated carry handles, lightweight hollow-core construction, or those designed to fit neatly into standard weather-resistant drafting portfolios. A board that is too heavy or awkward to carry will often be left behind, defeating its purpose as a portable workspace.
Your choice of board size must also align with the physical constraints of your study environment. If you live in a compact student hostel or a shared apartment, a massive A1 board may overwhelm your desk and prove difficult to store. Measure your available desk space and locker dimensions before making a purchase. Many students find that a highly portable A2 board offers the best compromise, providing sufficient drawing area for most coursework while remaining small enough to store vertically in a wardrobe or studio locker.
How to Build Your Writing Board Shortlist
To build a reliable shortlist of writing boards, start by verifying the manufacturer’s technical specifications. Look for explicit guarantees regarding edge straightness tolerances, material density, and warp resistance. Reliable brands will often specify the exact materials used in their cores and surface laminates. Avoid generic products that lack detailed material descriptions, as these are more likely to use low-density cores that warp quickly under Singapore’s environmental conditions.
Next, analyze user feedback from other design, engineering, and art students who have used the boards over multiple semesters. Pay close attention to long-term durability reports, looking for any mentions of clip spring fatigue, surface scratching, or edge delamination. A board that performs well in a dry, air-conditioned showroom may behave differently after six months in a humid home environment, making real-world student feedback incredibly valuable.
Finally, confirm the return policies and warranty terms offered by local art supply shops or online stationery retailers. Because absolute flatness is critical for technical drawing, you must be able to inspect the board immediately upon delivery. A practical way to test a new board is to place a high-precision metal ruler edge-on against the surface and shine a light from behind; if you see light leaking under the ruler, the board is bowed and should be exchanged. Ensure your chosen retailer supports hassle-free returns for manufacturing defects before finalizing your purchase.
Frequently Asked Questions (FAQ)
Can I use a standard clipboard for architectural sketching?
While a standard clipboard is perfectly acceptable for quick, freehand conceptual sketches, site notes, or diagramming during field trips, it is inadequate for formal technical drafting. Standard clipboards lack the precise, straight edges required to guide T-squares and parallel rulers accurately. Furthermore, they are rarely large enough to accommodate standard architectural paper sizes like A3 or A2, forcing you to fold or crease your sheets, which is unacceptable for professional presentation drawings.
How do I clean and maintain a drafting board surface?
To preserve the integrity of your board’s surface and prevent graphite or ink transfer to your drawings, clean it regularly using gentle, non-abrasive methods. Wipe away graphite dust, eraser crumbs, and paper fibers using a soft, dry microfiber cloth or a drafting brush after every drawing session. For stubborn smudges or ink marks, use a slightly damp cloth with a mild, pH-neutral soap; avoid harsh chemical solvents, alcohol-based cleaners, or abrasive scrubbing pads, as these can strip the protective lacquer off wooden boards or scratch plastic and acrylic surfaces. Always store your board flat or vertically in a dry, shaded area away from direct sunlight and high-humidity zones to prevent warping.
Community discussion
Share your experience or ask a question. Comments are reviewed before publication.