
Selecting your first bottle of adhesive for scale modeling can feel surprisingly overwhelming. When browsing the shelves of a local hobby shop or searching online marketplaces, you will quickly notice that Tamiya offers several different formulas, each housed in distinctively colored bottles. Choosing the right one is not just about making the parts stick together; it is about understanding how the liquid interacts with the plastic to create a permanent, clean bond without damaging your model.
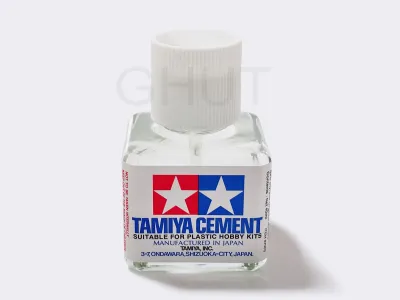
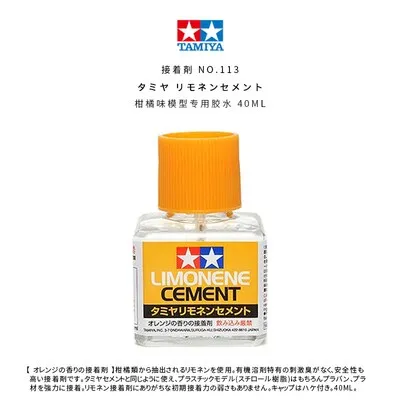
For most beginners, the most practical choice is to start with a bottle of Tamiya Extra Thin Cement (distinguished by its green cap) or a bottle of standard Tamiya Cement (distinguished by its orange cap). If you are working in a shared family space or a typical indoor apartment where strong chemical odors are a concern, the limonene-based citrus alternative is an excellent substitute. Rather than acting like a traditional glue that forms an intermediate sticky layer, these cements are chemical solvents designed to melt the polystyrene plastic slightly, fusing the two pieces together into a single, continuous piece of plastic once dry.
To make the best purchase for your first project, you need to evaluate the type of model kit you are building, your preferred working speed, and the ventilation options in your workspace. By matching these factors to the specific characteristics of each cement category, you can avoid common mistakes like ruined plastic details, fused bottle caps, or weak joints that fall apart during painting.
Products mentioned in this guide
![○◆ [Gunpla] TAMIYA 87137 ABS Plastic Model Glue 40ml Blue Cover Military Art Craft](https://img.lazcdn.com/g/p/ab867b5c4eddae666cf859ce9fe3f6fc.jpg_400x400q80.jpg_.webp)
![◙❃ [Gunpla] TAMIYA MARK FIT Model Dedicated Use Green Cover Glue Extra Thin/High Fluidity (40ml) 87038](https://img.lazcdn.com/g/p/70b5e3d4496b36dd71e3c3e8671458b8.jpg_400x400q80.jpg_.webp)
Prices are valid at publication and may change. Please refer to the product page for the latest price.
Identifying the Main Tamiya Cement Categories
Understanding the distinct product lines Tamiya offers is the first step toward setting up your modeling workbench. The manufacturer categorizes these cements primarily by their viscosity, drying speed, and solvent base, which are easily identifiable by the color of the bottle caps and the text printed on the labels.
Standard formulations, often referred to simply as Tamiya Cement, come in a glass bottle with a bright orange cap. This liquid has a relatively high viscosity, meaning it is thick and flows slowly, similar to a light syrup. It is formulated for general-purpose assembly where you need the adhesive to stay exactly where you place it without running into surrounding details. Because it evaporates more slowly than thinner alternatives, it provides a longer window of time to adjust and align your parts before the plastic cures. When purchasing, check the label to verify the net volume, which is typically 40ml, and ensure it is designated for polystyrene plastics.
Thin and extra-thin formulations, most notably Tamiya Extra Thin Cement with its iconic light green cap, represent a completely different approach to assembly. This liquid has an extremely low viscosity, flowing as easily as water. Instead of applying it to a part before joining, you hold the two plastic pieces tightly together first, then touch the fine applicator brush to the seam. The liquid is drawn into the joint automatically through capillary action, melting a microscopic layer of plastic along the contact line. This method results in incredibly clean joints with minimal excess residue, making it highly favored for delicate assemblies.
Citrus or limonene-based options are designed specifically for modelers who want to avoid the strong, sharp smell of traditional organic solvents. These bottles, often featuring a white cap with orange or green accents, utilize limonene extracted from citrus peels as the active solvent. While they perform the same basic function of melting and fusing polystyrene, they evaporate at a slower rate than standard solvents. This means your assembly pace will be slightly slower, but your workspace will be filled with a pleasant orange scent instead of heavy chemical fumes.
Before finalizing your purchase, always read the bottle’s label carefully to verify the specific product name and intended application. Some specialized bottles are formulated specifically for ABS plastic or feature quick-setting properties. For your very first kit, sticking to the standard polystyrene formulas ensures maximum compatibility with the vast majority of plastic model kits on the market.
Matching the Cement to Your First Model Kit
The ideal cement for your workbench depends heavily on the specific engineering of the model kit you plan to build. Different genres of scale models present unique assembly challenges, from long, structural seams to microscopic detail parts that can easily dissolve if too much solvent is applied.

If your first project is a traditional scale model, such as a military aircraft, a tank, or a civilian vehicle, you will likely encounter a mix of large structural panels and tiny, delicate components. For large assemblies like joining two fuselage halves or a car chassis, standard cement is highly beneficial because it does not dry instantly, allowing you to apply it along a long edge and align the parts carefully. Conversely, for tiny cockpit instruments, clear canopy parts, or small exterior tools, the extra-thin formula is much safer because its fine brush tip allows you to apply a microscopic droplet that will not flood and ruin the surrounding molded details.
If you are starting with snap-fit or articulated figures, such as modern sci-fi character kits, the role of cement changes. These kits are engineered to hold together securely using friction joints and plastic pegs, meaning cement is technically optional for basic assembly. However, experienced builders use thin cement on these kits to permanently fuse seam lines on armor plates or to reinforce loose joints that might slip during posing. Before buying cement for a snap-fit kit, check the instruction manual to see if any specific sub-assemblies explicitly recommend glue, or if you are purely using it to enhance the final appearance of the model.
Your personal assembly pace and experience level should also dictate your choice. Standard cement is highly forgiving for beginners because its slower drying time gives you several seconds to slide a misplaced part into its correct position. Extra-thin cement, particularly the quick-setting variants, bonds almost instantly upon contact. If you are still developing your hand-eye coordination and part-handling skills, relying solely on ultra-fast-drying formulas can lead to permanent mistakes if a part is misaligned during the initial contact.
Finally, always cross-reference the plastic type of your kit with the cement’s compatibility. While the vast majority of model kits are molded in polystyrene (often labeled as PS on the box or sprue frames), some kits use ABS plastic for high-stress structural joints or articulated skeleton frames. Standard polystyrene cement will not dissolve ABS effectively, resulting in a weak bond that can easily snap under pressure. Checking the plastic indicators on your kit’s packaging will tell you if you need to purchase a specialized ABS-compatible cement alongside your standard bottle.
Safety, Ventilation, and Workspace Requirements
Because hobby cements rely on active chemical solvents to dissolve and fuse plastic, establishing a safe and comfortable workspace is essential before you open your first bottle. Taking a few minutes to prepare your environment ensures that your modeling sessions remain enjoyable and free from physical discomfort.
Always begin by reading the safety warnings, hazard symbols, and first-aid instructions printed directly on the product packaging or the accompanying safety leaflet. These labels provide crucial information regarding flammability, skin irritation, and inhalation risks. Understanding these guidelines beforehand helps you react correctly in the event of an accidental spill or skin contact.
Adequate cross-ventilation is the most critical requirement when working with solvent-based cements. In typical indoor environments, such as a compact room or an air-conditioned apartment in Singapore, solvent fumes can accumulate quickly and cause headaches or dizziness. To maintain safe air quality, position your workbench near an open window and use a small desk fan to gently direct the air away from your face and toward the outside. If you must work in an enclosed space without natural airflow, choosing a limonene-based cement is highly recommended to minimize the inhalation of harsh organic vapors.
Fire safety and proper storage are equally important. Plastic cements are highly flammable liquids that must be kept far away from heat sources, open flames, hot desk lamps, or electrical outlets that might spark. When you are not actively building, store your bottles upright in a cool, dry cupboard that is completely out of reach of children and household pets.
Depending on your personal sensitivity, you may also want to consider basic protective gear. If you have sensitive skin or are prone to contact dermatitis, wearing lightweight nitrile gloves can prevent accidental skin exposure when handling wet parts. While a standard dust mask will not filter out solvent vapors, working in a well-ventilated room remains the most effective way to protect your respiratory health during long assembly sessions.
Essential Application and Storage Practices
Developing good habits with your cement application and bottle maintenance will save you from ruined models, wasted product, and the frustration of permanently stuck bottle caps. Treating your adhesive as a precision tool rather than a simple glue will immediately improve the quality of your builds.
Before applying cement to your actual model parts, always perform a test run on a piece of spare sprue—the plastic frame that holds the model parts. Cut off a small section of the sprue, apply a drop of cement, and press it against another scrap piece. This simple test allows you to observe firsthand how the solvent flows, how quickly it begins to melt the plastic, and how long it takes to form a rigid bond. Because different model manufacturers use slightly different plastic formulations, this trial run prevents unexpected melting disasters on your actual model.
Precision is key when applying solvent cement. Standard Tamiya cement bottles feature a brush attached to the underside of the cap, which is useful for spreading adhesive over larger surfaces. However, for finer work, you can use a dedicated, fine-tipped modeling brush or a specialized applicator tool to control the exact volume of liquid delivered to the joint. When using extra-thin cement, remember that a tiny touch of the brush tip is usually enough; letting the liquid flood the area can cause it to seep under your fingers, leaving permanent, unsightly fingerprints melted into the visible surfaces of your model.
One of the most common beginner mistakes is failing to clean the bottle neck after a modeling session. As you wipe excess cement from the applicator brush against the inner rim of the bottle, liquid accumulates on the glass threads. If you screw the cap back on over this wet residue, the cement will melt the plastic cap and fuse it permanently to the glass bottle as it dries. To prevent this, always use a clean paper towel to wipe the bottle neck and threads completely clean before sealing the container.
Finally, store your cement bottles upright in a cool, dry place away from direct sunlight. In warm, tropical climates, elevated temperatures can increase the pressure inside the bottle, accelerating solvent evaporation if the cap is not perfectly sealed. Ensuring the cap is tightened firmly after every use prevents the liquid from thickening into an unusable gel, preserving its shelf life for many projects to come.
Frequently Asked Questions (FAQ)
Can I use Tamiya cement on non-plastic materials like metal or resin?
No, Tamiya plastic cements are formulated specifically to work via solvent action on compatible plastics like polystyrene. Because materials like metal, wood, photo-etched parts, and cured polyurethane resin do not dissolve in these organic solvents, the cement cannot create a bond. Attempting to use plastic cement on these materials will only leave a sticky, unbonded residue that can ruin the surface finish. For joining non-plastic parts to your model, you should check the kit instructions for recommended alternative adhesives, such as cyanoacrylate (commonly known as super glue) or two-part epoxy resins.
What should I do if the cement becomes too thick over time?
If your cement has thickened into a syrupy or gelatinous consistency, it is usually because the active solvents have evaporated through an imperfectly sealed cap. You should consult the manufacturer’s instructions for any approved thinning methods or disposal guidelines. Never attempt to thin the cement using water, rubbing alcohol, or random household solvents, as these will disrupt the delicate chemical balance, ruin the bonding strength, and potentially melt your model kits unpredictably. If the cement has thickened to the point where it no longer flows smoothly or melts plastic cleanly during a sprue test, it is safest to dispose of the bottle according to local waste regulations and replace it with a fresh one.

Community discussion
Share your experience or ask a question. Comments are reviewed before publication.