
To start fabric dyeing successfully, the very first product a beginner should buy is a bottle of liquid RIT dye—specifically, either RIT All-Purpose Liquid Dye or RIT DyeMore for Synthetics, depending entirely on the fiber content of the item you want to dye. Along with the dye, a beginner’s starter kit must include a bottle of RIT Color Remover (if you are changing a dark garment to a lighter color) and RIT Color Stay Dye Fixative to lock in the pigment on natural fabrics. Equipping yourself with these core products prevents the most common beginner frustrations, such as patchy color, faded results, or dyes that wash out on the first rinse.
Fabric dyeing is an incredibly rewarding way to refresh faded wardrobe essentials, customize home textiles, or upcycle thrifted finds. However, the chemistry of fabric fibers dictates exactly how dye molecules bond to them. Selecting the wrong formula or skipping essential prep steps will lead to disappointing results. By understanding the specific RIT product lines, formats, and supplementary tools available, you can confidently assemble a starter kit tailored to your first project and achieve vibrant, long-lasting color.
Match the Dye to Your Fabric: RIT All-Purpose vs. DyeMore
The single most critical decision you will make when purchasing RIT dye is matching the chemical formula of the dye to the fiber content of your fabric. Dyes are not one-size-fits-all; they are formulated to bond with specific molecular structures. Using the wrong dye line will result in the color completely washing down the drain, leaving your garment unchanged or patchily stained.
Products mentioned in this guide
![Rit Dye Liquid Dye 8 fl oz Denim[PRE-ORDER]](https://images-na.ssl-images-amazon.com/images/I/41YyE8gUYBL.jpg)

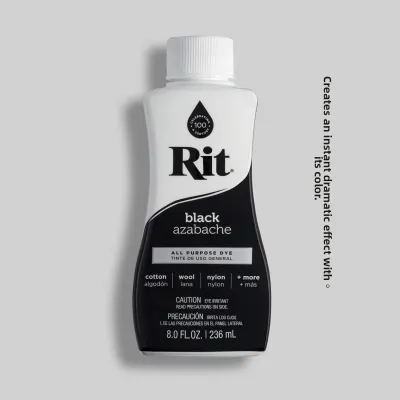
Prices are valid at publication and may change. Please refer to the product page for the latest price.
RIT All-Purpose Dye is the classic formula designed specifically for hydrophilic (water-loving) natural fibers. This includes cotton, linen, wool, silk, ramie, and rayon. It also works exceptionally well on nylon, which, despite being synthetic, has a molecular structure that readily accepts the acid dyes present in the All-Purpose formula. This line is the most versatile choice for standard wardrobe refreshes, such as bringing faded black jeans back to life, customizing cotton t-shirts, or dyeing linen bedsheets and cotton bath towels.
RIT DyeMore is a specialized formula engineered specifically for hydrophobic (water-repelling) synthetic fibers. This includes polyester, acrylic, acetate, and blends that contain a high synthetic content—typically anything over 35% polyester. Synthetic fibers are essentially plastics, meaning they lack the porous structure of natural fibers and cannot absorb standard dyes. RIT DyeMore utilizes disperse dyes that can only penetrate the tight molecular structure of synthetic fibers when subjected to extreme heat.
To determine which dye line you need, you must locate and read the garment care label inside your item. Check the exact fiber composition percentage. If your garment is a blend, such as 60% cotton and 40% polyester, you must use RIT DyeMore to ensure both the natural and synthetic fibers take the color evenly. If you use All-Purpose dye on such a blend, only the cotton fibers will absorb the pigment, resulting in a significantly lighter, heathered, or washed-out appearance.
There are clear physical limitations to what these dyes can achieve. Neither RIT All-Purpose nor RIT DyeMore will work effectively on 100% acrylic, heavily treated waterproof fabrics (such as rain jackets or Gore-Tex), or items with specialized chemical finishes like fire retardants and stain-resistant coatings. Additionally, you should check the manufacturer tags for “dry clean only” warnings; fabrics that cannot tolerate hot water baths will shrink, warp, or degrade during the dyeing process, making them unsuitable for home dyeing.
Liquid vs. Powder RIT Dye: Which Format is Best for Beginners?
Once you have identified the correct dye line for your fabric, you must choose between RIT’s two physical formats: liquid dye and powder dye. While both formats deliver rich, beautiful color when used correctly, they differ significantly in convenience, preparation requirements, and storage needs.

Liquid Dye is a pre-mixed, highly concentrated liquid solution. Because the dye pigments are already completely dissolved, liquid dye eliminates the risk of undissolved powder particles leaving dark specks or uneven spots on your fabric. It is incredibly easy to measure out in small, precise quantities using standard measuring spoons, making it the perfect choice for small-to-medium projects, custom color mixing, and precision techniques like tie-dye or ombré dipping. For beginners, liquid dye minimizes workspace mess and removes the intimidating step of mixing hot chemical solutions from scratch.
Powder Dye is the traditional, dry-form pigment. It is highly concentrated, lightweight, and exceptionally cost-effective when you need to dye large batches of fabric, heavy items like curtains, or deep, dark colors like navy and black. However, powder dye requires meticulous preparation. You must dissolve the powder completely in very hot water in a separate container before adding it to the main dye bath. Failing to dissolve every single granule will result in permanent, dark speckling on your finished garment.
Storing these products requires special attention, particularly in Singapore’s highly humid tropical climate. Average relative humidity levels often exceed 80%, which can quickly ruin opened packaging. If you choose powder dye, any unused portion must be transferred immediately to an airtight glass or plastic container. Adding a food-grade silica gel desiccant packet to the container is highly recommended to prevent the powder from absorbing ambient moisture, clumping, and losing its chemical efficacy. Liquid dye, by contrast, is far more resilient to local weather conditions; you can simply screw the cap back on tightly and store the bottle in a cool, dark cupboard without worrying about moisture degradation.
For almost every novice fabric dyer, liquid dye is the clear winner. Its pre-dissolved nature makes it the most forgiving, accessible, and low-stress starting point for your first few projects. The ease of pouring directly from the bottle allows you to focus on mastering fabric preparation and dye bath temperatures rather than worrying about powder solubility.
Essential RIT Add-ons and Tools for a Complete Starter Kit
To achieve professional, long-lasting results, your starter kit needs to expand beyond the dye bottle itself. Several supplementary products and physical tools are essential for preparing your fabric, locking in the color, and keeping your workspace and body safe from stains.
RIT Color Remover is a non-chlorine, reductive bleach that is crucial if you plan to dye a dark or brightly colored garment to a lighter, different shade. Because fabric dye is translucent (behaving like watercolor paint rather than opaque acrylic paint), applying a new color over an existing one will result in a blend of the two. For example, dyeing a blue shirt yellow will yield green. RIT Color Remover strips the existing factory dyes and stains from natural fabrics, leaving a neutral, off-white base that is ready to absorb the new color perfectly. Note, however, that it has limited effectiveness on certain synthetic disperse dyes.
RIT Color Stay Dye Fixative is an absolute necessity if you are working with natural cellulosic fibers like cotton, linen, rayon, or ramie. This concentrated liquid acts as a cationic polymer that bonds to the anionic dye molecules inside the fabric. Applying the fixative immediately after the dyeing process—before you run the garment through its final machine wash—locks the pigment into the fiber matrix. This simple step reduces color bleeding, prevents the dye from transferring to other clothes in the wash, and keeps your customized items vibrant for years.
In addition to commercial chemical products, you will need standard household dye assistants to catalyze the bonding process. For natural fibers like cotton and linen, adding plain table salt (sodium chloride) to the dye bath helps drive the dye molecules out of the water and into the fabric. For protein fibers like silk and wool, or synthetics like nylon, adding white vinegar (acetic acid) lowers the pH of the bath, which activates the dye-receptive sites on those specific fibers. Always check the instructions on your specific RIT package to verify the correct salt or vinegar ratios for your water volume.
Finally, you must assemble a set of dedicated, non-consumable tools. Because fabric dyes and chemical fixatives are not food-safe, you must never reuse any dyeing equipment for cooking or food preparation. Ensure your starter kit includes:
- Heavy-duty rubber gloves: Long gloves protect your hands and forearms from chemical exposure, hot water, and stubborn skin staining.
- Stainless steel or heavy-duty plastic buckets: Ensure the container is large enough for the fabric to move completely freely. Avoid porous materials like cheap, thin plastics or unglazed ceramics, which will absorb the dye permanently.
- Dedicated stirring utensils: A long-handled stainless steel spoon or a heavy-duty plastic paddle that is reserved exclusively for craft projects.
What to Buy: Recommended RIT Starter Bundles by Project
To make your first purchase as straightforward as possible, you should tailor your shopping cart to the specific project you want to tackle. Below are three scenario-based product bundles designed to ensure you buy exactly what you need without overspending.
Scenario 1: Refreshing Faded Cotton Clothes
If you want to restore a faded black cotton jacket, a pair of worn-out navy chinos, or a set of gray cotton towels, buy this bundle:
- Dye: RIT All-Purpose Liquid Dye (1-2 bottles of your target dark shade).
- Fixative: RIT Color Stay Dye Fixative (1 bottle).
- Prep: RIT Color Remover (1 box, optional but recommended if the garment has uneven bleach spots or sweat stains).
- Method: The standard hot-water sink, laundry tub, or large plastic bucket method. This project is highly accessible because it only requires hot tap water (around 60°C) to achieve excellent results.
Scenario 2: Dyeing Polyester Activewear or Swimwear
If you want to change the color of a polyester gym shirt, nylon-blend leggings, or a synthetic swimsuit, buy this bundle:
- Dye: RIT DyeMore Liquid Dye (1-2 bottles in your chosen color).
- Tools: A dedicated, inexpensive stainless steel pot (large enough for the garment to submerge and circulate freely) and a dedicated stirring spoon.
- Method: The stove-top method is mandatory here. Because synthetic fibers require sustained, near-boiling temperatures (93°C to 100°C) to open up and accept the disperse dye, you must perform the entire process in a pot simmering on a stove for at least 30 minutes.
Scenario 3: Beginner Tie-Dye or Craft Projects
If you want to create colorful spiral patterns on cotton t-shirts, canvas tote bags, or small fabric crafts, buy this bundle:
- Dye: A multi-pack of RIT All-Purpose Liquid dyes (typically containing primary colors like Red, Blue, and Yellow for custom mixing).
- Fixative: RIT Color Stay Dye Fixative (1 bottle, preferably transferred to a spray bottle for easy application).
- Accessories: Empty plastic squeeze bottles with fine-tip nozzles, heavy-duty rubber bands, plastic drop cloths to protect your table, and sealable plastic bags.
- Method: Direct squeeze-bottle application on damp, bound fabric, followed by sealing the damp item in a plastic bag to cure for 24 hours before rinsing.
When sourcing these items in Singapore, you can find a reliable selection of RIT products at specialized local art and craft supply stores (such as Art Friend or Spotlight), as well as through reputable online craft retailers. Expect to spend approximately S$10 to S$15 per individual bottle of liquid dye, with fixatives and color removers priced similarly. Before checking out, always double-check the physical product label to ensure you have selected the correct formula (All-Purpose vs. DyeMore) and format (liquid vs. powder) for your intended project.
Crucial Prep and Dyeing Rules to Protect Your First Project
Achieving a flawless, professional-looking dye job requires adhering to several fundamental rules of fabric preparation and dye chemistry. Skipping these steps is the primary cause of uneven color, splotches, and ruined garments.
First, you must wash your fabric before dyeing it, even if the item is brand new. Fabric manufacturers routinely coat new garments in chemical finishes, starches, and “sizing” to keep them looking crisp and wrinkle-free on retail hangers. These invisible coatings act as a barrier that prevents dye molecules from penetrating the fibers, resulting in patchy, uneven color. Wash the item in warm water with standard laundry detergent, but absolutely avoid using fabric softeners or dryer sheets, which leave a stubborn silicone residue that repels water and dye.
Second, you must manage your expectations when dealing with fabric blends. If you dye a 50/50 cotton-polyester blend using RIT All-Purpose dye, only the 50% cotton portion will absorb the pigment. The 50% polyester portion will remain its original color, yielding a significantly lighter, heathered, or denim-like appearance. If your goal is a solid, deep, uniform color on any garment containing more than 35% synthetic fibers, you must use RIT DyeMore and commit to the stove-top method.
Third, respect the strict temperature requirements of the dye line you are using. Dyeing is a thermal process; heat is the catalyst that opens up the microscopic pores of the fibers to let the dye molecules in. RIT All-Purpose dye requires hot water of at least 60°C, which can easily be drawn from a hot tap or a boiled kettle. RIT DyeMore, however, requires a constant simmer of 93°C to 100°C throughout the entire dyeing process. Never attempt to use a microwave or improper heating methods to warm your dye bath, as this can lead to uneven heating, melted synthetic fibers, or dangerous splashing.
Finally, understand that dye is translucent and will not act like opaque paint to cover up existing stains. If your garment has bleach spots, grease stains, or ink marks, the dye will simply color over them, leaving them visible as darker or lighter variations of the new shade. To address this, always use RIT Color Remover first to strip the fabric’s existing color as evenly as possible, or select a very dark dye shade, such as dark charcoal or black, to help mask minor surface imperfections.
Frequently Asked Questions (FAQ)
Can I use RIT dye on shoes or hard plastics?
Yes, but results are highly variable and depend entirely on the material. RIT All-Purpose dye can successfully color certain nylon-based shoes, canvas sneakers, and porous 3D-printed plastics. However, synthetic leathers, vinyl, rubber soles, and glossy or coated plastics will not absorb the dye because their surfaces are completely sealed. Always check the material composition of your item first, and perform a small spot test on an inconspicuous area, such as the inside of a shoe tongue, before submerging the entire item.
How much dye do I need for one standard t-shirt?
As a general rule of thumb, one standard 8-ounce (approx. 236 ml) bottle of RIT Liquid Dye or one box of Powder Dye is formulated to dye up to 1 pound (approximately 500 grams) of dry fabric. This is roughly equivalent to two large adult t-shirts or one pair of jeans. For lighter pastel shades, you will only need a fraction of the bottle, while deep, saturated colors like black or dark green may require doubling the amount of dye. Always weigh your dry garment on a kitchen scale and consult the packaging instructions to calculate the exact dye-to-water ratio.
Will RIT dye wash out in the washing machine later?
Properly dyed and set garments are washfast, but minor color bleeding is normal during the first few launderings. To maximize color longevity, always use RIT Color Stay Dye Fixative immediately after dyeing natural fabrics. For the first few laundry cycles, wash your newly dyed items separately in cold water with a mild detergent to prevent residual pigment from transferring to other clothes. Over time, you can wash them with like colors, but avoiding harsh bleach and hot water washes will preserve the color’s original vibrancy.
Community discussion
Share your experience or ask a question. Comments are reviewed before publication.