
Choosing your very first set of embroidery needles can feel surprisingly overwhelming. When you look at the sewing notions wall in a craft shop, you are confronted with dozens of different packages, obscure terms like “Crewel” or “Sharps,” and a confusing numbering system where larger numbers actually represent smaller needles. If you are starting your embroidery journey with Pony, a highly reliable and widely available brand, you do not need to buy every single size they manufacture.
For a beginner, the most versatile purchase is a mixed pack of Pony Crewel (Embroidery) needles in sizes 3 to 9, or a dedicated pack of size 7 needles. Sizes 5 and 7 are the absolute “sweet spots” for standard hand embroidery, as they perfectly accommodate two to four strands of standard six-strand cotton embroidery floss. Size 3 is ideal when you want to work with thicker threads like perle cotton or wool. When shopping, always ensure you select packages explicitly labeled “Crewel” or “Embroidery” rather than “Sharps” or “Betweens.” This ensures the needle eyes are long and wide enough to thread multi-stranded floss without causing immense frustration, thread fraying, or snapped fibers.
Understanding Pony Embroidery Needle Sizing
To make smart purchasing decisions, you must first master the counterintuitive numbering system used by needle manufacturers worldwide, including Pony. In the world of hand-sewing needles, the higher the size number, the finer and shorter the needle. Conversely, a lower size number indicates a thicker, longer needle. For example, a Pony size 3 needle is robust, thick, and long, whereas a Pony size 10 needle is incredibly thin, short, and delicate.
Products mentioned in this guide
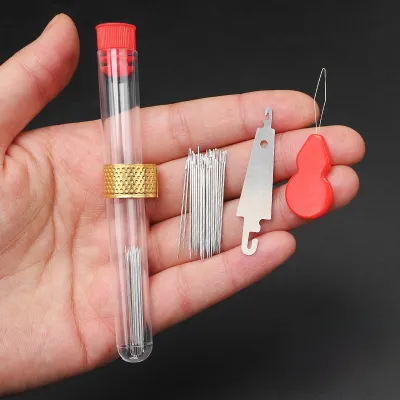
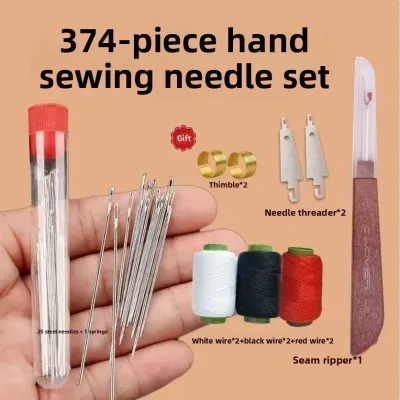
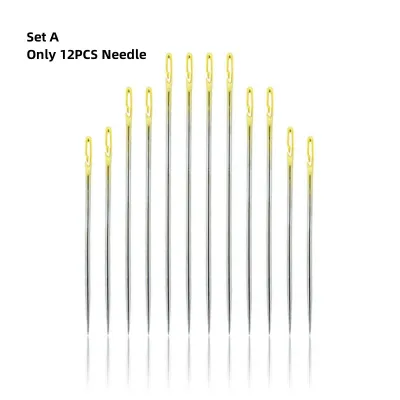
Prices are valid at publication and may change. Please refer to the product page for the latest price.
Beyond the numbers, you must understand the anatomical differences between needle types. Beginners often make the mistake of buying standard hand-sewing needles, commonly sold as “Sharps.” While Sharps are excellent for basic mending, they feature a small, round eye designed for a single strand of thin sewing thread.
In contrast, Pony Crewel needles—the traditional term for embroidery needles—are designed with an elongated, oval eye. This elongated eye is specifically engineered to allow multiple strands of cotton floss, metallic threads, or wool to pass through smoothly. The needle shaft remains thin, while the sharp point easily pierces woven fabrics. Using a Crewel needle prevents your embroidery thread from bunching up at the eye, reducing friction and wear as you pull the thread through your fabric.
The Most Versatile Pony Needle Sizes for Beginners
Instead of buying individual packs of every size, focus your budget on the specific range that covers ninety percent of beginner embroidery projects. This targeted approach saves money and prevents your sewing kit from becoming cluttered with tools you are not yet ready to use.

Sizes 3 to 5: For Thicker Threads and Bold Stitches
Pony needles in sizes 3, 4, and 5 are the heavyweights of your beginner kit. These needles are thicker and longer, making them incredibly sturdy and easy to hold if you are still developing your hand coordination and grip.
These sizes are best suited for:
- Thick threads: Size 5 or 8 perle cotton, tapestry wool, crewel yarn, or using all six strands of standard cotton embroidery floss simultaneously.
- Heavy fabrics: Sturdy, loosely woven fabrics such as heavy linen, cotton canvas, denim, or monk's cloth.
- Textured stitches: Creating dimensional, bold stitches like French knots, bullion knots, thick satin fills, and heavy chain stitches.
Because these needles have a wider shaft, they naturally clear a larger pathway through your fabric. This structural design is crucial when using thick threads; it prevents the bulky fibers from rubbing excessively against the fabric weave, which would otherwise cause the thread to pill, thin out, or lose its sheen.
Sizes 7 to 9: For Standard Floss and Detailed Work
This range represents the absolute workhorse category of hand embroidery. If you are working on a standard commercial embroidery pattern or a modern pre-printed kit, you will spend almost all of your time using these sizes.
These sizes are best suited for:
- Standard floss counts: One, two, or three strands of six-strand cotton embroidery floss.
- Medium-weight fabrics: Standard quilting cotton, calico, linen blends, and lightweight linen.
- Delicate details: Fine outlining, intricate stem stitches, delicate split stitches, and precise leaf fills.
Size 7 is widely considered the ultimate starting needle for any beginner. It is thin enough to slide effortlessly through standard quilting cotton without leaving gaping holes, yet its eye is large enough to thread two or three strands of floss without needing a wire needle threader. Size 9 is slightly finer and shorter, making it your go-to tool when you want to execute highly detailed work, such as fine facial features or tiny floral elements, using a single strand of thread.
Why You Can Skip the Extremes (Sizes 1 and 10+)
When browsing Pony’s catalog, you will see needles as large as size 1 and as small as size 12. As a beginner, you should actively avoid these extremes to prevent unnecessary frustration.
Pony sizes 1 and 2 are exceptionally thick. They are designed for heavy-duty upholstery work, thick yarn, or stitching through leather. If you attempt to use a size 1 needle on standard embroidery fabrics like calico or linen, the thick shaft will force the fabric threads permanently apart, leaving unsightly, irreversible holes in your background fabric that your embroidery thread cannot fill.
On the other end of the spectrum, sizes 10, 11, and 12 are microscopic. These needles are designed for advanced bead embroidery, miniature silk shading, or couture tambour work. For a beginner, simply threading a size 10 needle can take ten minutes of squinting and straining. Furthermore, these ultra-fine needles are highly flexible; they bend easily under inexperienced hand pressure and can snap instantly if you try to push them through a slightly dense fabric weave or a section of fabric that already has several layers of stitches.
How to Match Your Needle Size to Thread and Fabric
While guidelines and size charts are incredibly helpful, the perfect combination of needle, thread, and fabric is something you must verify physically before starting any major project. The interaction between these three elements determines how smooth your stitching experience will be.
To find the perfect match, you should perform a simple, observable test known as the “Pull Test” or “Pop Test”:
- Secure a scrap piece of your project fabric tightly in your embroidery hoop.
- Cut a standard length of your chosen embroidery thread and separate the exact number of strands required by your pattern.
- Thread your Pony needle and tie a temporary knot at the long end of the thread.
- Pierce the fabric from the back and pull the needle and thread completely through to the front.
As you perform this test, pay close attention to the physical sensations and sounds. The needle should glide through the fabric with a very soft, satisfying “pop” as it parts the weave. It should not require significant physical force or tugging. Once the needle has passed through, the thread should follow smoothly behind it without squeaking, bunching up at the eye, or requiring a hard pull.
If you have to tug hard or if your thread squeaks and frays, your needle is too small. The needle’s shaft is not thick enough to open a wide enough channel in the fabric weave, causing the thread to rub violently against the fabric fibers. This friction will quickly destroy your thread’s luster and cause it to snap.
If the needle slides through with zero resistance but leaves a visible, open hole in the fabric around the thread, your needle is too large. The needle has forced a gap in the fabric weave that your thin thread cannot fill, resulting in loose, sloppy-looking stitches.
Always check your thread manufacturer’s label or your pattern instructions for recommended needle sizes. However, remember that fabric weave density varies wildly. A high-thread-count cotton fabric will require a slightly finer needle (like a size 8 or 9) than a loose, rustic linen fabric, even if you are using the exact same number of thread strands. Keeping a mixed pack of Pony needles on hand allows you to run this quick test and adjust your tools instantly.
What to Check Before Buying Pony Needles in Singapore
When shopping for Pony sewing needles in Singapore, whether you are visiting physical craft havens in Chinatown, large haberdashery chains, or browsing local ecommerce platforms, there are several key factors to verify to ensure you get high-quality, authentic tools.
First, always inspect the packaging for authenticity. Authentic Pony needles are packaged in high-quality, rigid paper-and-plastic blister cards featuring the iconic, clean Pony logo (the silhouette of a running horse). The packaging will clearly state the needle type—look specifically for “Crewel” or “Embroidery” in clear English lettering. Avoid packs that only say “Sharps,” “Betweens,” or “Tapestry” (unless you are doing cross-stitch, which requires blunt-tipped tapestry needles). Pony packaging is often color-coded, making it easier to identify the correct needle family once you become familiar with their product lines.
Second, consider Singapore’s tropical climate. Our high relative humidity is a constant threat to metal sewing tools. High humidity can cause microscopic rust, tarnish, or pitting on steel needles if they are not stored or packaged correctly. When buying online, read customer reviews carefully. Look for sellers who guarantee rust-free arrivals and who ship their needles in rigid, moisture-resistant packaging (such as bubble mailers or cardboard boxes) rather than thin plastic sleeves. A bent needle is completely unusable, and even a tiny amount of microscopic rust on the shaft will snag your fabric and ruin your silk or cotton threads.
In terms of pricing, Pony is celebrated for being an exceptionally budget-friendly, high-quality brand. In Singapore, a standard mixed pack of 16 Pony Crewel needles (typically containing sizes 3 to 9) should cost between S$2.50 and S$4.50. If you encounter prices significantly lower than this range, double-check the authenticity of the seller. If the price is substantially higher, you are likely paying an unnecessary markup.
Once you bring your needles home, store them in a dry place. Keeping a small packet of silica gel inside your embroidery accessory box or sewing basket is an excellent, low-cost way to protect your Pony needles from Singapore’s humid air, ensuring they remain smooth, sharp, and rust-free for years to come.
Frequently Asked Questions (FAQ)
Can I use standard Pony sewing needles (Sharps) for embroidery?
While you can physically force embroidery floss through a standard Pony sewing needle (Sharp) in an emergency, it is highly discouraged. Sharps are designed with small, round eyes meant for thin, single-strand sewing thread. Attempting to squeeze multiple strands of embroidery floss through this tiny opening will compress the fibers, causing the thread to shred, fray, and snap as you work. Furthermore, the small eye does not create a wide enough channel in your fabric, resulting in high friction that will quickly ruin your embroidery floss. Pony Crewel needles feature elongated eyes designed specifically to let embroidery floss slide freely.
How often should a beginner replace their embroidery needle?
Embroidery needles are consumable tools that wear out over time. You should replace your Pony needle as soon as you notice it dragging through the fabric, snagging fibers, or if your thread begins to shred frequently (which indicates a microscopic burr has formed inside the needle’s eye). As a general rule of thumb, a needle should be replaced after about 10 to 12 hours of active stitching, or after completing one large, complex project. Additionally, if you accidentally drop your needle onto Singapore’s common hard ceramic or homogeneous tile floors, replace it immediately. The impact can easily bend or blunt the microscopic tip, which will permanently damage your embroidery fabric if you continue stitching with it.
Community discussion
Share your experience or ask a question. Comments are reviewed before publication.