
Choosing the right top coat is the defining final step of any scale model project. For beginners, navigating the Mr. Hobby lineup can feel overwhelming due to the variety of finishes and chemical formulas available. The ideal choice depends entirely on your model type and the specific paint layers you have already applied. Generally, a matte finish is best for military models and realistic sci-fi kits, a gloss finish is essential for automotive models and decal preparation, and a semi-gloss finish offers a versatile middle ground for general-purpose projects. By understanding how these finishes interact with light, paint, and decals, you can confidently select the perfect variant to protect and elevate your first build.
Understanding Gloss, Semi-Gloss, and Matte Finishes
To make an informed decision, you must first understand how each finish type alters the appearance and physical texture of your model. A gloss top coat creates a perfectly flat, highly reflective surface. When light hits a gloss finish, it reflects at a uniform angle—a phenomenon known as specular reflection. This reflection enhances the depth and saturation of the underlying paint, making colors appear richer and darker. Physically, a gloss surface is incredibly smooth to the touch, which has practical benefits for subsequent modeling steps.
In contrast, a matte (or flat) top coat contains microscopic flattening agents, typically silica particles, that rise to the surface as the clear coat dries. These particles create a microscopically rough, uneven texture. When light strikes this uneven surface, it scatters in multiple directions, resulting in diffuse reflection. This scattering eliminates glare, softens color transitions, and gives the model a realistic, non-reflective appearance. However, this microscopic roughness makes applying decals directly onto a matte surface risky; air can get trapped in the tiny recesses beneath the decal film, causing an unsightly reflective sheen known as “silvering.”
Products mentioned in this guide
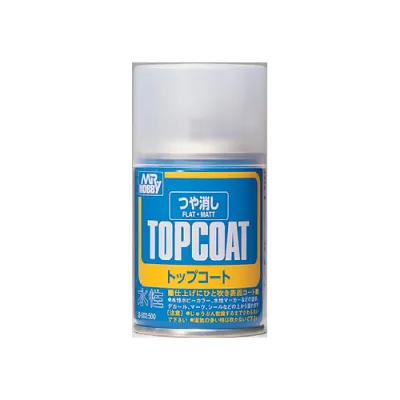
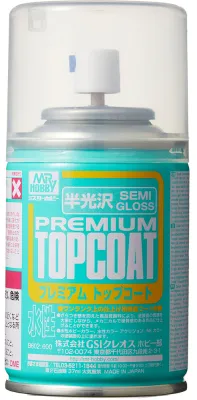
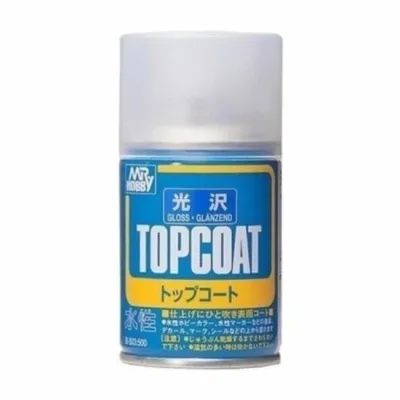
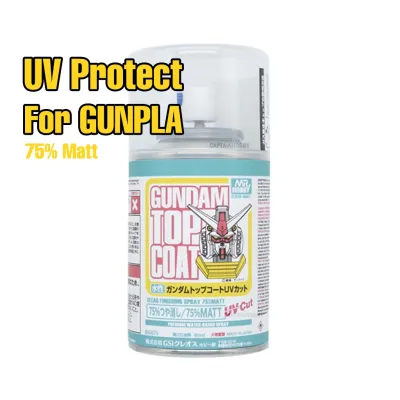
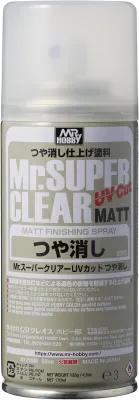
Prices are valid at publication and may change. Please refer to the product page for the latest price.
A semi-gloss (sometimes called satin) finish sits precisely between these two extremes. It contains a moderate concentration of flattening agents, allowing it to diffuse some light while retaining a soft, subtle sheen. This finish mimics the natural look of real-world materials that are neither perfectly polished nor completely dry, such as treated leather, scale aircraft skin, or clean industrial machinery.
Understanding these physical properties helps you plan your build sequence. For example, experienced modelers often apply a temporary gloss coat to seal their paint and provide a smooth surface for decals and panel lining washes. Once those details are complete, they apply a final matte or semi-gloss coat to achieve the desired realistic texture.
Matching the Top Coat to Your Model Genre
Different modeling genres demand distinct visual characteristics to look convincing at a reduced scale. Selecting the wrong finish can instantly break the illusion of realism, turning a meticulously painted miniature into a toy-like object.

Sci-Fi and Mecha Kits Science fiction subjects, particularly Gundam models (Gunpla) and other armored mecha, offer significant creative freedom, but they benefit greatly from strategic top coating. If you are aiming for an anime-accurate, clean look, a semi-gloss or matte finish is highly effective. Matte finishes soften the plastic look of unpainted kits, emphasize molded panel lines, and make the armor plates look heavy and metallic rather than cheap and plastic. However, if your mecha features metallic or candy-coated paint jobs, a matte coat will dull the metallic flake and ruin the shine. In these cases, a gloss or semi-gloss coat is necessary to preserve the luster of the metallic pigments while protecting the surface.
Military Vehicles and Aircraft For historical military subjects like tanks, armored cars, and warplanes, a matte finish is almost always the standard choice. Real military equipment is painted with non-reflective, camouflage coatings to avoid detection. A high-gloss tank would look completely out of place. Furthermore, military modeling heavily relies on weathering techniques, such as mud splatters, rust streaks, and oil washes. A matte surface provides the necessary physical tooth for weathering pigments and pastel dust to adhere to. If you are building a modern jet aircraft, a semi-gloss finish is often more appropriate, as it replicates the slight sheen of clean, high-tech metal panels without looking overly shiny.
Automotive Models Cars and motorcycles are the primary domain of the gloss top coat. Whether you are building a classic sports car or a modern racing vehicle, the goal is typically to replicate a flawless, deep, mirror-like factory paint job. Achieving this look requires multiple layers of gloss top coat, which are then wet-sanded and polished with fine compounds. A matte or semi-gloss finish on a car body is generally reserved for specific custom builds, carbon fiber parts, or interior components like vinyl seats and dashboards.
Figures and Dioramas Scale figures, whether historical soldiers or anime characters, require careful finish management. Human skin, organic fabrics, and natural elements like soil, wood, and stone do not have a high-gloss shine. Applying a matte top coat to these elements is crucial for removing the artificial glare of plastic or cured paint, making skin tones look soft and natural. Conversely, small details on a figure—such as metallic armor buckles, wet mud on boots, or realistic eyes—can be selectively hand-brushed with a gloss coat after the main matte coat has dried to create a striking contrast.
Spray Cans Versus Bottled Paints for Beginners
Once you have decided on the finish type, you must choose the application format. Mr. Hobby offers top coats in both convenient aerosol spray cans and bottled liquids designed for airbrushing or hand-brushing.
Aerosol Spray Cans For absolute beginners, aerosol spray cans are the most accessible entry point. They require no expensive equipment, no mixing or thinning, and zero cleanup. You simply shake the can and spray. Mr. Hobby produces two main lines of spray cans: the aqueous-based “Mr. Top Coat” and the solvent-based “Mr. Super Clear.” The aqueous version is highly recommended for beginners because its mild formula is extremely forgiving and highly unlikely to react with or melt underlying paint layers, including acrylics and decals. The primary trade-offs of spray cans are a lack of fine flow control, a wider spray pattern that can lead to paint wastage, and a higher long-term cost per milliliter compared to bottled paint.
Bottled Paints for Airbrushing If you already own or are willing to invest in an airbrush and compressor setup, bottled top coats offer unparalleled precision and cost efficiency. Airbrushing allows you to control the air pressure and paint flow, enabling you to apply incredibly thin, even coats without the risk of pooling or running. Bottled variants, such as “Mr. Color GX” clear coats, are highly concentrated and must be mixed with compatible thinners before use. While this method offers the best professional results, the initial equipment cost, the learning curve of mixing ratios, and the mandatory cleanup process make it a more complex path for an absolute beginner’s very first project.
Brush-On Application Hand-brushing a clear top coat over an entire model is generally not recommended. Because clear coats need to level out smoothly to form a uniform barrier, applying them with a traditional paintbrush often introduces visible brush marks, uneven thickness, and bubbles. Furthermore, the physical friction of a brush can easily reactivate and smear underlying acrylic paints or tear delicate decals. Hand-brushing should be strictly limited to small, localized touch-ups or adding selective gloss details to specific parts of a model.
Essential Application and Safety Checks
Achieving a flawless top coat finish requires careful preparation, environmental awareness, and strict adherence to safety protocols. Clear coats are highly sensitive to external conditions, and a single mistake can ruin hours of painting work.
Surface Preparation Before spraying, ensure your model is completely free of dust, fingerprints, and oils from your hands. Wipe the surface gently with a tack cloth or a microfiber cloth. If you have applied decals, ensure they have cured completely—typically at least 24 hours—and that all setting solutions have been thoroughly wiped away with water. Any moisture or residue trapped under the top coat can cause permanent cloudiness or bubbling.
Environmental Conditions The environment in which you spray plays a massive role in the final result. High humidity is the single greatest enemy of clear top coats, particularly in tropical climates like Singapore. When humidity levels are high (typically above 70%), the rapidly evaporating solvents in the spray can cool the surrounding air, causing moisture to condense into the wet paint layer. This trapped moisture cures inside the paint, resulting in a hazy, white, ruined finish known as “frosting” or “blushing.” Always check the local weather or use a hygrometer; if the humidity is too high, wait for a drier day or spray in an air-conditioned room with proper ventilation.
Ventilation and Personal Safety Safety must be your top priority when working with hobby paints and clear coats. Solvent-based top coats, such as lacquer-based formulas, release volatile organic compounds (VOCs) that are harmful to inhale. Always spray in a well-ventilated area, preferably outdoors or using a dedicated hobby spray booth that vents fumes outside. Wear a properly fitted respirator mask equipped with organic vapor cartridges. Even water-based aqueous top coats produce fine airborne particulates when sprayed, so a basic particulate mask and safety glasses are highly recommended to protect your lungs and eyes.
Compatibility Testing Different paint chemistries do not always mix well. As a general rule, a stronger solvent-based paint (like lacquer) applied over a weaker paint (like acrylic or enamel) can dissolve and ruin the base layer. To prevent this, always perform a compatibility check. Spray a small, hidden area of your model or a painted piece of scrap plastic first. If you observe any bubbling, cracking, or color bleeding, pause immediately and consult the manufacturer’s compatibility charts to find a safer combination.
Frequently Asked Questions (FAQ)
Can I apply a matte top coat over a gloss base?
Yes, this is actually a highly recommended professional technique. Applying a gloss coat first provides a perfectly smooth surface that allows decals to adhere flawlessly without trapping air bubbles. Once your decals are sealed and dry, you can apply a matte top coat over the entire model. The matte coat will completely eliminate the gloss shine, leaving you with a realistic, flat finish while keeping your decals perfectly protected and seamlessly integrated into the surface.
How do I fix a frosted or cloudy top coat finish?
If your top coat turns cloudy due to high humidity, do not panic. If the frosting is mild, you can often resolve it by applying another very light, wet coat of the same clear paint on a dry day; the fresh solvents can sometimes re-dissolve the surface and allow the trapped moisture to escape. For moderate frosting, gently polishing the affected area with an ultra-fine polishing compound or a high-grit sanding sponge can restore clarity. If the cloudiness is severe and deep within the paint layers, you may need to strip the paint back to the bare plastic and start over.
Do I need to thin Mr. Hobby bottled top coats?
Yes, bottled Mr. Hobby top coats are highly concentrated and must be thinned before they can be sprayed through an airbrush. If you attempt to spray them straight from the bottle, they will clog your airbrush or dry mid-air, creating a rough, sandy texture on your model. Always check the manufacturer’s label for the recommended thinning ratio, which typically ranges from 1:1 to 1:2 (paint to thinner). Be sure to use the specific proprietary thinner recommended for that paint line, as incompatible thinners can cause the paint to curdle and ruin your equipment.
Community discussion
Share your experience or ask a question. Comments are reviewed before publication.