
Choosing the right closure is a pivotal decision in bag making, directly affecting both the functionality and the finished look of your project. To select the ideal magnet closure for bag designs, you must balance three critical variables: your fabric’s weight, whether the lining is already assembled, and the mechanical stress the opening will endure. Selecting the wrong hardware can lead to misaligned flaps, sagging fabric, or even permanent tears in your material.
By evaluating your materials and construction sequence beforehand, you can identify the perfect hardware match. This guide breaks down the structural differences, installation requirements, and optimal use cases for prong, sew-in, and snap-in magnetic closures so your handmade bags look polished and function beautifully.
Quick Diagnostic Guide: Matching Closure to Your Project
Before purchasing your hardware, use this quick-reference matrix to align your bag’s fabric and construction stage with the most compatible magnetic closure type.
Products mentioned in this guide
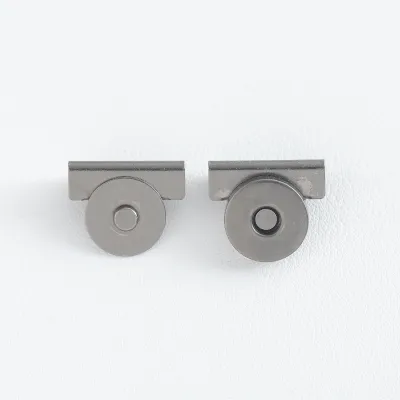
![[SG FREE ] 10x/5Pairs Magnetic Clasp Purse Snaps Closures Sewing Button Bag 14/18mm](https://img.lazcdn.com/g/p/1ce0b4e4dfe29fb0616fc776e9673e41.jpg_400x400q80.jpg_.webp)
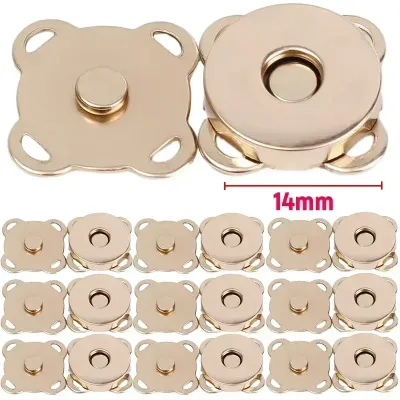
![[SG FREE ] A pair Magnet Buttons Sewing Supplies Magnetic Clothing Invisible Magnet Buttons Metal Buttons Handmade DIY](https://img.lazcdn.com/g/p/6ab667455ee96e38a06ee751ab9ab27d.jpg_400x400q80.jpg_.webp)
Prices are valid at publication and may change. Please refer to the product page for the latest price.
| Bag Material / Scenario | Lining Status | Fabric Structure & Weight | Recommended Closure Type | Primary Selection Reason |
|---|---|---|---|---|
| Heavy leather, cork, thick canvas | Open (unfinished) | Highly structured, rigid | Prong Closure | Exceptional mechanical hold; prongs hide behind lining. |
| Silk, satin, delicate linen | Open or Finished | Soft, lightweight, fragile | Sew-In (Vinyl Pocket) | No fabric punctures; completely invisible and gentle on fibers. |
| Quilting cotton, light denim | Open (unfinished) | Medium structure (interfaced) | Prong or Snap-In | Fast installation; secure hold when backed with stabilizer. |
| Bulky wool, faux fur, thick fleece | Open or Finished | Soft, thick, high-loft | Sew-In (Metal Rim) | Prongs are too short for high-loft fabric; sew-in rings bypass thickness. |
| Already finished bag, repairs | Finished (closed) | Any weight, no internal access | Snap-In or External Sew-In | Can be installed without opening the lining seams. |
When selecting your closure, fabric thickness and structural support are the primary deciding factors. If your fabric cannot support the weight of heavy metal hardware, or if your lining is already stitched shut, you must rule out certain options immediately to protect your project from damage.
Step 1: Assess Your Bag Material and Design Constraints
Every successful bag project begins with a realistic assessment of your materials. Before installing any hardware, measure the compressed thickness of your fabric layers. Take a scrap of your exterior fabric, lining, and any planned interfacings, stack them together, and press them firmly between your fingers. If this combined thickness exceeds 2.5 millimetres, standard prong closures may not have enough post length to fold over securely, making sew-in or snap-in varieties a more reliable choice.

Structural support is another critical element. Unstructured fabrics like quilting cotton or linen will sag under the weight of a heavy metal magnet. To prevent this, plan to use stabilizers or interfacing. Woven fusible interfacing adds body to the fabric, while lofted stabilizers like fusible fleece or stiff sew-in foam provide the necessary rigidity to support heavier hardware.
Next, identify the stress points on your bag design. The constant pulling force required to separate a strong magnetic closure concentrates mechanical stress on a very small area of fabric. If the closure is placed on a single layer of fabric without reinforcement, the fibers will eventually fatigue, stretch, and tear. You must design your bag so that this pulling force is distributed across a wider surface area, typically by placing the closure on a reinforced flap or a stabilized pocket wall.
Lining considerations will dictate your installation sequence. If you are working on an open-lining project, you have full access to the wrong side of both the exterior fabric and the lining. This allows you to install prong closures, hiding the metal washers and bent prongs completely inside the finished bag. If your lining is already attached or if you are repairing an existing bag, you must use sew-in or snap-in closures that do not require access to the internal raw seams.
Finally, perform a hardware clearance check. Ensure your chosen closure sits at least 1.5 centimetres away from any seam lines, zipper teeth, or gussets. Placing a metal magnet too close to a seam allowance makes it incredibly difficult for your sewing machine foot to pass by, resulting in skipped stitches, uneven seams, or a broken needle.
Prong Magnet Closure for Bag Projects: Best for Structured Fabrics
Prong magnetic closures, also known as post-style snaps, are the industry standard for commercial and handmade bags alike. The mechanism consists of two main parts: a male piece with a raised center stud and a female piece with a matching depression. Each piece features two flat metal prongs extending from the back. To secure the closure, these prongs are inserted through small slits in the fabric and bent flat over a metal backing washer on the reverse side.
These closures are ideal for medium-weight to heavy-weight materials that can handle mechanical manipulation. Structured leather, cork, vinyl, heavy canvas, and denim are excellent candidates. Because these materials have tight, dense weaves or solid structures, they can hold the metal prongs firmly in place without the risk of the hardware shifting or rotating over time.
- Pros: They offer an exceptionally strong, permanent hold that will not loosen even with heavy daily use. Once installed, only the smooth, polished metal face of the magnet is visible on the bag's interior flap, providing a clean, high-end aesthetic. They are also highly secure against shear forces when the bag is carried by its handles.
- Cons: Installation requires you to cut small slits directly into your fabric using a seam ripper, buttonhole chisel, or sharp embroidery scissors. If you mismeasure or cut the slits too wide, the damage to your fabric is permanent and cannot be easily repaired. Additionally, they are entirely unsuitable for delicate, sheer, or loosely woven fabrics, as the metal prongs will quickly shred the fibers under tension.
Sew-In Magnetic Closures: Ideal for Delicate, Thick, or Finished Linings
Sew-in magnetic closures offer a non-destructive alternative that prioritizes fabric safety and design flexibility. These magnets are typically packaged in one of two ways: encased in a thin, square, transparent PVC or vinyl envelope, or set into a metal rim featuring pre-drilled sewing holes around the perimeter. Instead of puncturing the fabric, these closures are stitched directly onto the material.
This style is the premier choice for delicate materials such as silk, satin, velvet, and lightweight quilting cotton, where cutting slits would cause immediate fraying. They are also highly effective for exceptionally thick, bulky materials like faux fur, shearling, or heavy wool. Because these bulky fabrics are too thick for standard metal prongs to penetrate, sewing the closure directly to the surface or burying it within the seam allowance bypasses the thickness limitation entirely.
- Pros: There is absolutely no cutting required, making this an incredibly forgiving option for beginners. If you sew the magnet in the wrong position, you can simply unpick the stitches, realign the hardware, and sew it down again without leaving permanent holes. When using the vinyl-encased variety, you can sew the magnet between your exterior fabric and lining, making the closure completely invisible from both the outside and inside of the bag.
- Cons: Stitched closures can be slightly bulkier than prong types, especially if you use the vinyl-envelope style. If you choose the metal-rim style, the stitching lines will be visible on the surface of your fabric, which may disrupt a clean, minimalist design. They also require hand-sewing or careful machine-stitching with a zipper foot to get close to the magnetic core, which takes more time than snapping metal prongs together.
Snap-In Magnetic Closures: Perfect for Thin Fabrics and Quick Installs
Snap-In magnetic closures, often referred to as compression snaps or rivet-style magnets, rely on a friction-fit or screw-together mechanism. Instead of using bendable prongs, these closures feature a decorative front cap with a central post that snaps, screws, or twists directly into a matching backing plate on the opposite side of the fabric.
These closures are perfect for thin to medium-weight woven fabrics, linen, and projects where you want a fast, tool-based installation. They are highly popular for casual tote bags, lightweight backpacks, and pouches where a visible, industrial-style metal rivet matches the overall design aesthetic.
- Pros: They are incredibly fast and satisfying to install. Instead of cutting wide horizontal slits, you only need to punch a single, neat circular hole using a leather punch or a sharp awl. They provide a highly secure grip that compresses the fabric evenly between the front cap and backing plate, reducing the risk of the hardware spinning. Many varieties are also removable and reusable, allowing you to salvage the hardware if the bag eventually wears out.
- Cons: If installed on very thin, soft fabrics without proper stabilization, the hard metal plates can pinch and distort the fabric, creating a puckered look around the snap. The backing plate remains completely visible on the inside of the bag, which may not suit projects where you want a hidden, seamless lining. Additionally, they require specialized setting tools, such as a hand press, rivet setter, or anvil, to crimp the metal pieces together securely.
Installation Checks and Fabric Protection
To ensure your magnetic closure functions reliably without damaging your bag over time, you must prepare your fabric carefully before installation. Never skip the reinforcement step. Even if your bag is made of sturdy canvas, always fuse a square of heavy-duty stabilizer—such as Decovil Light, Peltex, or a scrap of firm vinyl—directly to the wrong side of the fabric where the magnet will sit. This reinforcing patch should be at least 1 centimetre larger on all sides than the backing washer or sew-in envelope, effectively distributing the pulling force across a wider surface area.
Before finalizing your installation, conduct a magnetic strength test. Temporarily place your chosen magnets on opposite sides of your fabric stack, including all interfacing layers. Gently pull them apart to feel the resistance. If the pull is too strong, it will warp or stretch your fabric every time you open the bag, indicating that you need to add a thicker stabilizer or switch to a weaker magnet. If the pull is too weak, the bag flap will slide open on its own, meaning you need to reduce the thickness of the fabric layers between the magnets.
Accurate alignment is crucial for a professional finish. Use a water-soluble fabric marker or tailor’s chalk to mark the exact center point of your closure on both the bag body and the flap. Fold the bag flap down naturally, simulating how it will sit when the bag is fully loaded with items. Mark the meeting point only after verifying that the flap sits square and even. A misaligned magnet will cause the entire bag to twist and pucker when closed.
Finally, understand your safety boundaries. If you notice your fabric beginning to fray, stretch, or show visible stress lines during your test fit, stop immediately. Do not attempt to force the installation. Switch to a sew-in closure to eliminate fabric punctures, add an extra layer of fusible interfacing to reinforce the area, or consult a professional bag-making guide to resolve the structural weakness before proceeding.
Frequently Asked Questions (FAQ)
Can I use a magnetic closure on a leather bag without damaging it?
Yes, you can use a magnetic closure on leather, but you must plan carefully because punctures in leather are permanent. If you choose a prong closure, always reinforce the back of the leather with a scrap of stiff leather or heavy stabilizer before bending the prongs. This prevents the metal washer from cutting into the leather fibers over time. For a completely non-destructive option, use a sew-in magnetic closure hidden behind a leather lining panel, which keeps the exterior leather surface pristine and free of metal hardware.
How do I stop the magnetic closure from tearing my thin fabric?
To prevent a magnetic closure from tearing thin fabrics like quilting cotton or linen, you must never install the hardware directly onto a single layer of raw fabric. Always apply a layer of woven fusible interfacing to the entire panel first. Then, fuse a 2.5-centimetre square of heavy-duty stabilizer, such as Peltex or firm canvas, directly behind the spot where the magnet will be installed. This structural patch absorbs the physical stress of opening and closing the bag, protecting the delicate outer fibers.
Are magnetic closures safe for bags used around electronics?
Standard magnetic bag closures are generally safe for modern smartphones, tablets, and solid-state drives, as these devices do not rely on magnetic storage media. However, caution is highly advised if your bag will be used to carry magnetic stripe cards, such as older credit cards, hotel key cards, or transit passes, as the magnetic field can demagnetize and ruin them. Additionally, keep strong magnets away from mechanical watches and sensitive medical devices, and consult your device manufacturer’s guidelines if you have specific safety concerns.
Community discussion
Share your experience or ask a question. Comments are reviewed before publication.