
Completing your first scale model or miniature is a major milestone, but applying the final protective layer can feel incredibly daunting. A hobby top coat—also known as a clear coat or varnish—serves as the ultimate shield for your hard work, protecting the paint from dust, skin oils, and UV damage while unifying the overall sheen of the project.
For a beginner, the ideal top coat depends heavily on the subject matter of your model and your chosen application method. However, because flat and satin finishes naturally diffuse light, they are generally the most forgiving for newcomers, as they easily mask minor brush strokes and surface imperfections. Gloss finishes, while visually striking and functionally essential for decal application, require meticulous surface preparation to avoid highlighting tiny flaws.
Understanding how these finishes behave, how they interact with your tools, and how local environmental factors influence their application will ensure your first project looks exactly as you envisioned.
Products mentioned in this guide
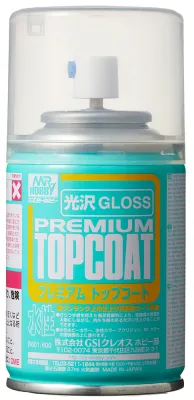
Prices are valid at publication and may change. Please refer to the product page for the latest price.
Understand How Gloss, Matte, and Satin Finishes Alter Your Model
To make an informed decision, you must first understand how different clear coats manipulate light and alter the visual characteristics of your paint job.
A gloss top coat creates a perfectly smooth, glass-like surface that reflects light directly. This direct reflection causes colors beneath the clear layer to appear deeper, richer, and more saturated. Black looks darker, metallic paints shine with realistic luster, and bright colors pop with high contrast. However, this high reflectivity is a double-edged sword: because light bounces cleanly off the surface, any microscopic scratch, dust speck, or uneven paint texture will be highly visible.
A matte top coat, conversely, dries with a microscopically rough texture that scatters light in all directions. Because the light is diffused rather than reflected directly, the surface appears completely flat and devoid of shine. This diffusion creates an organic, weathered appearance that is highly realistic for historical and military subjects. The trade-off is that matte coats tend to slightly desaturate colors, making very dark shades like deep black or dark blue look slightly lighter or dusty.
A satin top coat represents the middle ground, offering a subtle, semi-gloss sheen. It allows a small amount of light reflection while diffusing the rest, mimicking the natural texture of materials like human skin, leather, polished wood, or clean fabric. Satin finishes provide enough depth to keep colors vibrant without creating the harsh, distracting glare of a full gloss coat. For many beginners, satin is an excellent starting point because it balances the color-enhancing benefits of gloss with the forgiving nature of matte.
Diagnose Your Project: Match the Finish to Your Model Genre
Choosing the right finish is not just a matter of personal preference; it is a critical step in matching the realistic textures of the subject you are replicating.

Gloss for Vehicles, Mechs, and Decal Preparation
If your first project is a civilian sports car, a modern fighter jet, or a futuristic sci-fi robot, a gloss finish is often the standard choice. Civilian vehicles require a polished, showroom shine that can only be achieved with multiple layers of gloss top coat, followed by polishing compounds. Similarly, metallic finishes on mechs or aircraft look most convincing when protected by a clear gloss that preserves the metallic paint’s inherent reflectivity.
Beyond aesthetics, gloss plays a vital functional role in model building: decal preparation. Water-slide decals require a microscopically smooth surface to adhere correctly. If applied directly over a rough matte paint, tiny air pockets get trapped beneath the decal film, causing a distracting reflective phenomenon known as “silvering.” Applying a thin layer of gloss top coat before placing decals ensures a perfect seal, which can then be sealed with your final finish of choice.
Matte for Military, Figures, and Realistic Scale Models
For military tanks, armored vehicles, historical infantry figures, and realistic dioramas, a matte top coat is indispensable. In the real world, military equipment is painted with flat, non-reflective coatings to avoid detection, and replicating this scale effect requires a completely flat finish.
For beginners, a matte coat is incredibly forgiving. If your base coat has minor brush marks, slightly uneven transitions, or small fingerprint smudges from handling, a matte top coat will diffuse the light hitting those areas, effectively rendering the imperfections invisible to the naked eye. It also provides an excellent toothy texture for weathering products like pigments, washes, and oil paints, which slide off gloss surfaces but cling beautifully to matte finishes.
Satin for Fantasy Miniatures and Organic Textures
Fantasy miniatures, tabletop gaming figures, and organic creatures benefit immensely from a satin finish. When painting small-scale figures, a completely matte finish can sometimes look chalky, lifeless, and flat, while a gloss finish makes the miniature look like cheap, wet plastic. A satin finish strikes the perfect balance, giving skin tones a healthy, lifelike glow and making leather armor or fabric garments look supple and realistic.
Furthermore, satin top coats are highly favored in the tabletop gaming community for their durability. Gaming miniatures are handled constantly during play, exposing them to friction and skin oils. Satin varnishes typically offer a robust protective barrier that resists wear and tear while preventing distracting glare under bright overhead gaming lights, ensuring your miniatures look excellent from any angle on the tabletop.
Assess Your Tools and Skill Tolerance for Each Finish
Before purchasing a hobby top coat, you must evaluate the tools you have at your disposal and understand the technical challenges associated with each finish type.
Applying top coats can be done via aerosol spray cans, airbrushes, or traditional hand brushes. For beginners, aerosol spray cans offer a convenient, low-barrier entry point, requiring no expensive equipment. However, they offer less control over flow and pressure. Airbrushes provide the ultimate precision and the thinnest, most even coats, but they require a significant upfront investment and thorough cleaning. Hand-brushing is the most accessible method but is highly challenging when applying gloss coats, as the clear medium dries quickly and is highly prone to leaving visible brush streaks. Matte and satin varnishes are much more forgiving when applied by hand brush, provided they are thinned correctly with the appropriate medium.
One of the most common and disappointing beginner mistakes is “frosting” or “blushing,” which occurs almost exclusively with matte aerosol sprays. When a matte top coat is sprayed in high-humidity environments, or if the can is not shaken thoroughly, the matting agents (usually microscopic silica particles) can clump together or trap moisture as they travel through the air. This causes the clear coat to dry into an opaque, cloudy white residue that completely ruins the paint job underneath.
In tropical climates like Singapore, where relative humidity routinely exceeds 80%, this risk is exceptionally high. To prevent frosting, beginners must avoid spraying outdoors on rainy or highly humid days, shake the aerosol can vigorously for at least two full minutes, and ensure they spray within the manufacturer’s recommended temperature and distance parameters.
While gloss finishes do not suffer from frosting in the same way matte finishes do, they present their own set of difficulties. Because a gloss surface acts like a mirror, any underlying defect—such as coarse sanding marks, trapped dust particles, or uneven paint layers—will be magnified. Achieving a flawless gloss finish requires a pristine, dust-free working environment and meticulous surface preparation, which can be frustratingly difficult for a beginner still mastering basic assembly and painting techniques.
A Beginner’s Workflow for a Flawless First Top Coat
To ensure your first top-coating experience is successful, follow a structured, disciplined workflow that prioritizes preparation, environmental control, and safety.
Before applying any clear coat, ensure your base paint is completely cured. There is a critical difference between paint being dry to the touch (which can happen in minutes) and being fully cured (which can take 24 to 48 hours depending on the paint type). Applying a top coat over uncured paint can trap escaping solvents, causing the paint to bubble, crack, or wrinkle. Once cured, use a soft, dry makeup brush or compressed air to remove any dust, hair, or debris from the model’s surface.
Always check the weather before spraying, particularly if you are using aerosol cans. Ideal spraying conditions are dry, warm, and calm. If you live in a highly humid region like Singapore, consider spraying indoors in a climate-controlled, air-conditioned room to lower the ambient humidity, provided you have adequate ventilation. Using a simple digital hygrometer can help you verify that the relative humidity is below 65% before you begin.
When using a spray can or airbrush, never start or stop spraying directly on the model. Start spraying off to one side, sweep across the model in a smooth, continuous motion, and stop spraying only after you have cleared the opposite side. Begin with a very light “mist coat” (also called a dust coat) to give the subsequent layers something to adhere to. Let this flash dry for a few minutes, then apply one or two slightly heavier “wet coats” to achieve a smooth, unified finish, taking care not to let the liquid pool in recessed details.
Many hobby top coats contain strong solvents and organic compounds that can be harmful if inhaled. Always read the safety labels on your specific product before use. Work in a well-ventilated area, preferably outdoors or next to an open window with a fan drawing air away from you. For spray cans and airbrushes, wearing a dedicated organic vapor respirator mask (fitted with activated carbon filters, not just a simple dust mask) is highly recommended to protect your lungs from airborne particulates and harmful fumes.
Frequently Asked Questions (FAQ)
Can I apply a matte top coat over a gloss base?
Yes, this is actually a highly recommended professional technique. Many modelers apply a gloss top coat first to protect the paint and provide a smooth surface for decals and weathering washes. Once those steps are complete, they apply a final matte top coat over the entire model. The matte layer will completely eliminate the shine of the underlying gloss, leaving you with a realistic, flat finish while retaining the protective and aesthetic benefits of the initial gloss layer.
How long should I wait before applying a top coat over acrylic paint?
You should generally wait at least 24 hours before applying a top coat over acrylic paints, though 48 hours is safer for water-based acrylics. While acrylics dry quickly to the touch, they require time to fully cure and release all moisture. If you apply a solvent-based top coat (such as a lacquer or enamel-based clear) over uncured acrylics, the strong solvents can react with, lift, or dissolve the delicate acrylic layer underneath, ruining your paint job.
Community discussion
Share your experience or ask a question. Comments are reviewed before publication.