
Starting your leather crafting journey can feel overwhelming, especially when faced with hundreds of pre-assembled tool sets online. A reliable beginner leather sewing kit must prioritize three core elements: high-carbon steel pricking irons, waxed polyester or linen thread, and blunt harness needles. Many entry-level kits lure buyers with a high tool count, but they often rely on unlabeled alloy tools and include excessive filler items—such as low-grade snaps, plastic glue spreaders, or toy-like mallets—that compromise overall build quality. Before purchasing, the most critical compatibility check is ensuring that the thread thickness matches both the needle eye and the spacing of your pricking irons.
Essential Tools to Look for in a Leather Sewing Kit
To evaluate any kit effectively, you must understand how its components support the three main phases of leather sewing: preparation, assembly, and finishing. Preparation involves marking, cutting, and punching clean stitching holes in the leather. Assembly is the actual sewing process, typically using the traditional saddle stitch, which requires specialized needles, heavy-duty thread, and a way to hold the leather pieces together. Finally, finishing ensures the raw edges of your project are smooth, sealed, and professional-looking. A well-designed starter kit should cover all three phases seamlessly, allowing you to complete basic projects like cardholders, wallets, or keychains without requiring immediate supplementary purchases.
Cutting, Punching, and Marking Tools
The preparation phase dictates the final look of your project, making high-quality punching and marking tools indispensable. Pricking irons, also known as stitching chisels, are the most critical tools in this category. When reviewing a kit, check for consistent tooth spacing, which is typically measured in millimeters from the center of one tooth to the next. For beginners, a spacing of 3mm, 3.85mm, or 4mm is ideal. Look for irons with sharp, uniform tips; dull teeth will tear the leather fibers rather than slicing through them cleanly, resulting in messy, uneven stitches. The spacing you choose dictates the final stitch appearance: smaller spacing creates a delicate, refined look suitable for small watch straps, while larger spacing is perfect for rugged, durable bags.
Products mentioned in this guide
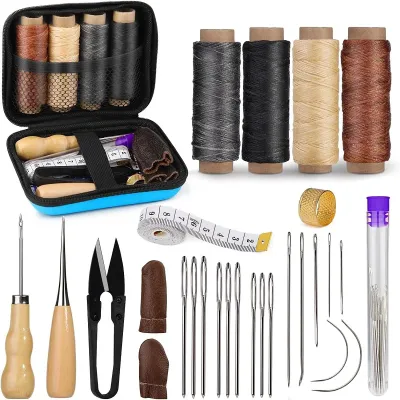
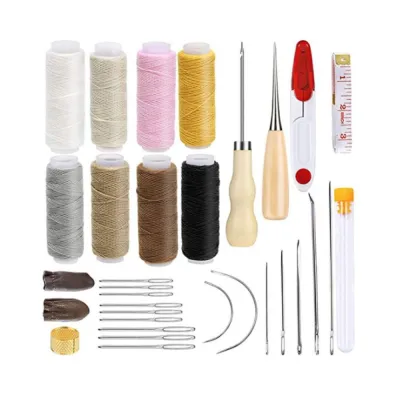
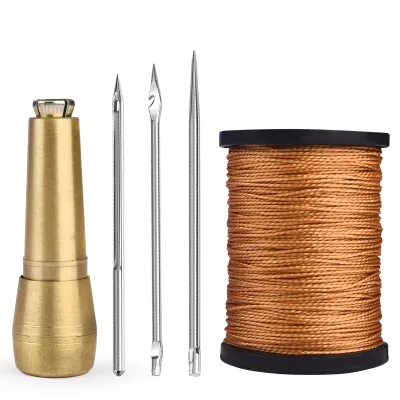
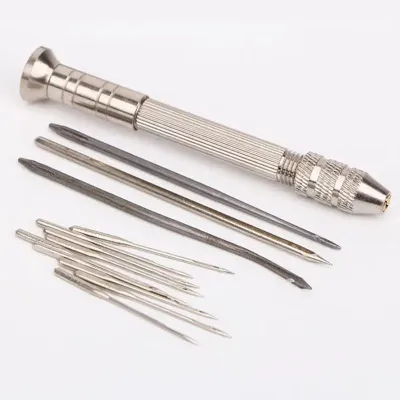
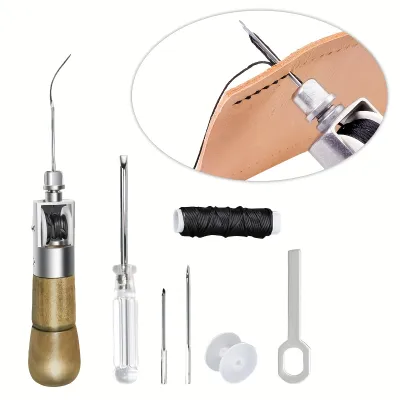
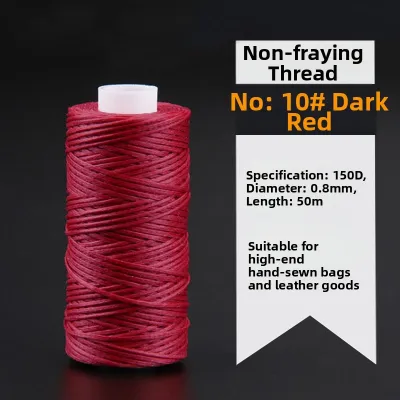
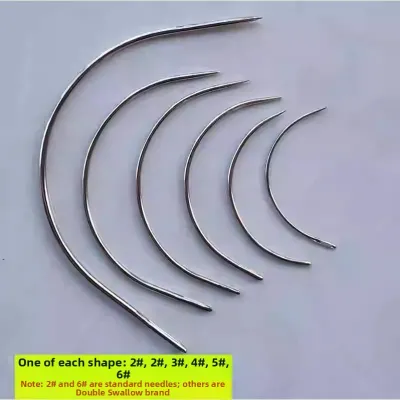
Prices are valid at publication and may change. Please refer to the product page for the latest price.
A scratch awl and a utility knife are also essential for cutting and marking. The scratch awl is used to trace patterns onto the leather surface and to help align holes during assembly. Ensure the awl in the kit has a comfortable, non-slip wooden or heavy plastic grip, as you will need to apply steady pressure. The utility knife or leather cutting knife must feature easily replaceable blades; leather dulls steel incredibly fast, and attempting to cut thick leather with a dull blade is both frustrating and dangerous.
Finally, precise marking requires basic alignment tools. Verify that the kit includes a metal ruler, a small square, or a spacing compass (often called a wing divider). A spacing compass is particularly valuable because it allows you to scribe a perfectly straight line parallel to the edge of the leather, serving as a guide for your pricking irons. Without these marking tools, keeping your stitches straight and aligned becomes an uphill battle.
Stitching Tools and Consumables
Once your holes are punched, you move to the assembly phase, which relies on a specific combination of needles, thread, and holding clamps. Unlike fabric sewing, leather crafting requires specialized harness needles. These needles feature blunt tips and rounded eyes. Because the stitching holes are already punched by your pricking irons, a sharp needle is not only unnecessary but actively detrimental. A sharp tip can easily split the thread or pierce the internal leather fibers, locking the thread in place and making it impossible to adjust your tension or undo a mistake.
The thread included in the kit must be strong enough to withstand the high tension of a saddle stitch. Look for waxed polyester or waxed linen thread. Polyester thread is highly recommended for beginners because of its extreme tensile strength and the ability to melt the ends with a lighter to secure the stitch. Linen thread offers a beautiful, traditional matte finish but is more prone to fraying if not properly waxed. Visually inspect the kit’s specifications to ensure the thread thickness (usually between 0.45mm and 0.8mm) matches the needle eye and the pricking iron spacing. Using a thread that is too thick for your punched holes will make sewing incredibly difficult and can damage the leather, while a thread that is too thin will look sparse and weak.
A stitching pony or clamp is another critical component that holds your leather pieces securely, freeing up both of your hands to perform the saddle stitch. When evaluating a kit’s stitching pony, check the jaw width and ensure the jaws are padded with soft leather or felt. Unpadded wooden jaws can easily mar, dent, or scratch the surface of vegetable-tanned leather under clamping pressure, leaving permanent marks on your finished piece.
Edge Finishing and Maintenance
The final phase of any leather project is finishing the raw, cut edges to protect them from moisture and wear. Edge bevelers are used to shave off the sharp 90-degree corners of the leather edge, creating a rounded profile that is much easier to burnish. When choosing a kit, check the size of the included beveler. Bevelers are sized numerically (such as Size 1, 2, or 3), with smaller numbers designed for thinner leather. A Size 1 or 2 beveler is generally the most versatile for beginner projects using leather thicknesses between 1.2mm and 2.0mm.
After beveling, the edge must be burnished using a wood slicker and a burnishing agent. A wood slicker is a cylindrical wooden tool with multiple grooves of varying widths. Ensure the slicker in the kit has a smooth, polished finish and offers several groove sizes to accommodate different leather thicknesses. The kit should also include a basic burnishing agent, such as beeswax or gum tragacanth. Rubbing these agents onto the beveled edge and vigorously rubbing it with the wood slicker generates friction, which flattens the leather fibers and seals the edge into a glossy, professional finish.
Quality Indicators: How to Spot Reliable Tools in a Kit
Distinguishing high-quality leather tools from cheap, disposable ones can be challenging for a beginner, but several physical indicators can guide your decision. First, pay close attention to the metal composition of the cutting and punching tools. Reliable pricking irons, knives, and bevelers are made from high-carbon steel or high-grade stainless steel. High-carbon steel can be honed to an incredibly sharp edge and holds that sharpness through repeated use. In contrast, cheap kits often utilize unlabeled “alloy” or pot metals. These tools are lightweight, dull quickly, and are prone to bending or snapping when struck with a mallet. You can often spot cheap alloy tools by their rough, unpolished casting lines and a dull, greyish finish.

Handle ergonomics play a massive role in your comfort and safety. Leather crafting involves repetitive, high-pressure movements that can quickly cause hand fatigue or cramping. Look for tools with wooden, contoured, or ergonomically shaped handles that fit comfortably in the palm of your hand. Avoid kits that feature straight, thin, unpadded metal handles on awls or knives, as these offer poor grip and transfer all the pressure directly into your joints.
The quality of the thread and wax coating is another easy-to-spot indicator. High-quality waxed thread should feel smooth and glide easily through pre-punched holes without fraying or leaving heavy, sticky deposits on your fingers. If the thread in the kit feels overly sticky, clumpy, or brittle, it is likely coated with low-grade paraffin wax rather than pure beeswax. This cheap wax will flake off during sewing, weakening the thread and clogging your needle eyes.
In humid climates like Singapore, rust prevention and tool care are paramount. High-carbon steel tools are highly susceptible to rust when exposed to moisture and humidity. When purchasing a kit, check if the steel tools are shipped with a light protective oil coating. Reliable manufacturers will oil their tools and wrap them in protective plastic to prevent rust during transit and storage. Once you receive your kit, you must establish a regular maintenance routine, including wiping down your tools and applying a thin layer of machine oil to keep them in pristine condition.
Pre-Packaged Kits vs. Curating Your Own Tools
For most beginners, purchasing a pre-packaged leather sewing kit is highly appealing due to its convenience and cost-effectiveness. A comprehensive starter kit on online marketplaces in Singapore typically ranges from S$30 to S$80, providing a wide array of tools that would cost well over S$200 if purchased individually. This low entry barrier allows you to explore the hobby without a massive financial commitment. However, these kits often achieve their low price point by bundling lower-quality consumables, such as cheap synthetic glue, weak thread, or dull bevelers that require immediate sharpening.
A strategic approach for beginners is to start with a modest, well-reviewed kit and plan for selective upgrades as your skills progress. You can easily use the kit’s basic items—such as the metal ruler, cutting mat, stitching pony, and harness needles—since these simple tools do not require premium manufacturing to function well. However, you should plan to upgrade your pricking irons and cutting knife early on. Investing in a single, high-quality 2-prong and 4-prong pricking iron set from a reputable specialty brand will dramatically improve your stitching alignment and reduce the physical effort required to punch through thick leather.
When evaluating a kit’s true value, perform a quick “filler ratio” check. Many kits advertise “100-piece sets” to seem like an incredible bargain, but a closer look reveals that 80 of those pieces are cheap metal snaps, rivets, plastic finger cots, or decorative stamps you may never use. A kit that focuses on 10 to 15 high-quality, essential tools is far more valuable than a massive box of low-grade filler items.
Workspace and Safety Requirements for Leather Tools
Setting up a safe, stable workspace is crucial when working with sharp blades, heavy mallets, and steel punches. You must use a solid, shock-absorbing cutting mat to protect both your tabletop and the delicate edges of your cutting knives. Additionally, when using pricking irons, place a thick plastic or rubber pounding board (often called a cutting block) directly underneath your leather. This prevents the sharp teeth of your irons from striking the hard table or cutting mat, which can instantly chip or bend the steel teeth. Your work table must be sturdy and stable; a flimsy folding table will transfer excessive vibration, making it difficult to punch straight holes and creating a noisy, disruptive working environment.
Mallet selection is another critical safety and tool-preservation factor. You must use a nylon, polyurethane, or rawhide mallet when striking steel pricking irons or hole punches. Never use a standard metal claw hammer. Striking a hardened steel tool with a steel hammer will cause the end of the tool to deform or “mushroom” over time. This deformation can send dangerous metal splinters flying and will eventually ruin the tool. A plastic or rawhide mallet absorbs the shock of the impact, protecting your tools and reducing hand strain.
Finally, pay attention to ventilation when using chemical consumables. If your kit includes solvent-based contact cements, edge paints, or leather dyes, always work in a well-ventilated room with open windows or an active exhaust fan. These adhesives emit strong fumes that can cause headaches or dizziness in enclosed spaces. Always read the manufacturer’s safety labels and application instructions for any chemical product before use.
Frequently Asked Questions (FAQ)
Can I use regular sewing needles and thread for leather?
No, regular sewing needles and thread are not suitable for leather crafting. Standard fabric needles are sharp and designed to pierce through woven fibers, which will cut and permanently weaken the structure of leather, leading to tears. Leather sewing requires blunt harness needles that safely pass through pre-punched holes. Additionally, standard cotton thread lacks the tensile strength and friction resistance needed for leather. It will quickly fray and snap when pulled through tight leather holes. Waxed polyester or linen thread is essential to provide the necessary durability and lock the stitches securely.
How do I maintain carbon steel leather tools in a humid climate?
Singapore’s high humidity makes carbon steel tools highly vulnerable to rust. To protect your investment, wipe your tools clean with a dry microfiber cloth after every use to remove sweat, fingerprint oils, and leather dust. Apply a very thin, even coat of mineral oil, camellia oil, or light machine oil to all exposed metal surfaces. Store your tools in a dry, sealed container or a dedicated toolbox, and place several silica gel packets inside to absorb any ambient moisture. Avoid storing carbon steel tools in damp areas like balconies or near open windows.
What leather thickness is best for a beginner's first project?
For your first leather-crafting project, medium-weight vegetable-tanned leather with a thickness of 1.2mm to 1.6mm (approximately 3 to 4 ounces) is highly recommended. This thickness is incredibly forgiving for beginners; it is sturdy enough to hold its shape for cardholders, keychains, and small pouches, yet soft enough to punch through easily with basic pricking irons. It also responds beautifully to edge beveling and burnishing, allowing you to practice all the fundamental steps of leather crafting without needing heavy-duty, industrial-grade tools.
Community discussion
Share your experience or ask a question. Comments are reviewed before publication.