
Selecting your first fabric paint starter set can feel overwhelming with the sheer variety of arts and crafts supplies available. To make an informed decision, a beginner should look for a kit that offers a balanced selection of highly pigmented base colors, durable synthetic brushes, and clear, straightforward curing instructions. The ideal starter set should not only match the specific fabric fiber you plan to decorate but also provide enough volume per bottle to complete your initial projects without requiring immediate, costly additions.
In Singapore, where DIY craft workshops and personalized canvas tote bags are highly popular, choosing the right fabric paint ensures your designs remain vibrant and flexible, even after multiple washes. By verifying a few key components and quality indicators on the packaging, you can avoid the common pitfalls of stiff, cracking, or fading designs.
Essential Components to Verify in a Beginner Fabric Paint Kit
When unboxing or selecting a starter set, you want to ensure it contains everything needed to begin painting immediately. A complete kit saves you from making secondary purchases and helps you maintain a seamless creative workflow from start to finish.
Products mentioned in this guide
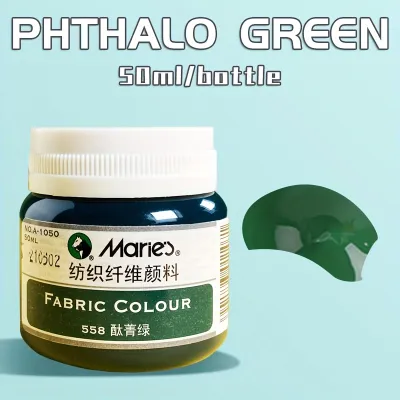
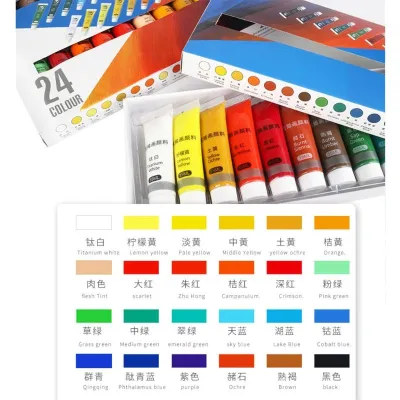
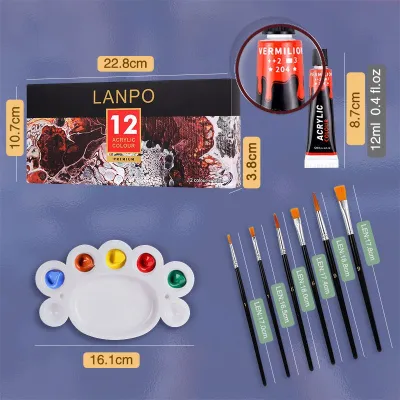
![[SG Ready Stock]12/24 Acrylic Paint With Brushes And Palette 12 ML Waterproof Acrylic Paint Tube for Wood/Canvas/Fabric Students Drawing Set](https://img.lazcdn.com/g/p/076b5de8a7f769a9c538b2880c81ef54.jpg_400x400q80.jpg_.webp)
Prices are valid at publication and may change. Please refer to the product page for the latest price.
Base Colors and Mixing Capabilities
A common mistake is choosing a kit solely based on having dozens of pre-mixed pastel or neon shades. Instead, prioritize a set that includes the core primary colors—red, blue, and yellow—along with generous portions of black and white. This foundational palette allows you to learn the essentials of color theory and mix virtually any shade you need. Look for sets where the primary colors are highly saturated, as this ensures your custom blends do not turn muddy or dull when applied to the fabric. Additionally, having a dedicated white paint is crucial for creating pastel shades and highlights, while black is essential for deep shadows, outlines, and dramatic contrasts. Testing your custom color mixes on a small scrap piece of the same fabric before applying them to your main project is an excellent habit to develop, as fabric paints can dry slightly darker than they appear when wet.
Brush Variety and Bristle Type
Fabric paint has a thicker, more viscous consistency than standard watercolor or fluid acrylics, which means the brushes included in your kit must be up to the task. A beginner set should provide at least two distinct brush shapes to handle different parts of your design. A flat brush is indispensable for laying down broad strokes, filling in large color blocks, and base-coating. A round brush with a fine tip is equally necessary for outlining, adding intricate details, and writing script. Ensure these brushes feature synthetic bristles, which hold their shape much better against the rough texture of woven fabrics. Because fabric paint dries quickly and is water-resistant once dry, it is vital to keep your brushes wet during your painting session. Always have a jar of clean water nearby to rinse your brushes immediately after use, preventing the paint from drying and permanently ruining the bristles.
Mixing and Protection Tools
Working with fabric paint requires a clean, flat surface to blend your colors and a way to protect your workspace and garments. Verify if the starter kit includes a reusable plastic or wooden mixing palette with shallow wells. Additionally, check for protective barriers such as cardboard inserts or wax paper sheets. When painting a T-shirt or a tote bag, inserting a rigid barrier between the front and back layers of fabric is critical to prevent the wet paint from bleeding through and ruining the opposite side. Some comprehensive beginner kits also include basic stencils or low-tack painter’s tape. These accessories are incredibly helpful for beginners, allowing you to create clean, sharp lines and geometric patterns without relying solely on freehand brush control.
Mediums and Additives
Some starter kits do not contain dedicated fabric paints but instead package standard multi-surface acrylics alongside a bottle of textile medium. A textile medium is a liquid additive that, when mixed with regular acrylic paint, thins the consistency and imparts flexibility to the cured paint film. If you choose a kit utilizing this approach, verify that the volume of textile medium provided is proportional to the total volume of acrylic paint. Alternatively, look for kits that feature pre-formulated, dedicated fabric paints that require no mixing with external mediums.
Quality Indicators: How to Evaluate the Paint and Brushes
Not all paints behave the same way once applied to a textile surface. Understanding how to read product labels and inspect physical tools will help you identify a high-quality kit that yields professional, long-lasting results.

Paint Formulation Labels
When examining a starter set, look closely at the terminology used on the packaging. High-quality kits will explicitly use terms like “fabric paint,” “textile paint,” or “soft body acrylic.” Avoid sets labeled generically as “all-purpose craft paint” unless they explicitly list fabric suitability and washability on the back. The label should also indicate the paint’s opacity level—some are formulated to be transparent for layering on light fabrics, while others are designated as opaque or “3D dimensional” paints. Checking the back of the bottle for a transparency rating—often represented by a small square that is either open, half-filled, or fully black—will tell you exactly how well the paint will cover the underlying fabric fibers.
Pigment and Binder Quality
The durability of your painted design depends heavily on the quality of the binder, which is the polymer that glues the pigment to the fabric fibers. Student-grade paints are excellent for beginners due to their affordability—typically ranging from S$15 to S$40 for a complete set in Singapore—but they should still offer a flexible acrylic binder. A high-quality binder ensures that once the paint cures, it moves and stretches with the fabric rather than cracking, flaking, or peeling off when the garment is worn or folded. In Singapore’s hot and highly humid climate, drying and curing times can be slightly prolonged. A premium binder helps prevent the paint from remaining tacky or attracting dust in humid conditions, ensuring a smooth, clean, and professional satin finish once fully dry.
Brush Construction
Take a close look at the brushes included in the starter set. Synthetic fibers like nylon or taklon are the industry standard for fabric painting because they resist the abrasive nature of woven textiles and clean up easily with water. Inspect the metal ferrule—the part that connects the bristles to the wooden or plastic handle. A quality brush features a seamless, tightly crimped metal ferrule. Avoid kits with loose or poorly glued ferrules, as they will shed bristles onto your wet paint, leaving unsightly hairs trapped in your design.
Washability and Curing Claims
A key indicator of a reliable fabric paint is the presence of clear, detailed instructions regarding washability. The packaging should specify the exact steps required to make the design permanent. This typically involves a heat-setting process using a household iron or a hair dryer, or a designated curing period—often 24 to 72 hours—before the item can be safely laundered. If a kit lacks clear instructions on how to set the paint, it is highly likely the design will fade or wash away during the first laundry cycle.
Matching the Paint Set to Your Target Fabric and Project
The success of your first project depends heavily on matching your paint formulation to the specific textile medium you are decorating. Different fabrics interact with paints in unique ways, and a mismatch can lead to disappointing results.
Light vs. Dark Fabrics
The base color of your fabric dictates the type of paint opacity you need. Standard beginner fabric paints are often semi-transparent, which works beautifully on white, cream, or pastel cotton fabrics because the light background reflects through the paint layer. However, if you plan to paint on dark fabrics like black canvas, navy denim, or charcoal T-shirts, these standard paints will appear dull or virtually invisible. For dark surfaces, look for starter sets specifically labeled as “opaque,” “intense,” or “for dark fabrics,” which contain higher pigment concentrations to block out the underlying fabric color. If your starter kit only contains semi-transparent colors, you can perform a helpful workaround: paint a solid white undercoat in the shape of your design first, let it dry completely, and then apply your colors over the white base to make them pop.
Fabric Weave and Composition
Natural fibers such as cotton, linen, and heavy canvas are highly absorbent and provide an ideal grip for fabric paint binders. Synthetic fibers like polyester, nylon, and spandex have smoother, non-porous surfaces that make it difficult for standard paints to adhere. Before purchasing a kit, cross-reference its recommended fabric list with your intended project. If you are customizing a synthetic athletic shirt or a water-resistant windbreaker, you will need a highly specialized, ultra-flexible paint formula rather than a general cotton-focused starter set. Additionally, consider the weave of the fabric; tight weaves like cotton canvas are easy to paint on, whereas open, loose weaves like burlap or heavy linen require a thicker paint consistency to prevent the pigment from seeping through the gaps without coating the surface.
Project Scale and Volume
Evaluate the total volume of paint provided in the starter set against the scale of your planned projects. Beginner kits often contain small jars or squeeze tubes ranging from 15ml to 30ml per color. While this is more than sufficient for detailing small handkerchiefs, stenciling compact logos, or customizing a pair of canvas shoes, it may run out quickly if you intend to paint large, solid color blocks on a heavy canvas tote bag or a denim jacket. Ensure the kit provides larger bottles of the colors you expect to use as background shades. If you are planning a group activity, such as a family crafting afternoon or a birthday workshop in Singapore, look for starter sets that offer larger 59ml (2-ounce) bottles to ensure everyone has enough paint to complete their designs without running short mid-session.
Common Pitfalls to Avoid When Selecting Your First Kit
Navigating the arts and crafts market requires a critical eye to avoid marketing traps that can lead to frustration, wasted money, or ruined garments.
Prioritizing Color Count Over Volume
It is easy to be enticed by starter sets that boast 24, 36, or even 48 different colors at a very low price point. However, these kits often distribute the paint in tiny, single-use pots containing only 3ml to 5ml of product. You will quickly find yourself running out of essential colors like white or blue during your very first painting session. A far more practical approach is to select a kit with 6 to 8 standard-sized jars—typically 30ml to 59ml each—of high-quality base colors, which gives you plenty of material to practice mixing and complete multiple projects. This not only teaches you valuable color-mixing skills but also ensures you have enough volume to fix mistakes or paint larger solid areas without running dry.
Overlooking Curing Requirements
Some fabric paints require elaborate curing processes, such as baking in a home oven or waiting up to a week before the paint is fully stable. For a beginner, especially those crafting in home environments without specialized equipment, these requirements can be highly inconvenient. Look for kits that offer simple heat-setting options—such as ironing the reverse side of the fabric for a few minutes—or air-curing formulas that become wash-fast naturally after 72 hours. To ensure your paint has cured successfully, you can perform a simple, non-destructive scratch test on a small, hidden painted area of the fabric. Gently scratch the surface with a fingernail; if the paint lifts or feels rubbery and loose, it requires further heat-setting or curing time before it can be safely washed.
Ignoring Safety and Age Recommendations
Always check the product label for recognized safety certifications, such as the AP (Approved Product) non-toxic seal. This is particularly important if you are purchasing the starter set for children’s activities, school projects, or if the painted item will have direct, prolonged contact with skin—like face masks or t-shirts. Non-toxic, water-based acrylic fabric paints are the safest choice, ensuring easy clean-up with soap and water and peace of mind during your creative sessions.
Assuming All Craft Paints are Fabric-Safe
Many multi-surface craft paints claim to work on “wood, glass, ceramic, and fabric.” While they may physically stick to fabric, they often dry to a hard, plastic-like finish that makes the fabric stiff and uncomfortable to wear. Over time, these non-specialized paints are highly prone to cracking and peeling when the fabric bends. Investing in a dedicated fabric paint set ensures the paint remains soft, flexible, and fully integrated into the textile fibers.
Frequently Asked Questions (FAQ)
Can I use regular acrylic paint instead of a dedicated fabric paint set?
Yes, but regular acrylic paint dries stiff and is highly likely to crack or peel when the fabric is bent or washed. To use standard acrylics successfully on textiles, you must mix them with a specialized textile medium. This medium thins the paint and adds the necessary flexibility, allowing the acrylic to bond with the fabric fibers without losing its soft texture.
Do I need to pre-wash the fabric before using the paint?
Yes, pre-washing is highly recommended for all new fabrics before you begin painting. New garments and textiles are treated with factory sizing, starches, and chemical finishes that prevent paint from adhering properly to the fibers. Washing the fabric without fabric softener removes these barriers, ensuring optimal paint absorption and preventing your finished design from peeling or washing away later.
How do I know if the painted fabric is safe to machine wash?
To determine if your painted item is machine-washable, always consult the specific manufacturer instructions on your paint kit’s label. Most fabric paints require you to heat-set the design with an iron or wait for a full curing period—typically 72 hours—before laundering. Once properly set, wash the item inside out on a gentle cycle using cold water, and air dry to preserve the color vibrancy.
Community discussion
Share your experience or ask a question. Comments are reviewed before publication.