
Selecting your first needle threader kit is a small decision that makes a massive difference in your embroidery journey. For beginners, the process of threading multi-stranded floss through a tiny needle eye can quickly become the most frustrating part of the craft, often leading to eye strain and split threads. A dedicated needle threader kit solves this problem by providing specialized tools designed to handle the unique thickness and texture of embroidery fibers. When evaluating a kit, you should prioritize wire flexibility, handle ergonomics, and a variety of wire thicknesses to accommodate different needle sizes.
While a basic threader might seem like a simple accessory, a well-curated kit offers a range of tools that protect both your materials and your hands. By understanding the mechanical differences between various threader styles and matching them to your specific needlework projects, you can avoid the common pitfalls of thread fraying and frequent tool breakage. Investing in the right kit from the start ensures a smoother, more enjoyable stitching experience.
Why Standard Sewing Threaders Fail at Embroidery
Standard sewing threaders are designed for single-strand, tightly spun polyester or cotton threads used in machine or basic hand sewing. These threaders typically feature a rigid, thin wire loop attached to a tiny aluminum tab. While this construction works well for sliding through the small, round eyes of standard sewing needles, it is poorly suited for the unique demands of hand embroidery. Embroidery needles, such as crewel or tapestry needles, feature elongated eyes designed to hold multiple strands of floss, which requires a completely different approach to threading.
Products mentioned in this guide
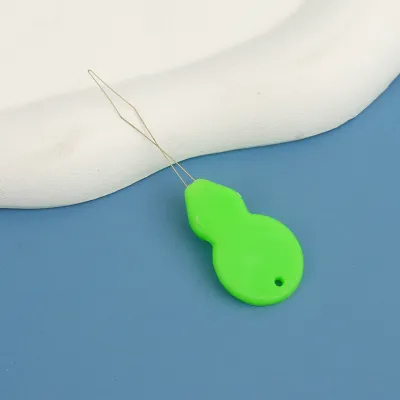
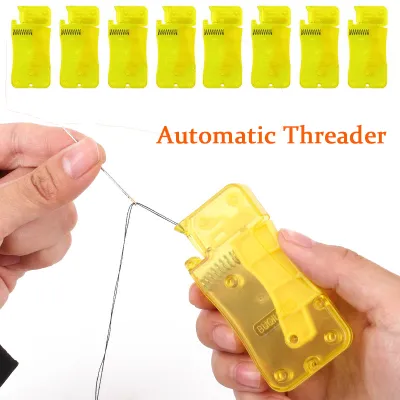
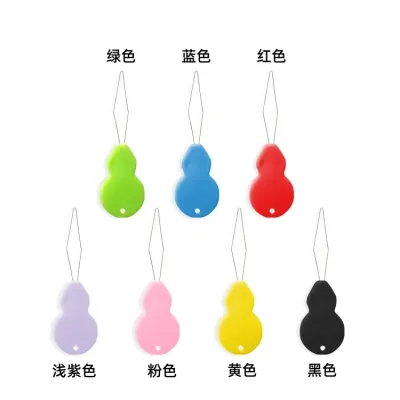
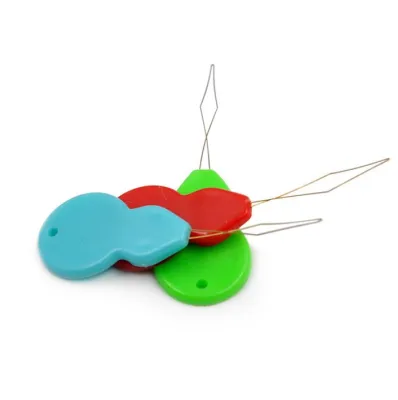
Prices are valid at publication and may change. Please refer to the product page for the latest price.
Embroidery threads—particularly stranded cotton, silk, wool, and metallic threads—are structurally delicate and loosely twisted. When you attempt to pull these bulky, multi-stranded fibers through a needle eye using a stiff, standard sewing threader, the rigid wire compresses the fibers too tightly. This intense friction often causes the thread to split, fray, or shred before it even passes through the needle eye. The result is wasted material and a weakened thread tail that is difficult to secure.
Furthermore, standard sewing threaders lack the structural resilience needed to pull thick embroidery floss through narrow openings. Attempting to force a thick bundle of cotton floss through a crewel needle using a cheap sewing threader almost always results in the wire snapping or detaching from its handle. A dedicated embroidery needle threader kit is specifically engineered to preserve thread integrity, offering highly flexible wires and specialized shapes that accommodate the bulk of embroidery fibers without causing damage.
Core Features to Look for in Your First Threader Kit
To ensure your first needle threader kit is practical and long-lasting, you must evaluate several key design and material characteristics. The physical construction of the threader directly impacts how easily it slides through a needle eye and how many project hours it can withstand before needing replacement.

Wire Flexibility and Thickness
The wire loop is the most critical component of any manual needle threader. A high-quality kit should offer a variety of wire thicknesses, often measured in fractions of a millimeter. For fine crewel needles, you need an ultra-thin, highly flexible wire that can compress to fit through a narrow eye and then spring back open to receive the thread. Conversely, for heavier tapestry or chenille needles, a slightly thicker wire provides the structural strength needed to pull heavy yarns or multiple strands of floss without bending out of shape.
Handle Ergonomics
Repetitive threading can quickly lead to hand fatigue, especially during long stitching sessions. Avoid kits that only feature flat, razor-thin metal tabs, as they are difficult to grip securely and can slip from your fingers. Look for threaders with contoured, textured, or slightly raised plastic handles. An ergonomic grip provides better leverage, allowing you to guide the wire through the needle eye at a perfectly flat angle, which reduces physical strain on your fingers and minimizes wear on the tool itself.
Wire Loop Durability
The joint where the wire loop meets the handle is the most common point of failure. In cheap threaders, the wire is simply glued or lightly crimped inside the handle, making it easy to pull out under tension. High-quality kits feature reinforced base joints, where the wire is deeply embedded into a solid plastic handle, secured with high-strength epoxy, or anchored with a metal sleeve. Inspecting this joint before purchasing can save you from the frustration of a tool breaking mid-project.
Valuable Bonus Tools That Elevate a Beginner Kit
Many beginner needle threader kits come bundled with supplementary tools that add significant value to your embroidery setup. These accessories are not mere fillers; they actively improve your workflow and help maintain the quality of your stitching materials.
- Thread Snips or Micro-Scissors: Cleanly sheared thread ends are essential for easy threading. Standard household scissors often crush or chew through embroidery floss, leaving a fuzzy, splayed end that is incredibly difficult to feed into a threader loop. High-quality thread snips with sharp, stainless steel blades ensure a crisp, clean cut every time, preventing the fibers from unraveling.
- Fine-Tip Tweezers: When working with short thread tails or complex multi-color patterns, pulling the thread through the needle eye by hand can be clumsy. A pair of fine-tip tweezers allows you to grasp tiny thread ends securely and pull them through the loop with precision. They are also incredibly useful for retrieving dropped needles or adjusting misplaced stitches on the back of your fabric.
- Silicone Needle Grabbers or Thimbles: In warm or humid climates, such as Singapore, your fingers can easily become slick or sweaty while stitching. This makes it difficult to pull a needle through dense, tightly woven fabrics like heavy linen or canvas. Silicone needle grabbers provide the necessary traction to grip and pull the needle without straining your hand, while a lightweight thimble protects your fingertips from painful punctures.
Which Type of Needle Threader Kit Should You Choose?
Needle threader kits come in several distinct styles, each catering to different budgets, project types, and physical needs. Understanding these categories helps you select the best match for your personal stitching environment.
Standard Wire Loop Multi-Packs
Standard wire loop multi-packs are the most common and budget-friendly option available. These kits typically contain anywhere from 10 to 20 simple wire threaders, often color-coded by wire thickness. Because ultra-fine wires are inherently delicate and subject to metal fatigue, they are best treated as consumable items that will eventually need replacement.
These packs are highly practical for beginners who want to experiment with different wire sizes without a significant financial commitment. They allow you to keep spare threaders in multiple project bags, ensuring you are never left without one. However, the primary trade-off is the lack of robust, ergonomic handles, which may make them less comfortable for extended use.
Multi-Tool Embroidery Companion Kits
Multi-tool companion kits are comprehensive bundles designed to give absolute beginners a complete hand-tool setup. In addition to a selection of wire and hook threaders, these kits often include embroidery scissors, seam rippers, needle cases, and compact storage pouches. They offer excellent convenience and portability, keeping all your essential tools organized in one place.
When choosing a companion kit, it is vital to check the material quality of the included tools. Ensure the scissors and snips are made of high-quality stainless steel rather than cheap carbon steel, which can rust quickly in humid conditions and dull rapidly. A well-made companion kit is a fantastic investment that can last for years, while a poorly made one will require you to replace individual tools almost immediately.
Desktop or Automatic Needle Threaders
Desktop or automatic needle threaders are mechanical devices designed to thread needles with minimal manual intervention. You place the needle into a designated slot, lay the thread across a guide, and press a button or lever. An internal mechanism pushes a tiny hook through the needle eye, catches the thread, and pulls it through.
These devices are excellent for individuals experiencing eye strain, low vision, or physical dexterity challenges like arthritis. However, they have strict limitations that beginners must consider. Most automatic threaders are calibrated for standard sewing needles and cannot accommodate the thicker, elongated eyes of embroidery needles or the bulk of multi-stranded floss. Always verify the needle size and thread compatibility specifications before purchasing a mechanical threader.
How to Match the Threader to Your Embroidery Style
The specific embroidery technique you plan to practice plays a major role in determining which threader and wire size you should use. Different styles of needlework rely on distinct needle shapes and thread weights, requiring a tailored approach to tool selection.
Cross-Stitch and Needlepoint
Cross-stitch and needlepoint primarily utilize tapestry needles, which feature blunt tips and large, elongated eyes designed to pass smoothly through the open holes of Aida cloth or canvas. Because the needle eyes are relatively spacious, you do not need ultra-fine, delicate wire threaders. Instead, you can use medium-to-thick wire loop threaders or even sturdy metal hook threaders. These robust tools can easily handle the multiple strands of cotton floss or tapestry wool commonly used in these crafts without bending or snapping.
Surface Embroidery and Crewelwork
Surface embroidery, crewelwork, and goldwork rely on sharp needles with much smaller, narrower eyes, such as crewel or chenille needles. Because these techniques often require you to stitch fine details on dense fabrics like linen or silk, the needle eye must remain as small as possible to avoid leaving large holes in the material. Threading multiple strands of floss through these tiny openings requires an ultra-fine, highly flexible wire threader. A thick wire will simply not fit through the eye, and forcing it can permanently distort or damage the needle.
Ribbon or Yarn Embroidery
Ribbon embroidery involves working with delicate silk or organza ribbons rather than twisted threads. Pulling a flat ribbon through a needle eye using a standard wire loop threader will crush, twist, or shred the material, ruining its luster and texture. For this style of needlework, you need specialized wide-slot metal threaders or flexible plastic bodkins. These tools feature flat, wide openings that keep the ribbon perfectly flat as it is guided through the large eye of a chenille needle.
Quick Pre-Purchase Checklist for Beginners
Before purchasing a needle threader kit, use this quick checklist to evaluate its quality, versatility, and suitability for your embroidery projects:
- Assorted Wire Gauges: Verify that the kit includes a range of wire thicknesses (from ultra-fine to medium) to match both your small crewel needles and larger tapestry needles.
- Ergonomic Grips: Look for threaders with comfortable, textured plastic or rubber handles that are easy to hold, especially if you plan to stitch for long periods.
- Reinforced Joints: Examine the connection point between the wire loop and the handle; ensure it is securely anchored with epoxy or a metal sleeve to prevent detaching.
- Protective Storage Case: Ensure the kit includes a sturdy plastic case, tin, or pouch to protect the delicate wire loops from bending, tangling, or breaking when stored in your sewing box.
- Rust-Resistant Materials: If the kit includes bonus tools like scissors, tweezers, or metal threaders, confirm they are made of stainless steel to prevent rust stains on your expensive embroidery fabrics.
Frequently Asked Questions (FAQ)
How do I stop the wire on my needle threader from breaking?
To prevent the wire loop from breaking, always insert the threader straight and level into the needle eye without twisting or forcing it. When pulling the thread through, guide it gently rather than yanking it quickly, as sudden tension is the primary cause of wire fatigue. Additionally, ensure you are matching the wire thickness to the needle eye size; forcing a thick wire through a micro-sized crewel needle will place extreme shear stress on the base joint, causing it to snap.
Can I use a regular sewing needle threader for embroidery?
While a regular sewing threader can work in a pinch for large tapestry needles, it is generally unsuitable for standard embroidery projects. The rigid, thick wires of basic sewing threaders are often too large to fit through the delicate eyes of crewel needles. Furthermore, their stiff construction creates high friction that easily frays and shreds delicate, multi-strand embroidery floss, making a specialized embroidery threader kit a much safer and more efficient choice.
Community discussion
Share your experience or ask a question. Comments are reviewed before publication.