
Deciding whether the Stedi scribing tool is a worthwhile addition to your workshop in Singapore depends on the precision your projects demand and the specific materials you handle. While standard marking tools often struggle with irregular profiles, a dedicated multi-functional scribing tool offers a structured way to replicate complex contours onto wood, laminate, or acrylic. To determine if this tool fits your workflow, you must evaluate its build quality, locking stability, and how it compares to traditional alternatives like compasses or profile gauges. This guide provides a comprehensive framework to assess the tool’s design, practical applications, and value within the local market, helping you make an informed purchasing decision.
Understanding the Stedi Scribing Tool
A scribing tool functions by tracing an existing profile—such as an uneven masonry wall or a curved furniture leg—and simultaneously transferring that exact line onto a parallel workpiece. The Stedi model utilizes an adjustable multi-mode design, allowing users to switch between contour scribing, compass marking, and standard edge-ruling. This versatility is achieved through a series of articulated joints and a sliding pencil or pin holder that can be locked at various angles and distances. By adjusting the relative position of the tracing guide and the marking tip, you can maintain a consistent offset even when navigating highly irregular surfaces.
When examining this tool, you should look for several standard components that define its functionality. The main body structure typically consists of adjustable arms connected by pivot joints, which must be robust enough to prevent any unwanted movement during use. The marking tip holder is designed to accommodate standard pencil leads, deep-hole markers, or metal scribe pins, depending on the surface you are marking. Additionally, a guide roller or a pointed tracing foot is situated at the opposite end, serving as the contact point that rides along the reference surface. The adjustment mechanism, usually controlled by knurled thumbscrews, allows you to lock these components securely into the desired configuration.
Products mentioned in this guide
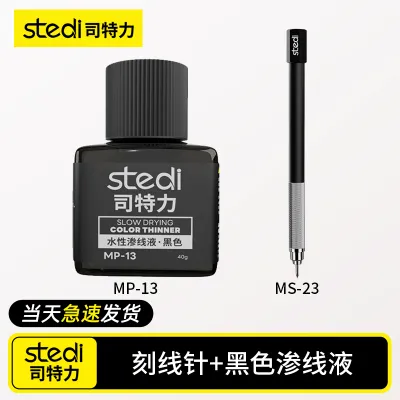
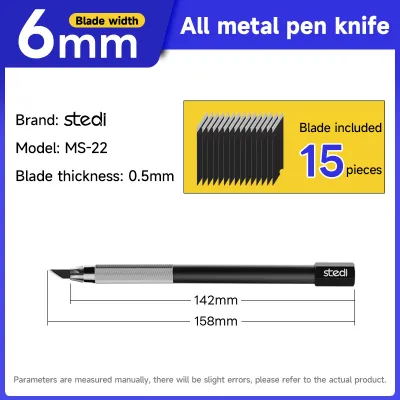
Prices are valid at publication and may change. Please refer to the product page for the latest price.
It is important to clarify how a dedicated scribing tool differs from traditional marking instruments like compasses, dividers, or basic marking gauges. Traditional compasses are excellent for drawing circles or transferring fixed distances, but they lack the flat reference faces and stable guides needed to glide smoothly along long, irregular walls. Basic marking gauges are restricted to straight edges, relying on a fence that rides along a flat board. A multi-functional scribing tool bridges this gap by providing a stable, flat base or roller guide that can follow highly irregular, non-linear paths while keeping the marking tip perpendicular to the target surface, ensuring an accurate transfer of the profile.
Evaluating Build Quality and Key Features
When inspecting a scribing tool, the choice of materials directly impacts its longevity and accuracy. A body constructed from anodized aluminum alloy or high-grade reinforced polymers offers a good balance of lightweight handling and structural rigidity. Metal components are generally preferred for the joints and locking threads, as plastic threads can strip over time under repeated tightening. Hold the tool to assess its weight balance; it should feel substantial enough to resist flexing when pressure is applied, yet light enough to allow delicate control. Any noticeable flexing in the arms under moderate hand pressure is a sign that the tool may struggle to maintain accuracy over long scribing runs.

The precision of any scribing tool hinges on its locking mechanisms. Before committing to a cut, verify that every pivot point locks completely without any residual play or wiggle. Even a fraction of a millimeter of movement during a trace can ruin a custom-cut piece of timber. Smoothness of operation is equally critical; the arms should slide or pivot without gritty resistance, allowing you to make micro-adjustments easily before tightening the thumbscrews. You should also check the compatibility of the pencil holder; it should firmly grip standard pencil leads or deep-hole markers without allowing them to slip backward when you press down to make a mark.
Extended marking sessions, such as scribing a long run of kitchen cabinets or floor skirting, can quickly lead to hand fatigue if the tool’s ergonomics are poor. Look for rounded edges on the main body and comfortably sized adjustment knobs that do not pinch your fingers. The grip should allow you to apply steady downward and lateral pressure simultaneously, ensuring the guide roller or pin remains in constant contact with the reference surface. A well-designed tool fits naturally in the hand, allowing you to focus on maintaining a steady speed and angle rather than struggling to keep a grip on a slippery or awkwardly shaped frame.
Ideal Applications for Woodworking and Crafts
In Singapore’s residential spaces, walls are rarely plumb or flat due to plastering variations and structural settling. When installing custom built-in shelving, wardrobes, or laminate flooring, a scribing tool is indispensable. It allows you to trace the exact wave of a concrete wall onto the edge of a wooden filler panel, ensuring a tight, gap-free fit without relying on excessive caulking. This is particularly useful in tight HDB flats or condominium units where maximizing usable space requires built-in furniture to sit flush against irregular masonry.
For detailed craft projects, model making, or template creation, you often need to replicate organic shapes or intricate moldings. The tool’s ability to act as a profile tracer makes it highly effective for copying the curve of an antique chair leg or transferring a complex trim profile onto a new piece of material. This eliminates the tedious trial-and-error process of cardboard templating, saving significant time and material costs. Whether you are working on a small-scale wooden jewelry box or a large-scale architectural model, the ability to transfer complex contours accurately ensures a professional finish.
Before starting your project, it is essential to check the manufacturer’s specifications regarding the tool’s compatibility with different material hardness levels. While the marking tip (whether a graphite lead, a metal scribe, or a blade) can easily mark softwoods, MDF, and plywood, harder materials like dense hardwoods, acrylic, or laminate sheets may require specific marking media. For instance, a metal scribe pin is excellent for scoring acrylic or leaving a crisp line on dark hardwoods, whereas a soft graphite pencil is better suited for highly visible lines on light-colored MDF or pine. Always verify the lead diameter and refill options to ensure you have the correct consumables for your specific medium.
Limitations and Alternative Tools to Consider
While highly versatile, a multi-mode scribing tool is not always the fastest or most precise option for every task. For simple, straight parallel lines along a milled board, a traditional brass-faced marking gauge with a hardened steel wheel remains highly effective because it scores a clean line directly into the wood fibers in a single, rapid motion. For capturing highly intricate, deep-profile moldings, a dedicated slide-pin contour gauge (often called a profile comb) might be faster for transferring the shape directly to a workpiece. Understanding these distinctions prevents you from using a complex tool where a simpler one would yield faster results.
Another limitation to consider is the maximum reach or offset of the tool’s articulated arms. If you need to scribe a gap wider than the tool’s maximum extension, or if you are working in extremely tight corners where the bulky body cannot fit, you may need to revert to a simple compass or a custom-made wooden scribing block. Heavy-duty professional carpentry applications that subject tools to rough handling in toolboxes might also wear out the fine adjustment threads of lighter-duty consumer models. If your work involves daily, high-impact site use, a more rugged, single-purpose professional scribe might be a more durable investment.
Always establish conditions under which you should pause and verify your setup. If you notice any flex in the tool’s arms, or if the marking tip seems to drag and deflect, stop immediately. Consult the manufacturer’s guidelines or professional tool reviews to ensure you are using the correct configuration for that specific angle. Making a critical cut on an expensive piece of solid timber based on an unstable scribe line can result in costly material waste. Before making any permanent cuts, perform a test trace on a scrap piece of the same material to verify the visibility, erasability, and accuracy of the marked line.
Purchasing Guide and Value Assessment in Singapore
When evaluating the price-to-performance ratio of the Stedi scribing tool in Singapore, compare its cost against both entry-level plastic compasses and high-end professional European or American marking gauges. You will typically find these tools listed on various online marketplaces and local specialty hardware stores. Ensure the price, which is often positioned in the mid-range (typically around S$20 to S$50 depending on the specific kit and accessories included), aligns with how frequently you plan to use it. If you only perform occasional DIY tasks, a mid-range tool offers excellent value, whereas professional carpenters might justify a higher investment for industrial-grade durability.
When browsing online listings, watch out for red flags such as missing components (like the pencil sharpener, spare leads, or specific guide rollers), vague product descriptions that do not specify the materials used, or sellers who offer no clear return policy. Because precision hand tools rely on tight manufacturing tolerances, buying from a seller with a robust return policy is crucial in case you receive a unit with excessive play in the joints. Be cautious of listings that use generic stock photos without showing the actual product packaging or detailed close-ups of the adjustment knobs.
To ensure you are getting a genuine product, check the seller’s rating and read through user feedback specifically looking for comments on build quality, packaging, and shipping speed. Reliable sellers will often provide detailed photos of the packaging and clear instructions. Additionally, verify the shipping terms; since Singapore has a humid climate, ensure the tool is packaged well to prevent any moisture damage to metal parts during transit, and check if local warranty support is available for peace of mind. Buying from established local distributors or highly rated online storefronts reduces the risk of receiving counterfeit or defective items.
Frequently Asked Questions (FAQ)
How do I maintain the marking tip for consistent lines?
To maintain a clean, precise line, regularly inspect the marking tip for any signs of dullness, bending, or resin buildup. If you are using a graphite lead, keep it sharp using the integrated sharpener or a fine sandpaper block. For metal scribe pins, check for micro-chips at the point. Clean the tip and the surrounding locking collar using a dry microfiber cloth to remove fine wood dust and adhesive residue. Avoid using harsh solvents that could degrade any plastic components or strip the protective oil coating from metal parts. If the tip becomes severely worn or bent, replace it immediately with a manufacturer-approved refill to maintain accuracy.
Can I use this scribing tool on curved surfaces?
Yes, the tool is designed to handle curved surfaces, but success depends on your technique. When tracing along a curved edge, use the roller guide attachment if available, as it allows the tool to glide smoothly without catching. Maintain a constant angle relative to the workpiece throughout the entire stroke; tilting the tool mid-scribe will alter the offset distance and distort your line. Keep light, consistent pressure pushing the guide against the reference curve. For highly complex 3D contours or extremely tight internal radiuses where the tool’s body cannot pivot freely, a flexible contour gauge or a simple hand-held washer scribe may be a more practical choice.
Community discussion
Share your experience or ask a question. Comments are reviewed before publication.