
Quick Diagnostic: Buy or Make Your Thank You Cards?
Deciding between ready-made and DIY thank you cards depends on three main variables: your recipient count, your available time, and the level of personal sentiment you want to project. While purchasing store-bought cards offers instant polish and efficiency for large events, crafting your own cards delivers unmatched emotional resonance for intimate milestones. Aligning your choice with your current constraints ensures you express gratitude beautifully without unnecessary stress.
To find your ideal path instantly, consider this quick diagnostic framework:
- Choose Ready-Made Cards if: You have a recipient list larger than 30 people, less than two weeks of lead time, a highly formal or corporate event, or a preference for uniform, professional finishes.
- Choose DIY Cards if: You have a small recipient list (under 15 people), a flexible timeline of several weeks, a desire to showcase specific crafting skills like watercolor or calligraphy, and a highly intimate occasion.
- Choose a Hybrid Approach if: You want the clean, heavy paper weight of professional printing but still wish to add a personalized touch, such as a custom wax seal, hand-stamped monogram, or handwritten message inside.
Evaluating Your Time and Crafting Bandwidth
Embarking on a handmade stationery project requires a realistic assessment of the physical labor and hours involved. Crafting a card from scratch is not a single action; it is a multi-phase production line. You must first invest time in sourcing materials from local paper merchants or craft suppliers, which can take several hours of browsing and transit. Once the materials are in your workspace, you must dedicate time to prototyping your design, testing ink compatibility, measuring dimensions, cutting cardstock, folding, assembling decorative elements, and finally, handwriting each message.
Products mentioned in this guide
![[SG Seller] Cute Floral Aesthetic Thank You Cards Small Business Packaging Customer Appreciation Inserts Teachers](https://img.lazcdn.com/g/p/9c9445f008af9e5f036802ef95db36db.jpg_400x400q80.jpg_.webp)
![[MIN 3 CARDS] 🇸🇬SG Farewell Colleagues Office Thank You Card Special Funny Editions Message Greeting Card](https://img.lazcdn.com/g/ff/kf/Se0ec2d02e5184afc83520eddb058ec5ez.jpg_400x400q80.jpg_.webp)
![[MIN 3 CARDS] 🇸🇬SG Punny Teacher Appreciation Card Special Editions for Graduation Greeting Thank You Heartfelt Support Message Card](https://img.lazcdn.com/g/ff/kf/S46b8562713de4564b8cea4c9945a655fF.jpg_400x400q80.jpg_.webp)
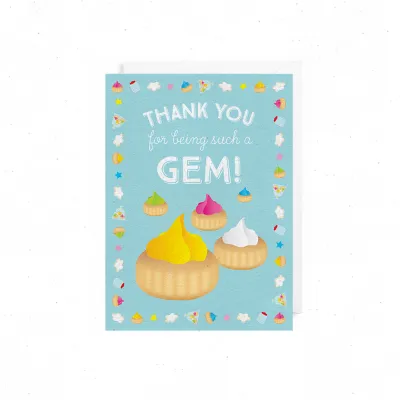
Prices are valid at publication and may change. Please refer to the product page for the latest price.

In contrast, purchasing ready-made cards streamlines the front-end process significantly. Your time commitment is limited to researching designs online or visiting a local boutique, placing an order, and waiting for delivery. For local orders within Singapore, delivery typically takes three to seven working days, leaving you with only the final task of writing your messages.
To determine if you have the bandwidth for a DIY project, use a simple time-per-card calculation. Estimate the time required to complete one single card from raw sheet to finished product, including cleanup. Multiply this number by your total recipient count, then add a two-hour buffer for material sourcing and setup.
For example, if a single handmade card takes a modest 15 minutes to assemble and write:
- 10 Recipients: 150 minutes (2.5 hours) + 2 hours buffer = 4.5 hours total. This is highly manageable over a single weekend.
- 80 Recipients: 1,200 minutes (20 hours) + 2 hours buffer = 22 hours total. This requires a significant, multi-week commitment that can easily lead to physical fatigue and rushed, inconsistent results.
Breaking Down the True Costs
Many creators choose the DIY route under the assumption that it is the more budget-friendly option. However, the financial trade-off is rarely that simple due to the upfront cost of specialized tools and materials. Buying ready-made cards in bulk packs or premium boxed sets offers a transparent, fixed per-unit cost. A standard box of 24 to 50 ready-made cards generally ranges from S$15 to S$35, resulting in a predictable cost of roughly S$0.60 to S$1.45 per card.
Conversely, the cumulative expenses of a DIY stationery project can escalate rapidly. To create a high-quality handmade card, you must purchase several raw materials and tools:
- Premium Cardstock: S$15 to S$30 for a pack of heavy, acid-free sheets (250 to 300 GSM).
- Matching Envelopes: S$8 to S$15 for a pack of 25 standard C6 or custom-sized envelopes.
- Precision Cutting Tools: S$15 to S$35 for a reliable paper trimmer or rotary cutter to ensure straight, clean edges.
- Adhesives: S$5 to S$12 for acid-free double-sided tape runners or specialized paper glue that will not warp the paper.
- Decorative Supplies: S$15 to S$40 for pigment ink pads, acrylic stamping blocks, or brush calligraphy pens.
When you add these initial investments together, your starting cost for a DIY project can easily exceed S$60 to S$130 before you have completed your first card. If you only need to send 10 thank you cards, your per-card cost for DIY stands at S$6 to S$13, which is significantly higher than purchasing a premium, professionally printed boxed set. The financial threshold where DIY becomes more cost-effective only occurs when you already own the necessary crafting tools, or when you scale the project to a mid-sized quantity where the cost of raw materials per unit drops below the retail price of individual store-bought cards.
How the Number of Recipients Shifts the Balance
The scale of your guest list is often the ultimate deciding factor in the buy-versus-make dilemma. As the number of recipients increases, the physical toll of hand-making cards scales linearly, while your physical stamina and design consistency inevitably decline. What begins as a relaxing, creative outlet on card number one can easily turn into a tedious, stressful chore by card number fifty.
Handwriting and hand-assembling cards in large quantities introduces the risk of physical fatigue, hand cramps, and visible inconsistencies. The ink work on your final cards may look shaky or rushed compared to the pristine prototypes you created at the start. If you are managing a large-scale event—such as a wedding with 150 guests, a major corporate milestone, or a large community fundraiser—ready-made cards are the most practical, stress-free choice. They ensure every recipient receives a card of identical, high-quality polish without placing an overwhelming physical burden on you during an already busy season.
The practical sweet spot for DIY thank you cards lies within a range of 1 to 15 recipients. Within this compact volume, you can easily maintain absolute focus on design precision, experiment with intricate hand-painted details, and write deeply personalized notes without feeling rushed. This makes handmade cards ideal for intimate circles, such as your bridal party, close family members, or a small team of supportive colleagues.
Aligning Personalization with the Occasion
The nature and formality of the occasion should dictate the presentation style of your thank you cards. Different events carry distinct emotional expectations and professional standards. Matching your card format to the context ensures your message of appreciation is received with the appropriate tone.
Handmade thank you cards shine brightest in highly personal, intimate contexts where the recipient deeply appreciates the time and effort you invested. Occasions such as baby showers, intimate milestone birthdays, personal favors, or teacher appreciation gifts are perfect matches for DIY cards. In these scenarios, minor handmade imperfections are not seen as flaws; instead, they serve as charming proof of your genuine care and personal connection.
Conversely, formal and professional events demand the crisp, uniform perfection that only professional printing can provide. For corporate networking, client appreciation, formal weddings, or expressing gratitude after a job interview, a high-quality ready-made card is the superior choice. Using a card printed on heavy, 300 to 350 GSM cotton or linen cardstock with clean typography or elegant foil accents projects a high level of respect, professionalism, and attention to detail. In a professional context, a messy or unevenly cut DIY card can inadvertently signal a lack of polish or disregard for standard business etiquette.
Final Decision Checklist and Next Steps
Once you have weighed your time, budget, quantity, and occasion, you can confidently move forward with your chosen method. Use these tailored preparation checklists to ensure a smooth, successful process.
If You Decide to Buy Ready-Made Cards
- Check Paper Weight: Look for cards specified at 250 GSM (Grams per Square Meter) or higher. Anything below 200 GSM will feel flimsy and cheap in the hand.
- Ensure Envelope Compatibility: Verify that the envelopes included match the size of the cards perfectly (such as C6 envelopes for A6 folded cards) and are made of a complementary paper weight.
- Verify Ink Compatibility: Glossy or heavily coated ready-made cards can cause water-based gel pens or fountain pen inks to smudge, pool, or take hours to dry. Opt for matte or uncoated cardstock if you plan to write long, handwritten messages inside, or test your preferred pen on a small, inconspicuous corner first.
- Factor in Lead Times: Order your cards at least two weeks before you intend to mail them to account for processing and local courier transit times.
If You Decide to Make Your DIY Cards
- Procure Essential Tools: Invest in a sharp paper trimmer rather than scissors to guarantee perfectly straight edges. Always use paper trimmers on a stable, flat surface and keep fingers clear of the cutting rail to ensure safe, precise cuts. Use a bone folder to achieve crisp, clean folds without cracking the paper fibers.
- Choose the Right Adhesive: Avoid standard liquid school glues, which introduce moisture and cause cardstock to warp or wrinkle as it dries. Instead, use acid-free double-sided tape runners or glue dots for a clean, professional bond.
- Conduct Ink and Paper Tests: Before writing your final messages, test your calligraphy pens, brush markers, or fountain pens on scrap pieces of your selected cardstock. Observe the paper for feathering (where ink bleeds along the paper fibers) and bleed-through (where ink visibly penetrates to the back of the page). Adjust your pen or paper choice if the ink spreads excessively.
- Keep Designs Flat for Mailing: If you plan to send your cards through the mail, keep the front designs relatively flat. Avoid thick 3D embellishments like heavy wooden shapes, large plastic buttons, or thick twine knots that can catch in automated sorting machinery.
Frequently Asked Questions (FAQ)
Can I combine both methods?
Yes, a hybrid approach is an excellent way to balance professional paper quality with personal effort. You can purchase high-quality, blank ready-made cards and matching envelopes, which saves you the time-consuming tasks of measuring, cutting, and folding. From there, you can add personal DIY elements to the blank canvas. Consider applying a custom-carved rubber stamp with your personal monogram, writing the recipient’s name in hand calligraphy on the envelope, or sealing each envelope with a classic wax seal. This hybrid method dramatically reduces your production time while still delivering a highly personalized, tactile experience.
Do handmade cards require extra postage?
Handmade cards can require additional postage if they exceed standard mailing dimensions or weight limits set by postal services like SingPost. In Singapore, standard local mail must fit within specific size limits (up to 240mm x 162mm x 6mm) and weigh under 40 grams to qualify for standard postage rates. If your DIY card is thicker than 6mm due to 3D embellishments like wax seals, ribbons, or pop-up elements, or if it features an irregular shape like a square or circle, it will be classified as non-standard mail. Non-standard mail requires higher postage rates. Additionally, lumpy or rigid envelopes should be handed over the post office counter rather than dropped into a standard mailbox to prevent them from tearing or jamming the automated sorting machines.
Community discussion
Share your experience or ask a question. Comments are reviewed before publication.