
Quick Answer: Which Invitation Route Fits Your Party?
Choosing between pre-made and DIY birthday invitation cards depends on your guest count, remaining planning time, and creative interest. If your party is less than three weeks away or your guest list exceeds 40 people, purchasing pre-made invitations is the most reliable way to ensure a stress-free lead-up to the event.
Conversely, if you have a small guest list, a highly specific theme, and at least four weeks to spare, crafting DIY invitations offers an exceptional level of personalization and creative satisfaction. Balancing your budget in S$ against your available hours will quickly point you toward the right decision for your celebration.
Pre-Made vs. DIY: Comparing Time, Budget, and Customization
To make an informed choice, you must evaluate the practical trade-offs of both methods across four core dimensions: cost, time, creative control, and finished quality.
Products mentioned in this guide
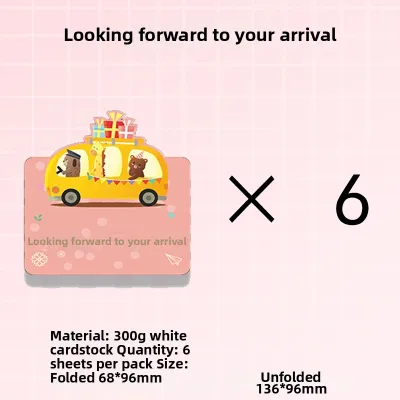
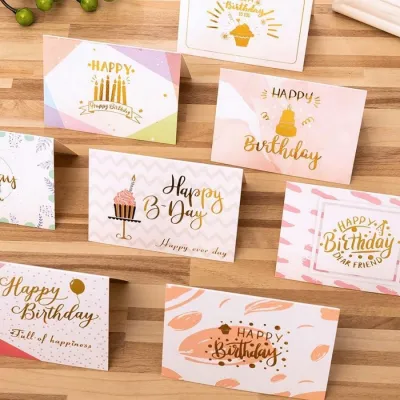
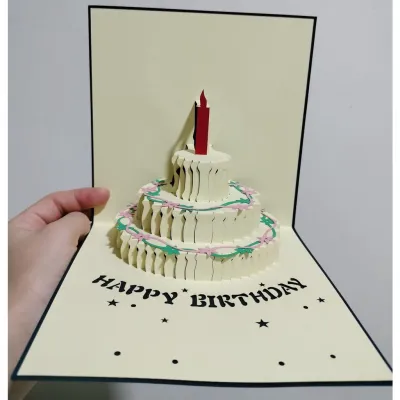
Prices are valid at publication and may change. Please refer to the product page for the latest price.

The cost structure of these two options is often misunderstood. Pre-made cards benefit from commercial economies of scale, meaning a pack of 20 standard cards might cost between S$15 and S$30, providing a highly predictable per-unit cost. DIY projects, however, require upfront investments in raw materials that can quickly accumulate. You must purchase cardstock packs, matching envelopes, and adhesive supplies, often in fixed quantities that leave you with excess waste. Furthermore, home printing consumes significant amounts of color ink; a single set of high-coverage designs can easily deplete a standard printer cartridge, raising the actual cost per card far beyond initial estimates.
Time investment is another critical differentiator. Pre-made invitations are ready for immediate writing or mailing the moment they arrive. In contrast, the DIY route demands a multi-stage commitment that spans graphic design, paper sourcing, test printing, precision cutting, and final assembly. Crafting a batch of 30 custom cards can easily require 10 to 15 hours of active labor. If you are already managing catering, decorations, and venue bookings, this additional time commitment can become a major source of pre-party stress.
Customization limits define what is creatively possible. Pre-made cards restrict you to fixed layouts, standard color palettes, and pre-printed text fields where you can only fill in the blanks. DIY invitations grant you creative freedom over every detail. You can select non-standard dimensions, such as a modern square format or a classic folding gatefold, and incorporate unique tactile elements like hand-tied silk ribbons, custom wax seals, or deckled edges.
Quality verification is essential to ensure your invitations look polished. Purchased cards feature professional offset or high-grade digital printing on heavy, uniform cardstock with crisp lines and consistent colors. For DIY invitations, achieving a professional finish requires careful calibration. You must verify your home printer’s maximum resolution and ensure the paper finish is compatible with your ink type to prevent smudging, bleeding, or feeding issues.
When to Choose Pre-Made Birthday Invitation Cards
Purchasing ready-made invitations is highly practical under specific planning conditions where efficiency and consistency are paramount.
When you are managing a large guest list with a tight deadline, pre-made cards are incredibly efficient. Attempting to hand-craft 50 or more invitations while juggling school, work, and other party preparations can quickly lead to fatigue and inconsistent quality. Pre-made sets allow you to fill in the essential details rapidly, ensuring all invitations are dispatched on schedule.
Formal or milestone celebrations, such as a grand 50th birthday dinner or a formal evening gala, often demand a level of precision that is difficult to replicate at home. Professional pre-made cards offer high-end finishes like metallic foil stamping, precise die-cut borders, and precisely aligned folds. These details convey a sense of formal elegance that sets the tone for a sophisticated event.
Additionally, pre-made cards are the logical choice if you lack access to specialized crafting tools or design software. Producing clean, straight cuts with standard household scissors is incredibly difficult, and purchasing a professional paper trimmer, high-resolution printer, and design templates solely for one event is rarely cost-effective. Opting for pre-made designs allows you to allocate your budget directly to the party experience itself.
When to Choose DIY Birthday Invitation Cards
Creating your own invitations adds immense value when the personal touch and creative expression align with your party’s scale and timeline.
For small, intimate gatherings like a cozy backyard dinner or a small crafting party, hand-making your invitations shows a high level of care. You can easily customize each card for the individual recipient, perhaps writing a personalized note on the back or tailoring the color scheme to their favorite shades. This level of thoughtfulness transforms the invitation from a simple piece of mail into a cherished keepsake.
DIY is also the ideal path when your party features a highly specific or niche theme. Standard retail collections often focus on broad, popular themes, leaving those hosting unique events—such as a vintage retro-gaming night, a specific botanical watercolor aesthetic, or a local heritage-themed gathering—with very few options. Designing your own cards ensures your invitations closely match your creative vision without compromise.
Finally, DIY is highly feasible if you have a flexible timeline and genuinely enjoy the crafting process. If you find scrapbooking, calligraphy, or graphic design relaxing, making invitations becomes an enjoyable pre-party activity rather than a chore. With a comfortable window of four to six weeks before your mailing date, you have ample time to prototype designs, source unique papers from local stationery suppliers, and assemble the cards at your own pace.
Step-by-Step Checklist to Finalize Your Choice
To make your final decision, work through this structured checklist to evaluate your resources and constraints.
First, assess your exact guest count. Calculate the number of households rather than individual guests, as families and couples only require one invitation. Compare the cost of purchasing that exact number of pre-made cards against the cost of buying full packs of DIY materials, keeping in mind that specialty cardstock is often sold in fixed packs of 25 or 50 sheets.
Second, map your timeline backward from your target mailing date, which should be three to four weeks before the party. Subtract the delivery time for pre-made cards, allowing extra days for international shipping if ordering online. For the DIY route, allocate at least seven to ten days for design, material sourcing, test printing, and assembly. If your remaining time is too tight, pre-made cards are the safest choice.
Third, inventory your available tools. Ensure you have a sharp paper trimmer to guarantee clean, straight edges, a reliable adhesive that will not warp the paper, and a printer with sufficient ink levels. If you need to purchase these tools, add their cost to your DIY budget to see if the project remains financially viable.
Fourth, establish a clear stop-condition. If you choose the DIY route, set a firm deadline to complete your first physical prototype. If you encounter persistent issues during this test—such as paper jams, ink smudging, or uneven cuts—and cannot resolve them within 48 hours, invoke your stop-condition and transition immediately to pre-made cards to keep your planning on track.
Frequently Asked Questions (FAQ)
Can I combine pre-made and DIY elements for my invitations?
Yes, a hybrid approach offers an excellent balance of convenience and personalization. You can purchase simple, high-quality pre-made card bases or blank flat cards and focus your creative energy on DIY embellishments. For example, you can use a custom rubber stamp with metallic ink, tie a piece of rustic twine around the card, or write the guest names in elegant hand calligraphy. Alternatively, you can design the invitation digitally, print it onto high-quality cardstock at a local print shop, and then hand-assemble them with pre-made envelopes and liner papers.
What paper weight is best for DIY birthday invitation cards?
For a premium, sturdy feel, look for cardstock with a weight between 220 gsm (grams per square meter) and 300 gsm. Standard printer paper (usually 80 gsm) is far too thin and will feel cheap and wrinkle easily. Before purchasing heavy cardstock, verify your home printer’s specifications; many standard home printers struggle to feed paper thicker than 200 gsm or 220 gsm, leading to paper jams or roller marks. Additionally, perform a quick test with your chosen writing instruments: highly textured or uncoated papers can cause fountain pen or gel ink to bleed or feather, while glossy papers may require extended drying times to prevent smudging.

Community discussion
Share your experience or ask a question. Comments are reviewed before publication.