
The most effective plastic rings for organizing cables and small desk accessories are selected based on their specific utility, material flexibility, and mounting style. For routing power cords and data lines, flexible split-ring cable managers or adhesive-backed plastic ring mounts keep cables secure yet accessible. For small desk accessories like swatches, keys, or lightweight tools, loose-leaf plastic binder rings and carabiner-style plastic clips offer a modular, easy-to-open solution. Selecting the right ring involves evaluating the inner diameter, material flexibility, and surface compatibility to ensure a tidy, damage-free desk setup.
Using plastic rings is an efficient, budget-friendly way to reclaim workspace surface area. Unlike permanent metal fixtures, plastic options are lightweight, resistant to rust, and less likely to scratch delicate desk finishes or cable jackets. By understanding the physical properties and design variations of these simple tools, you can build a customized organization system that adapts to your changing workflow.
Understanding Plastic Ring Types for Desk Use
To build an organized desk, you must first match the style of the plastic ring to the specific task at hand. Using the wrong type of ring can lead to sagging cables, dropped accessories, or damaged surfaces. Plastic rings generally fall into three distinct categories, each engineered for a specific type of weight and movement.
Products mentioned in this guide

Prices are valid at publication and may change. Please refer to the product page for the latest price.
Cable management rings are designed specifically to route, bundle, and secure electrical cords. These rings often feature a split-loop design, allowing you to slip cables in and out without disconnecting your devices. They are available in adhesive-backed styles that stick directly to the underside of your desk, screw-mount variations for heavy-duty setups, and free-floating split rings that bundle loose cables behind monitor arms. These rings keep power cords and display cables tucked away, preventing them from tangling around your feet.
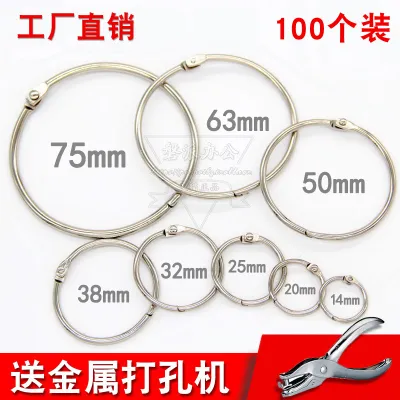
Binder rings and book rings offer a highly flexible solution for organizing small, loose items. Traditionally used to hold index cards or paper samples together, these rings feature a simple hinge and a snap-to-close locking mechanism. In a desk environment, they are excellent for grouping items with pre-drilled holes, such as color swatches, material samples, reference cards, or small hand tools. Because they open and close easily, you can add or remove items from the bundle in seconds.
Key rings and carabiner-style plastic clips provide a secure, modular way to group accessories that you use frequently. These rings often feature a spring-loaded gate or a threaded screw closure, making them highly secure against accidental opening. They are ideal for holding USB flash drives, key fobs, small pouches, or utility tools. By clipping these rings to a pegboard or a desk-side hook, you keep your most-used accessories within arm’s reach without letting them clutter your main workspace.
Evaluating Plastic Rings for Cable Management
When selecting plastic rings specifically for cable routing, physical dimensions and material properties are critical. Cables carry electrical currents and data signals, meaning they must be handled gently to prevent signal degradation or safety hazards. Choosing the wrong ring can pinch wires or trap heat, leading to premature cable wear.

First, you must match the inner diameter of the ring to the thickness of your cable bundle. Never pack cables tightly into a ring; always leave at least 20% to 30% of empty space inside the loop. This extra space allows for heat dissipation, which is especially important for power cables that warm up during use. A loose fit also makes it much easier to pull a single cable through the ring when you need to adjust your desk layout or swap out a device.
Second, inspect the material flexibility and edge smoothness of the plastic ring. Rigid, cheap plastics often have sharp flashing lines left over from the manufacturing mold. Over time, as your desk moves or as you adjust your devices, these sharp edges can rub against cable jackets, slowly slicing through the protective rubber insulation. Look for rings made from high-quality nylon or polyethylene, which offer rounded inner edges and a slight amount of flex to absorb movement without causing friction damage.
Finally, compare mounting mechanisms based on your desk material and how often you plan to move your cables. Adhesive-backed rings are ideal for smooth, non-porous surfaces like glass, metal, or sealed laminate desks, offering a clean look without drilling. However, if you have a heavy bundle of thick power cables, adhesive mounts may fail under the constant downward pull. In these cases, screw-mount plastic rings provide a permanent, fail-safe hold, provided your desk material can safely accept screws without splitting.
Choosing Rings for Small Desk Accessories
Organizing small accessories with plastic rings requires a focus on weight capacity, security, and visual clarity. Unlike cables, which generally stay in place once routed, accessory rings are handled frequently throughout the day. This constant movement means the rings must be durable and easy to manipulate.
Before committing to a ring style, assess the weight of the items you plan to hang. Plastic binder rings rely on friction or a small snap-fit joint to stay closed. If you overload a plastic binder ring with heavy metal tools or large key rings, the joint can easily pop open when bumped, spilling your items across the floor. For heavier accessories, choose thick, threaded plastic rings or carabiner-style clips that lock securely and cannot be forced open by gravity.
Sizing proportions are equally important for usability. A ring that is too large for its contents will allow items to hang too low, potentially hitting your knees under the desk or dragging on the surface. Conversely, a ring that is too small will bunch the items together, making it difficult to flip through swatches or detach a single tool. Choose a ring diameter that allows the items to lie flat against one another while still leaving enough clearance to slide them smoothly along the curve of the ring.
Color coding and visibility can greatly improve your daily productivity. Plastic rings are available in a wide variety of colors, including translucent and solid bright tones. You can use these colors to categorize your accessories at a glance. For example, use blue rings for charging adapters and dongles, red rings for keys and security fobs, and clear rings for paper swatches. This simple visual system eliminates the need to search through drawers, saving time and reducing mental clutter.
Installing Ring Mounts Safely on Desk Surfaces
Proper installation is the key to ensuring your plastic ring organization system lasts. Many users experience falling cables or damaged desk finishes simply because they rushed the installation process. Following a systematic approach ensures a strong hold and protects your furniture.
Begin by thoroughly preparing the mounting surface. Adhesive mounts require a completely clean, dry, and oil-free surface to bond correctly. Wipe the target area with isopropyl alcohol using a clean microfiber cloth to remove dust, fingerprints, and manufacturing residues. Avoid using household glass cleaners or multi-surface sprays, as they often leave behind a thin, slick film that prevents the adhesive from sticking. Allow the surface to dry completely before proceeding.
Once the surface is clean, peel the protective backing from the adhesive mount, position the ring, and press it firmly against the desk surface for at least 30 seconds. Do not immediately hang cables or accessories from the ring. Most pressure-sensitive adhesives require time to cure and reach full bonding strength. For best results, leave the mount empty for 24 hours before introducing any weight or tension.
To prevent sagging and reduce stress on individual mounts, plan your spacing carefully. Space your plastic rings at regular intervals of approximately 15 to 20 centimeters along the underside or back edge of your desk. This distribution prevents heavy cables from drooping and ensures that no single adhesive mount bears the entire weight of the cable run. If you encounter a sharp bend or a corner, place two rings close together to guide the cable smoothly around the turn without putting leverage on the adhesive.
Be highly cautious when dealing with fragile, textured, or porous surfaces. Unfinished wood, paper-wrapped particle board, textured laminates, and delicate painted surfaces do not bond well with standard adhesives. Applying a strong adhesive to these materials can fail to hold, or worse, rip away the outer veneer or paint layer when removed. For these sensitive surfaces, consider using clamp-on cable organizers, magnetic ring mounts, or free-standing cable trays that do not rely on chemical adhesives.
Frequently Asked Questions (FAQ)
Can plastic cable rings damage desk surfaces when removed?
Yes, plastic cable rings with strong adhesive backings can damage desk surfaces if they are ripped off carelessly. On veneered, painted, or paper-laminated desks, the adhesive bond can be stronger than the surface finish itself, leading to peeling or chipping. To remove an adhesive ring safely, use a hair dryer on a low-heat setting to gently warm and soften the adhesive backing. Once warmed, slide a piece of dental floss or a thin plastic card slowly beneath the mount to slice through the adhesive layer. Any remaining sticky residue can be cleaned off using a mild soapy water solution or a dedicated adhesive remover, always testing a small, hidden spot on your desk first to ensure the finish does not discolor.
How do I measure the correct ring size for a mixed cable bundle?
To find the correct ring size for a mixed cable bundle, gather all the cables you plan to route together and hold them firmly in a tight, round bundle. Wrap a strip of paper or a piece of string snugly around the thickest part of the bundle, and mark the point where the end overlaps. Lay the paper or string flat and measure the distance to the mark with a ruler to find the circumference of your bundle. Divide this measurement by 3.14 to calculate the exact diameter of the bundle. Finally, add a buffer of at least 20% to 30% to this diameter to find the ideal inner diameter for your plastic ring, ensuring the cables have enough room to breathe and slide easily.
Community discussion
Share your experience or ask a question. Comments are reviewed before publication.