
Selecting the correct protective finish is a critical final step in any art or modeling project. The choice between matte, gloss, and satin Vallejo varnishes depends primarily on your desired light reflection, the underlying medium, and any subsequent detailing techniques you plan to use. Rather than a single universal option, the right choice is conditional: gloss enhances color depth and prepares surfaces for decals, matte eliminates glare and seals final details, and satin offers a natural, mid-range sheen for organic textures. This guide breaks down the visual characteristics, ideal use cases, and application checks to help you match the exact Vallejo varnish finish to your project’s requirements.
Visual and Textural Differences: Matte, Gloss, and Satin Explained
To make an informed decision, you must first understand how each varnish finish interacts with light and the physical surface of your work. Light reflection is the primary differentiator among these three finishes. A gloss varnish creates a completely smooth, level barrier that reflects light in a single, uniform direction. This specular reflection minimizes light scattering, which makes the underlying colors appear highly saturated, deep, and rich. Dark tones, especially blacks and deep blues, gain immense visual depth under a gloss coat, though this comes at the cost of high reflectivity and potential glare under direct lighting.
Conversely, a matte varnish contains microscopic matting agents—typically silica particles—that settle on the surface as it dries. These particles create a microscopically rough texture that scatters light in multiple directions. Because the light is diffused rather than reflected uniformly, glare is virtually eliminated, resulting in a flat, non-reflective finish. However, this light scattering can slightly reduce the perceived contrast and saturation of dark colors, sometimes giving them a soft, slightly pastel, or dusty appearance.
Products mentioned in this guide
![[VALLEJO] ACRYLIC VARNISH (340g)](https://img.lazcdn.com/g/p/42590fd864cb7012324eee0cea8fac95.jpg_400x400q80.jpg_.webp)
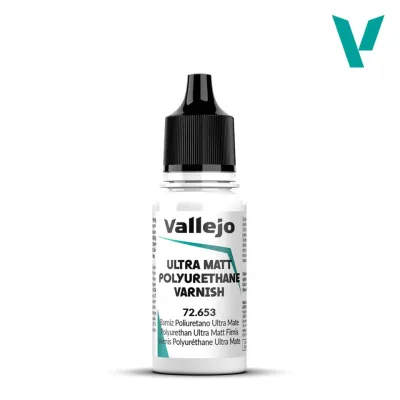
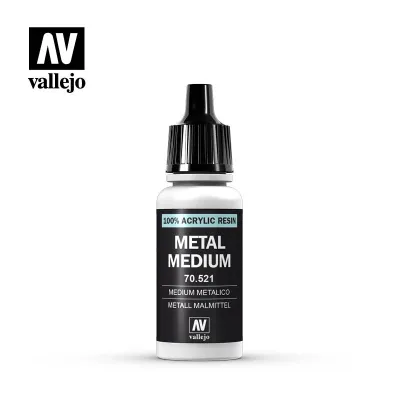
Prices are valid at publication and may change. Please refer to the product page for the latest price.
A satin varnish occupies the middle ground between these two extremes. It contains a balanced concentration of matting agents, allowing it to reflect some light while scattering the rest. This creates a soft, subtle sheen that mimics the natural luster of semi-gloss surfaces without the harsh reflections of a full gloss or the complete flatness of a matte finish. Satin preserves a high degree of color saturation and contrast while keeping glare manageable under standard viewing conditions.
The physical texture of your project also changes depending on the finish you select. Gloss varnishes tend to feel exceptionally smooth and slick to the touch, which can alter how subsequent paint layers or weathering products behave on the surface. Matte varnishes leave a slightly toothy, micro-textured surface that provides excellent physical grip for dry pigments, pencils, and pastel work. Satin finishes offer a smooth but non-slippery texture, making them highly versatile for multi-layered projects where you want to maintain a clean, touchable surface.
Matching the Varnish Finish to Your Specific Project
Your choice of finish should always align with the specific goals of your project, whether you are painting a miniature figure, building a scale model, or finishing a fine art canvas. Different mediums and disciplines require distinct surface properties to achieve realistic or visually striking results.

Miniatures, Scale Models, and Dioramas
In the world of miniature painting and scale modeling, varnishes serve both protective and functional roles during the painting process. Applying a gloss varnish is a standard intermediate step before applying decals or slide transfers. The ultra-smooth surface of a gloss coat prevents air from getting trapped beneath the decal film, which eliminates the silvering effect and ensures a seamless bond. Additionally, the slick surface of a gloss coat facilitates capillary action, allowing highly diluted washes and panel liners to flow smoothly into recessed panel lines and details without staining the flat areas of the model.
Once your decals and washes are dry, applying a matte varnish is often the preferred final step for most military models, historical miniatures, and fantasy figures. Scale models viewed under normal room lighting can look unnervingly shiny if left unfinished, as plastic and acrylic paints reflect light in ways that do not scale down realistically. A flat matte coat removes this unnatural glare, unifying the different paint types used on the model and making the sculpted details stand out clearly.
Satin finishes are invaluable when you need to replicate specific materials that are neither completely flat nor highly reflective. For example, leather jackets, wooden stocks, rubber tires, and polished metal parts look most realistic when sealed with a satin varnish. The subtle sheen mimics the natural oils and textures of these materials, preventing them from looking dry and lifeless under a matte coat or cartoonishly shiny under a gloss coat.
Canvas Paintings, Illustrations, and Mixed Media
For traditional artists working on canvas, paper, or wood panels, the choice of varnish directly influences how viewers experience the artwork in a gallery or home setting. A gloss varnish is highly effective for paintings with deep, dark color palettes or intricate, high-contrast details. By leveling the surface, gloss varnish brings out the rich undertones of acrylic paints, making them resemble the depth and luster of traditional oil paintings. However, you must consider the display environment, as strong overhead gallery lights can create distracting reflections on a glossy canvas.
If your artwork is destined for an environment with unpredictable or bright lighting, a matte varnish is often the safer choice. It ensures that the painting remains fully visible from any viewing angle without glare blocking the details. Matte varnish is also ideal for highly textured mixed-media pieces, as it protects the surface without adding an artificial shine that could clash with the natural textures of paper, fabric, or raw wood.
Satin varnish is the go-to option for portraiture, landscapes, and illustrations where you want a balanced, professional presentation. It provides enough sheen to make colors pop and details look crisp, yet it diffuses light sufficiently to prevent harsh hot spots of reflection. This makes satin-finished paintings much easier to photograph for digital portfolios or print reproduction, as it minimizes the glare that often plagues digital cameras.
Essential Preparation and Compatibility Checks Before Application
Before you apply any varnish to your hard work, you must perform several critical preparation and compatibility checks to avoid ruining your paint job. The most common cause of varnish failure—such as clouding, bubbling, or cracking—is applying the finish over paint that has not fully cured. While acrylic paints may feel dry to the touch within minutes, they can take several days to fully cure and release all remaining moisture. If you seal a partially cured paint layer with a varnish, the escaping moisture can become trapped, leading to a cloudy, white haze known as frosting. Always consult the paint manufacturer’s instructions for exact curing times before varnishing.
You must also check the specific Vallejo product label to determine the correct application method and thinning requirements. Vallejo offers varnishes formulated for both brush and airbrush application, and using the wrong technique can lead to pooling or uneven coats. If you are using an airbrush, verify the recommended thinning ratios and use only compatible thinners, such as Vallejo’s official airbrush thinner, rather than water or high-strength solvents that could break down the varnish formula. For brush application, use a soft, flat brush and apply thin, even coats to prevent the varnish from pooling in recesses, which can dry semi-opaque or cloudy.
Conducting a mandatory test application is the single best way to ensure success. Always apply a small amount of your chosen varnish to a hidden area of the project, a scrap piece of the same material, or a test swatch painted with the exact same paint layers. Allow this test piece to dry and cure completely under the same environmental conditions as your main project. This trial allows you to observe the final dried sheen, verify that the varnish does not lift or react chemically with the underlying paint, and ensure that no unexpected clouding occurs.
Final Decision Framework: Which Vallejo Varnish Should You Pick?
To make your final selection, evaluate your project against a simple, conditional framework based on your immediate goals. Choose a gloss varnish if your primary objective is to apply decals smoothly, use panel washes, or maximize the depth, contrast, and saturation of dark colors. This finish is best suited for intermediate steps in scale modeling or for final coats on high-contrast, dark-toned paintings where glare is not a concern.
Choose a matte varnish if you are sealing a completed miniature, want to eliminate all distracting light reflections, or prefer a flat, modern aesthetic for your artwork. Matte is the ideal final coat to unify different paint finishes and highlight fine, sculpted details without artificial shine.
Choose a satin varnish if you are replicating organic materials like leather, wood, or skin, or if you want a balanced, professional finish for portraits and landscapes. Satin provides a natural sheen that enhances colors while keeping reflections soft and manageable.
Regardless of your choice, always verify compatibility first if you are applying varnish over non-acrylic mediums, mixed media, or unknown underlying layers. Consult the product labels, ensure the surface is fully cured, and perform a test swatch to guarantee a flawless, protective finish.
Frequently Asked Questions (FAQ)
Can you mix Matte and Gloss Vallejo varnishes to create a custom Satin finish?
Yes, you can mix Vallejo’s matte and gloss varnishes from the same product line to achieve a custom level of sheen. Because they share the same acrylic binder, they blend seamlessly to create intermediate finishes like satin or semi-gloss. To do this successfully, track your mixing ratios precisely using a dropper so you can replicate the blend in future sessions. Stir the mixture thoroughly rather than shaking it vigorously to avoid introducing air bubbles, and always test the custom blend on a scrap surface to verify the dried sheen before applying it to your final project.
Should you apply a gloss coat before a matte coat for miniatures?
Applying a gloss coat before a final matte coat is a highly effective technique in miniature painting and scale modeling. The initial gloss layer provides a perfectly smooth surface that facilitates decal application and allows washes to flow smoothly into recessed details. Once these detailing steps are complete and fully dry, applying a final matte coat seals the entire model, protects the delicate paint layers beneath, and removes the glossy shine to restore a realistic, flat appearance. Ensure each intermediate layer is fully dry and cured according to the product instructions before applying the next coat.
Community discussion
Share your experience or ask a question. Comments are reviewed before publication.