
Quick Guide: Matching Magnetic Buttons to Your Bag Type
Choosing the right hardware for your bag-making project is the difference between a secure, professional-looking accessory and a frustrating closure that either pops open constantly or tears through your fabric. The ideal magnetic button for bags depends entirely on the structural demands of the bag style, the weight of the fabric, and the weight of the items you plan to carry inside.
To help you make an immediate decision, the table below maps common bag types to their recommended magnetic button styles, sizes, and relative strengths:
| Bag Type | Recommended Button Style | Diameter Range | Magnet Strength | Key Interfacing Requirement |
|---|---|---|---|---|
| Totes & Everyday Bags | Pronged (Push-in) or Large Sew-in | 14mm – 18mm | Medium | Heavy woven interfacing or fusible fleece |
| Clutches & Evening Bags | Hidden (Snap) or Thin Sew-in | 10mm – 14mm | Light to Medium | Decovil Light or firm sew-in stabilizer |
| Backpacks & Messenger Bags | Heavy-Duty Pronged | 18mm+ | Heavy-Duty | Plastic canvas, leather scrap, or Decovil Heavy |
| Small Pouches & Wallets | Micro Sew-in or Thin Snap | 10mm – 12mm | Light | Lightweight fusible woven interfacing |
While matching the button style to the bag type is a crucial first step, you must also account for the physical properties of your materials. Fabric thickness, the weight of your interfacing, and the expected load of the bag will ultimately dictate your choice. A heavy-duty magnet paired with a delicate, unreinforced fabric will quickly cause tearing, while a weak magnet buried under thick layers of canvas and fleece will fail to hold the bag closed.
Products mentioned in this guide
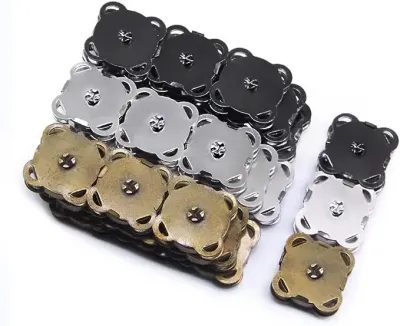
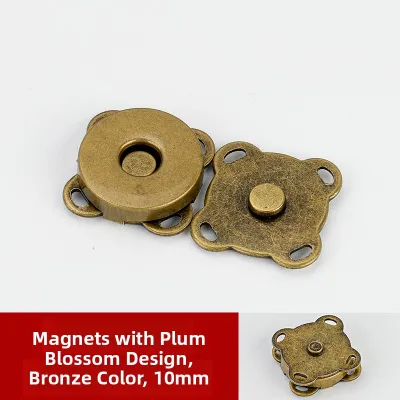
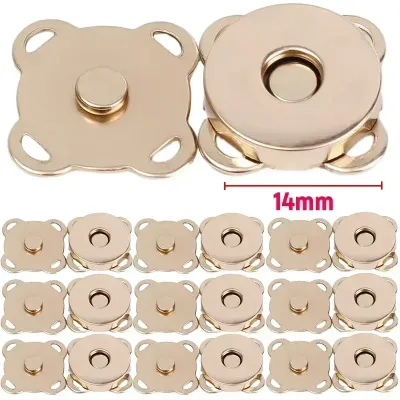
Prices are valid at publication and may change. Please refer to the product page for the latest price.
Before purchasing your hardware, always check the manufacturer instructions for both your sewing pattern and the magnetic snaps. Testing your chosen combination on a scrap piece of fabric layered with your exact interfacing setup is the safest way to ensure a secure, long-lasting closure.
Understanding Magnetic Button Styles and Installation Methods
To choose the best hardware for your project, you must first understand the mechanical differences between the three primary magnetic button styles. Each style requires a different installation technique, offers a distinct aesthetic finish, and performs best with specific fabric weights.

Sew-in Magnetic Buttons
Sew-in magnetic buttons are encased in a small, flexible plastic or vinyl sleeve, or they feature a metal rim with pre-drilled sewing holes. Because you stitch these buttons directly to the lining fabric or seam allowance, they do not require you to pierce or cut holes in your main fabric. This makes them exceptionally gentle on delicate materials like silk, satin, fine linen, and lightweight cotton.
These buttons are ideal when you want a clean, hidden finish on the exterior of your bag while keeping the interior hardware tidy. However, because they are held in place by sewing thread rather than metal backings, they are best suited for light to medium loads. Overloading a bag with sew-in snaps can put excessive strain on the stitches, potentially loosening the button over time.
Pronged (Push-in) Magnetic Buttons
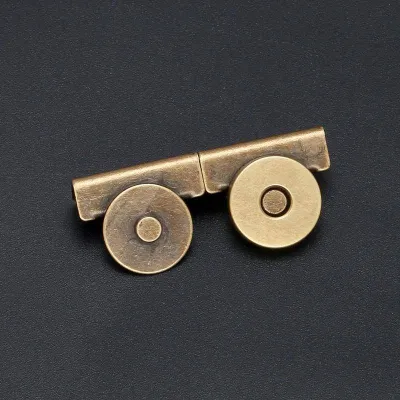
Pronged magnetic buttons, also known as push-in snaps, are the industry standard for commercial and handmade bags alike. These closures consist of a male and female piece, each featuring two flat metal prongs on the back, along with two matching metal washers. To install them, you must cut two tiny slits in your fabric, push the prongs through to the wrong side, slide the washer over the prongs, and bend the prongs flat.
Because the metal washer distributes the pulling force across a larger surface area, pronged snaps are incredibly secure and durable. They are the perfect choice for medium to heavy fabrics, canvas, denim, and real or faux leather. The primary trade-off is visibility: the back of the snap (the bent prongs and washer) will be visible unless you install them on the lining fabric before assembling the bag, or cover them with a decorative patch.
Hidden (Snap) Magnetic Buttons
Hidden magnetic snaps are ultra-strong neodymium magnets encased in thin, sewable plastic sleeves. You install these by sewing the plastic sleeve directly to the wrong side of your lining or exterior fabric, burying the magnet completely between the fabric layers. When the bag is closed, the hardware is entirely invisible from both the outside and the inside, providing a seamless, high-end minimalist appearance.
While hidden magnets offer an incredibly sleek aesthetic, they require precise alignment during construction. Because magnetic force decreases exponentially with distance, even a single millimeter of misalignment or an extra layer of thick fabric can dramatically weaken the hold. You must use strong, thin interfacing to support the fabric around the magnet, as the constant friction of the magnets snapping together can wear a hole in thin fabric over time.
Recommended Magnetic Button Specifications by Bag Type
Different bag designs serve different purposes, meaning their closures must meet distinct performance standards. Matching the size, strength, and style of your magnetic button to the specific category of your bag ensures a functional and durable finished product.
Totes and Everyday Handbags
Everyday tote bags and handbags are the workhorses of any wardrobe. They need to open and close easily, often with one hand while you are on the go, yet they must remain securely shut when you set the bag down on a car seat or office floor.
- Recommended Size: 14mm to 18mm in diameter.
- Recommended Style: Pronged buttons or large sew-in buttons.
- Magnet Strength: Medium.
For a standard tote bag carrying a wallet, keys, and a small water bottle, a 14mm or 18mm pronged snap offers the perfect balance of security and accessibility. If your bag pattern features a drop-in lining, installing pronged snaps on the lining before final assembly keeps the exterior of the bag clean while providing a rock-solid closure.
Because everyday bags are frequently exposed to the elements, always verify that your hardware features a rust-resistant finish, such as nickel-plated brass or antique brass. In humid environments, low-quality iron snaps can corrode, leaving permanent rust stains on your fabric.
Clutches and Evening Bags
Evening bags and clutches are designed for elegance and structure. They carry minimal weight—usually just a phone, a cardholder, and a lipstick—but they require a closure that maintains the bag’s clean, sophisticated lines without adding unnecessary bulk.
- Recommended Size: 10mm to 14mm in diameter.
- Recommended Style: Hidden magnets or ultra-thin sew-in snaps.
- Magnet Strength: Light to Medium.
Bulky hardware can ruin the silhouette of a delicate silk, satin, or fine leather clutch. For these projects, small hidden neodymium magnets (10mm to 12mm) are highly recommended. They provide a surprising amount of holding power for their tiny size, ensuring your clutch stays closed without any visible metal hardware.
To prevent the magnets from puckering or distorting delicate evening fabrics, you must reinforce the installation area. Apply a layer of firm, woven fusible interfacing or a small piece of Decovil Light to the wrong side of the fabric. This stabilizes the material, distributing the magnetic pull and keeping the clutch flap perfectly flat.
Backpacks, Messenger Bags, and Flap Bags
Backpacks and messenger bags are subjected to constant movement, heavy loads, and rigorous daily use. Whether you are commuting or traveling, these bags require heavy-duty closures that can withstand the physical strain of a packed interior and the weight of a heavy overhanging flap.
- Recommended Size: 18mm or larger.
- Recommended Style: Heavy-duty pronged buttons or specialized magnetic flap closures.
- Magnet Strength: Heavy-Duty.
For bags with large flaps, standard craft snaps are rarely strong enough. You need large-diameter, heavy-duty pronged snaps (typically 18mm or 20mm) that offer a high magnetic pull force. These snaps ensure that even if the backpack is fully packed, the flap will not swing open when you walk or bend over.
Because the pulling force of a heavy-duty magnet is substantial, you must reinforce the fabric behind the prongs to prevent them from tearing through your canvas, nylon, or leather. Always use a thick, wide metal washer and insert a physical barrier—such as a small square of plastic canvas, thick craft foam, or a scrap of heavy leather—between the washer and the wrong side of your fabric. This extra layer acts as a shock absorber, protecting your fabric from the metal edges of the washer.
Small Pouches, Wallets, and Cosmetic Bags
Small pouches, coin purses, and cosmetic bags are compact projects where space and weight are at a premium. The closure needs to be secure enough to keep small items like coins or bobby pins from sliding out, but gentle enough that it does not overpower the lightweight fabric.
- Recommended Size: 10mm to 12mm in diameter.
- Recommended Style: Micro sew-in snaps or thin snap magnets.
- Magnet Strength: Light.
Using an overly strong magnet on a small, lightweight pouch is a common mistake. If the magnetic pull is too strong, opening the pouch will require significant effort, putting immense strain on the seams and causing the lightweight cotton or nylon fabric to pucker and distort.
Opt for micro sew-in snaps or thin, lightweight snap magnets. Before finalizing your project, it is highly recommended to test the closure tension on a fabric scrap. Create a small mock-up using your chosen fabric, interfacing, and magnet to ensure the snap opens smoothly without straining the material.
Crucial Factors to Verify Before Purchasing
Before you click buy on a set of magnetic snaps, take a few minutes to run through this pre-purchase checklist. Verifying these technical specifications will save you from ruined fabric, broken needles, and closures that fail to function.
Fabric Thickness and Layering
You must measure and account for the combined thickness of your outer fabric, interfacing, and lining. If you are using pronged snaps, ensure the prongs are long enough to pass through all these layers with enough length remaining to bend flat over the washer. If your fabric sandwich is too thick, the prongs will not fold down securely, leaving the snap loose and prone to falling out.
Conversely, if you are using hidden magnets, remember that magnetic strength drops off rapidly with distance. If your fabric and interfacing layers are too thick, the magnetic field will not be strong enough to hold the bag closed. Keep your interfacing firm but thin in the immediate area of the magnet.
Material and Rust Resistance
Hardware quality varies significantly across manufacturers. In tropical, high-humidity climates like Singapore, cheap iron-based hardware will oxidize and rust rapidly when exposed to moisture, humidity, or perspiration. This can ruin a handmade bag with permanent, unsightly orange stains.
Look for product specifications that explicitly state the hardware is made from nickel-plated brass, solid brass, or marine-grade stainless steel. While these premium options may cost slightly more—typically ranging from S$3 to S$8 per pack depending on the size—the investment is essential for ensuring your bag remains beautiful and functional for years.
Washer and Backing Quality
The metal washer included with pronged snaps is the single most important component for protecting your fabric. Inspect the washers before installation; they should be thick enough to resist bending under pressure and have smooth, deburred edges. Cheap, stamped metal washers often have sharp edges that will slice through your fabric and interfacing over time as the bag is opened and closed.
Alignment and Polarity
This is a critical step that is easy to overlook during the excitement of assembly. Always physically test the polarity of your magnets before installing them. Ensure the male and female parts attract each other rather than repel.
Once you verify the polarity, use a fabric marker to mark the attracting faces. When installing, double-check your alignment. If your snaps are even slightly misaligned, the bag flap will sit crookedly, and the magnetic connection will be significantly weakened.
Frequently Asked Questions (FAQ)
Can I add a magnetic button to a finished bag without taking it apart?
Yes, you can add a magnetic closure to a completed bag, but your options are limited. Because the lining is already sewn shut, you cannot access the inside of the fabric to install a pronged snap with its washer. Attempting to cut into a finished lining to install a pronged snap is highly discouraged, as it can compromise the bag’s structural integrity and leave frayed edges.
Instead, your best option is to use a sew-in magnetic snap. You can carefully hand-stitch a sew-in snap directly onto the surface of the lining fabric using a strong thread, such as heavy-duty polyester or nylon upholstery thread. Be sure to catch only the lining fabric with your needle, avoiding the exterior fabric so your stitches remain invisible from the outside of the bag.
Will magnetic buttons interfere with my phone or credit cards inside the bag?
Modern smartphones use solid-state flash memory and are generally unaffected by the magnetic fields generated by standard bag closures. However, older magnetic stripe cards, such as hotel keycards, transit passes, or older credit cards, can be demagnetized if they come into direct, prolonged contact with strong neodymium magnets.
To prevent any risk of demagnetization, design your bag so that card slots and wallet pockets are kept away from the immediate closure area. If you are making a wallet or a bag with built-in card slots, consider lining those pockets with RFID-shielding fabric, which also helps block magnetic fields, or stick to lighter-strength ferrite magnets rather than ultra-strong neodymium options.
How do I remove a pronged magnetic button if I make a mistake?
If you install a pronged snap in the wrong position or realize the polarity is backward, you can remove it with care. Slide the tips of a pair of flat-nose pliers under the folded prongs on the back of the washer. Gently pry the prongs upward until they are completely straight and perpendicular to the washer.
Once the prongs are straight, slide the washer off, and slowly pull the snap out from the front of the fabric. Do not yank or twist the hardware, as this will tear the fabric. If the fabric has suffered minor damage or the slits have stretched, apply a small patch of heavy-weight fusible interfacing over the holes on the wrong side of the fabric to stabilize the area before attempting to reinstall the hardware.
Community discussion
Share your experience or ask a question. Comments are reviewed before publication.