
Choosing the right LED drawing board depends on your current skill level, the complexity of your projects, and your physical workspace. Beginners generally thrive with compact, lightweight, and highly portable A4-sized light pads that power up via standard USB connections, offering an affordable entry point into tracing, sketching, and calligraphy. In contrast, experienced artists, illustrators, and architects require larger formats like A3 or A2, exceptional light uniformity across the entire surface, and robust build materials that can withstand heavy daily use and support multi-layered media.
Transitioning from traditional tracing methods—such as holding paper up to a window—to a dedicated light pad significantly improves line control, reduces physical fatigue, and accelerates the learning curve. A reliable light source allows you to see through thicker paper stocks, making it easier to refine sketches without ruining your original linework. By understanding the key differences in size, brightness control, power delivery, and surface durability, you can select a tool that matches your creative workflow without overspending on unnecessary features.
When working on an illuminated surface, the heat generated by the LEDs—even if minimal—can interact with the humidity in the air and the moisture in your paper. In humid environments, paper can absorb ambient moisture, making it more prone to ink bleeding or tearing under the pressure of a sharp pen tip. Before starting a major project, perform a quick test on a scrap piece of your chosen paper. Place it on the powered-on board, apply your preferred ink or marker, and observe the drying speed and bleed resistance. Because the light shines from underneath, it can make wet ink look lighter than it actually is, so always let the ink dry completely and view it under normal ambient light to verify the final color density and line crispness.
Products mentioned in this guide
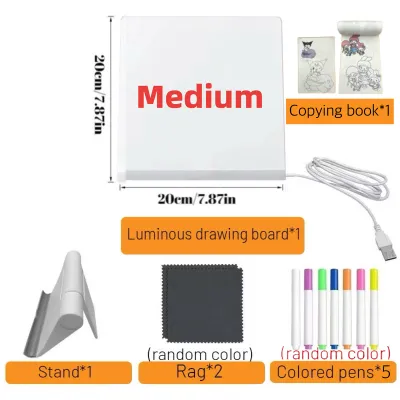
![[SG STOCK] Reusable LED Drawing Board DIY Luminous Acrylic Message Memo Note Pad Night Light Kids Writing Gift发光画板](https://img.lazcdn.com/g/p/b5a434f8ce7e510e5ec2b794e067b1f7.png_400x400q80.png_.webp)
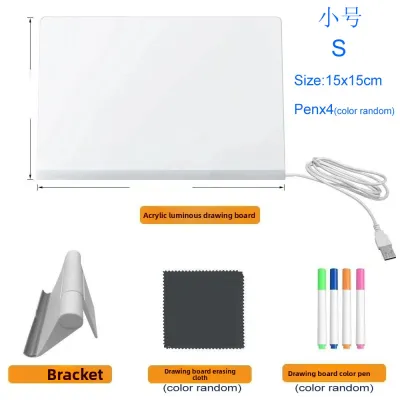
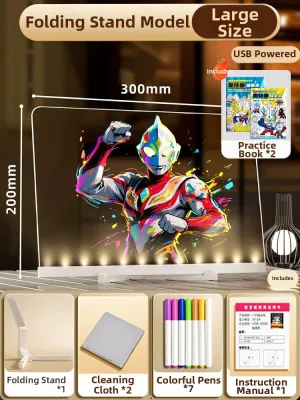
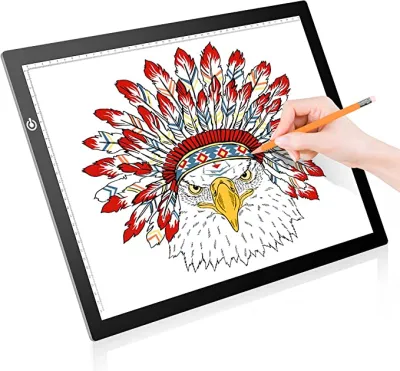
Prices are valid at publication and may change. Please refer to the product page for the latest price.
Core Features to Evaluate Before Buying
Selecting an LED drawing board requires a clear understanding of how technical specifications translate to daily drawing comfort. The physical size of the board is the first major decision point. Standard sizes range from A4 (similar to a standard letter sheet) to A3 and the much larger A2 format. It is crucial to remember that the physical dimensions of the board are always larger than the actual illuminated working area. If you have a compact study desk or work in a shared space, a massive A2 board can quickly become cumbersome and restrict your physical movement.
Brightness adjustment mechanisms directly impact eye comfort during long drawing sessions. Basic models offer preset button levels, typically switching between low, medium, and high settings. More advanced boards feature stepless dimming, which allows you to hold down a touch-sensitive button to smoothly transition to the exact brightness level you need. Stepless dimming is highly beneficial because it lets you match the board’s illumination to the ambient light of your room, preventing the harsh glare that leads to headaches and eye strain.
Power supply options dictate where and how you can use your drawing board. USB-powered models offer excellent mobility, allowing you to run the board off a laptop, a portable power bank, or a standard phone charger. Some compact boards feature built-in rechargeable batteries, providing true wireless freedom at the expense of added weight and a limited operational window. Larger A2 boards, however, often require dedicated AC wall adapters to deliver the higher voltage needed to illuminate a massive surface evenly, which restricts your workspace to the vicinity of a power outlet.
The surface material of the light pad affects both durability and the tactile feel of your drawing tools. Most budget-friendly boards use acrylic surfaces, which are lightweight and highly shatter-resistant but prone to micro-scratches from hard pencil leads or metal compass tips over time. Premium models may feature tempered glass, which offers superior scratch resistance and a highly stable, rigid surface. The smoothness of these materials means paper can slide easily, so you will often need to use low-tack artist tape or physical clips to keep your medium secure while tracing.
What Beginners Should Look For
For those just starting their artistic journey, simplicity, portability, and cost-effectiveness are the most important factors. An A4 or compact A3 board is highly recommended for beginners. These sizes easily fit into a standard backpack, store away neatly in a drawer when not in use, and do not overwhelm a small workspace. Working on standard printer paper or lightweight tracing paper does not require a massive surface, making these smaller formats highly practical for initial tracing, lettering, and line-art practice.

Beginners should prioritize boards with basic stepless dimming rather than fixed preset levels. When you are learning to control your line weight, being able to fine-tune the light intensity prevents your eyes from tiring quickly. Since beginners often work with thinner, standard 80 GSM paper, a very low brightness setting is usually sufficient. Having a board that can dim down to a gentle glow ensures you can practice comfortably for hours without experiencing visual fatigue.
Opting for a USB-powered or rechargeable light pad provides the flexibility that beginners need to stay motivated. Instead of being chained to a specific desk, you can take your light pad to a dining table, a couch, or a local cafe. This ease of setup lowers the barrier to practice, making it simple to plug the board into a laptop or power bank and start drawing immediately whenever inspiration strikes.
Finally, look for product packages that include bundled accessories. Many beginner-friendly options come with essential add-ons like physical paper clips, a protective storage sleeve, a USB cable, and a few starter sheets of tracing paper. These bundles offer immediate value, saving you from having to make multiple separate purchases before you can begin your first project. A complete kit ensures a smooth, frustration-free unboxing experience.
What Experienced Artists Need
Professional illustrators, architects, and experienced hobbyists require high-performance tools that can handle demanding workflows and heavy media. Large formats, such as A2 or even larger, are essential for complex compositions, architectural drafting, and detailed pattern making. A larger surface area allows you to work on oversized sheets without constantly shifting, taping, and realigning your paper, which preserves registration marks and maintains composition alignment across multi-layered projects.
Light uniformity is a critical requirement for professional work. Low-quality boards often suffer from hot spots directly over the LED strips and noticeable edge darkening, which can distort your perception of line weight and detail. Experienced artists working with thick, heavy media—such as 300 GSM watercolor paper, bristol board, or specialized tracing films—need powerful, perfectly even light distribution from edge to edge to ensure fine details remain visible through multiple layers.
Adjustable color temperature is another advanced feature that benefits professional workflows. Some high-end boards allow you to switch between warm white, natural white, and cool white light. Warm light is gentler on the eyes during late-night studio sessions, while cool white light provides the high contrast necessary for precise ink work, calligraphy, and color matching. This versatility allows you to adapt the board to different paper types and ambient lighting conditions.
Build quality and ergonomic compatibility are vital for tools that see daily, long-term use. Experienced artists should look for scratch-resistant tempered glass surfaces that can withstand the pressure of technical pens, hard graphite, and occasional utility knife use. Additionally, verify that the board is compatible with adjustable drafting stands or features built-in tilt legs. Maintaining a comfortable, angled drawing surface is essential for preventing neck and back strain during multi-hour professional sessions.
Feature Comparison Matrix
| Specification | Beginners / Hobbyists | Experienced / Professional Artists |
|---|---|---|
| Ideal Size | A4 to compact A3 | A3 to A2 or larger |
| Brightness Control | Basic stepless dimming or 3-level presets | Advanced stepless dimming with memory function |
| Power Source | USB (5V) or built-in rechargeable battery | Dedicated AC wall adapter or high-output USB-C |
| Surface Material | Lightweight, shatter-resistant acrylic | Scratch-resistant tempered glass or heavy-duty acrylic |
| Stand Adjustability | Flat profile, optional external wedge | Built-in multi-angle stand or VESA mount compatibility |
| Illumination Quality | Standard LED layout (suitable for up to 120 GSM) | High-CRI, flicker-free, edge-to-edge uniform light (up to 300 GSM) |
| Typical Price Range | S$20 to S$50 | S$80 to S$200+ |
How to Verify Board Quality Before Purchase
To avoid purchasing a low-quality light pad that flickers or dimishes in brightness over time, you must know how to evaluate product claims. Start by checking for light uniformity and edge darkening. Since you cannot always test online purchases in person, closely examine user-uploaded photos in the review sections of online marketplaces. Look for images taken in dark rooms with the board turned on; check if the corners appear significantly dimmer than the center, or if there are visible vertical or horizontal bands of light.
Always verify the actual illuminated working area versus the total physical dimensions of the board. Manufacturers often highlight the outer dimensions in their main titles, which can be misleading. A board marketed as “A4 size” might actually have an active light area that is slightly smaller than a standard A4 sheet of paper, causing the edges of your drawing to fall into the dark border. Check the detailed specification sheet for the “active area” or “illuminated area” measurements to ensure your preferred paper size fits entirely within the lit zone.
Consider the maximum paper thickness the board can effectively penetrate. If you plan to trace onto heavy media like 300 GSM watercolor paper or thick cardstock, a standard budget board may not be powerful enough. Look for the manufacturer’s stated lumen or lux rating. A rating of 1,500 to 3,000 lux is generally sufficient for standard tracing paper and medium-weight drawing paper, while professional applications involving thick, textured media require a high-output board rated at 4,000 lux or more.
Finally, review the warranty terms and return policies specifically covering the electronic components. The LEDs themselves are highly durable, but cheap internal wiring, fragile touch switches, and loose power ports are common failure points on low-quality models. Opt for brands that offer at least a 12-month warranty and have a clear process for returns. A reliable manufacturer will stand behind their product’s electronics, ensuring you do not end up with a useless piece of plastic if a connection fails after a few weeks of use.
Frequently Asked Questions (FAQ)
Can I use an LED drawing board for diamond painting or cross-stitch?
Yes, LED drawing boards are highly effective tools for diamond painting and cross-stitch. The light shining from underneath illuminates the tiny symbols on diamond painting canvases and makes the grid holes in cross-stitch fabric much easier to see, reducing eye strain. However, because the acrylic surface of most light pads is very smooth, these craft materials can easily slide around. To prevent this, it is highly recommended to use a non-slip silicone mat or low-tack artist tape to secure your canvas or fabric to the board while you work.
How do I clean the surface of an acrylic light pad without scratching it?
Acrylic is a relatively soft material that scratches easily, so you must avoid using paper towels, tissues, or rough cloths, which can leave micro-scratches that scatter light and cloud the surface over time. To clean your board safely, use a clean, dry microfiber cloth to gently wipe away dust and fingerprints. For stubborn smudges or adhesive residue, apply a small amount of water or a dedicated, alcohol-free screen cleaner directly to the microfiber cloth. Never spray liquid directly onto the board, as moisture can seep into the edges and permanently damage the internal LED strips and wiring.
Community discussion
Share your experience or ask a question. Comments are reviewed before publication.