
Selecting the right label roll for your label maker involves balancing print clarity, adhesive strength, and long-term durability against your specific environmental conditions. While many brands present their products as universal solutions, actual performance depends heavily on matching the label’s material specifications—such as direct thermal versus thermal transfer coatings and acrylic versus rubber adhesives—to your hardware and application surface. By understanding how these technical factors interact, particularly in challenging environments like Singapore’s high humidity, you can make an informed decision between specialized options like Sticki Rolls 3 and generic alternatives.
Understanding Label Roll Materials and Specifications
To make an informed choice, you must understand the core technologies that dictate how a label roll performs over time. Label rolls generally fall into two primary printing categories: direct thermal and thermal transfer. Direct thermal labels use heat-sensitive paper or synthetic media that darkens when it passes under the printer’s thermal print head. This eliminates the need for ink or ribbon, making it highly convenient for short-term applications like shipping labels or temporary visitor badges. However, because the material remains sensitive to heat and light, direct thermal prints are prone to fading or turning entirely black when exposed to high temperatures or prolonged sunlight.
In contrast, thermal transfer printing uses a heated ribbon to melt ink onto the label surface. This method produces highly durable prints that resist fading, scratching, and chemical exposure, making it the preferred choice for asset tracking and long-term archiving. Beyond the printing method, the backing material and adhesive type play critical roles in performance. Labels typically feature either acrylic-based or rubber-based adhesives. Acrylic adhesives offer excellent resistance to ultraviolet light and temperature fluctuations, bonding well to polar surfaces like glass and metals over time. Rubber-based adhesives provide high initial tack and adhere exceptionally well to non-polar surfaces like polyethylene and corrugated cardboard, though they tend to degrade faster under UV exposure.
Products mentioned in this guide
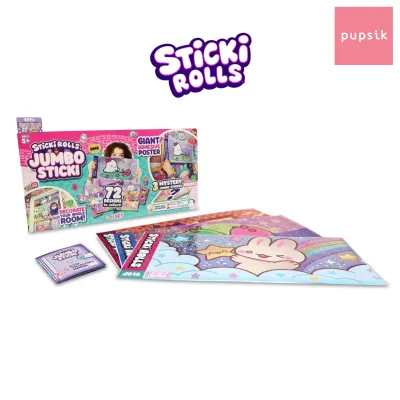
Prices are valid at publication and may change. Please refer to the product page for the latest price.
When evaluating different brands, always check the manufacturer’s technical data sheets for specific environmental resistance ratings rather than relying on vague marketing claims. Look for terms like “service temperature range” and “solvent resistance.” In tropical climates where indoor humidity can fluctuate significantly, choosing a synthetic face stock (such as polypropylene or polyester) with a moisture-resistant acrylic adhesive is often necessary to prevent premature peeling and edge curling.
How to Evaluate Print Quality and Clarity
Achieving sharp, legible text and scannable barcodes requires a precise match between your label maker’s resolution and the label roll’s surface characteristics. Printer resolution is measured in dots per inch (DPI), with standard desktop label makers typically operating at 203 DPI, while high-resolution models reach 300 DPI or 600 DPI. If you use a high-resolution printer with a rough, uncoated paper label roll, the ink or thermal reaction may bleed along the paper fibers, resulting in fuzzy edges and unreadable small fonts.

To prevent blurred text, verify that the label roll’s surface smoothness is compatible with your printer’s DPI rating. High-DPI printing demands a very smooth, consistent surface—often achieved through top-coating—to ensure even heat transfer and crisp edge definition. Top-coated direct thermal labels feature an extra protective layer over the heat-sensitive emulsion, which not only improves print contrast but also shields the print from smudging, scratching, and light moisture exposure during daily handling.
Before committing to a bulk purchase of any brand, it is highly recommended to perform a visual check using a single test roll. Print a test pattern containing various font sizes, fine lines, and standard barcodes. Inspect the print under bright, neutral light to evaluate edge sharpness and contrast. There should be a stark, clean contrast between the printed areas and the background, with no visible background noise, speckling, or light patches. If the barcodes scan quickly and reliably on your smartphone or dedicated scanner, the media is likely a good match for your hardware.
Assessing Adhesion and Durability for Your Environment
A label’s ability to stay securely attached depends entirely on the physical relationship between its adhesive layer and the target surface. Before applying any label, analyze the texture and material of the object. Smooth, clean surfaces like glass, acrylic, and polished metal allow for maximum surface contact, enabling the adhesive to form a strong, permanent bond. Conversely, textured plastics, powder-coated metals, and corrugated cardboard present microscopic gaps that limit contact area, requiring a high-tack, conformable adhesive to prevent lifting.
Environmental factors such as moisture, temperature, and chemical exposure will test the limits of any label roll. For labels destined for kitchen containers, laboratory equipment, or outdoor tools, check the manufacturer’s specifications for water, oil, and chemical resistance. In humid environments, standard paper labels can absorb moisture from the air, causing the face stock to warp and the adhesive to break down. For these demanding scenarios, synthetic materials like biaxially oriented polypropylene (BOPP) or polyester are far more reliable than standard paper.
To guarantee performance in your specific setup, plan a small-scale trial before executing a large labeling project. Apply a few test labels to your target surfaces and allow them to cure for at least 24 hours, as many adhesives require time to build their maximum bond strength. After the curing period, perform a peel test by attempting to lift a corner, noting whether the label tears (indicating a strong paper bond) or peels away cleanly. If the label is meant to withstand harsh conditions, expose the test item to simulated environmental stress—such as a cycle in a refrigerator or a light wipe with a damp cloth—to observe any lifting, bubbling, or ink degradation.
Sticki Rolls 3 vs. Alternatives: A Decision Framework
When deciding between Sticki Rolls 3 and alternative label rolls, a structured decision framework can help you balance cost, compatibility, and performance. To establish a baseline for value, calculate the cost-per-label by dividing the retail price of the roll in S$ by the total number of labels it contains. Keep in mind that while generic or third-party rolls often present a lower upfront cost, they may result in higher long-term expenses if they cause frequent printer jams, require reprinting due to poor quality, or peel off prematurely.
Choose Sticki Rolls 3 if you are using a compatible compact thermal printer and require a reliable, standard-size roll for everyday indoor organization, file labeling, or light retail use. These rolls are designed to match the tension and thermal sensitivity of standard portable label makers, ensuring consistent print density and smooth feeding without the need for manual calibration. They offer a practical balance of convenience and clear output for typical home and office environments where extreme temperatures or chemical exposures are not a concern.
Choose alternative brands or specialized media if your application demands heavy-duty performance, such as outdoor weatherproofing, industrial chemical resistance, or fabric labeling. If you need specialized materials like tamper-evident security film, high-temperature polyimide, or flexible nylon tape for curved cables, you will need to look beyond standard consumer rolls to dedicated industrial suppliers. Additionally, if you operate a high-volume shipping department, purchasing generic direct thermal rolls in bulk cases may offer significant cost savings that outweigh the convenience of branded consumer packaging.
Verify first, however, whether using alternative or third-party rolls will impact your printer’s warranty or operational status. Some manufacturers design their hardware to work exclusively with proprietary media, utilizing physical locks, specific spindle shapes, or digital detection systems. Ensuring that your chosen roll complies with your printer’s physical and digital requirements will save you from costly compatibility errors.
Verifying Printer Compatibility Before You Buy
Before purchasing any new label roll, you must verify its physical and digital compatibility with your specific label maker model. Start by measuring the physical dimensions of your printer’s media bay. You need to check three critical measurements: the maximum outer roll diameter that the bay can accommodate, the maximum media width, and the inner core diameter of the spindle. Attempting to force a roll with an oversized outer diameter or an incompatible core size into your printer can lead to severe feeding issues, motor strain, or physical damage to the printer’s internal gears.
In addition to physical dimensions, modern label makers increasingly employ digital verification systems to control media usage. Many brands embed proprietary RFID (Radio Frequency Identification) or NFC (Near-Field Communication) chips inside the cardboard or plastic cores of their official rolls. When you load a roll, the printer scans this chip to automatically calibrate print speed, temperature, and label size. If you attempt to use a third-party or alternative roll that lacks this chip, the printer may refuse to operate, display an error message, or lock out certain high-resolution print modes.
To avoid these compatibility traps, always consult your printer’s official user manual or the manufacturer’s support website before buying third-party media. Look for the exact list of supported media types, thickness limits, and roll configurations. If your printer does not use digital locking mechanisms, you can safely explore a wider variety of alternative brands, provided they match the physical dimensions and thermal sensitivity requirements of your hardware.
Frequently Asked Questions (FAQ)
Can I use third-party label rolls in a proprietary label maker?
Whether you can use third-party label rolls depends entirely on your label maker’s physical design and firmware restrictions. Some budget-friendly and open-format printers accept any roll that physically fits their media bay and matches their thermal technology. However, many premium or proprietary label makers require official rolls equipped with proprietary RFID or NFC chips, or specific physical notches on the roll spindle. If you install a non-OEM roll in a digitally locked printer, the device may display an error or refuse to print. Always check your printer’s manual to verify if it supports third-party media before purchasing.
Why do my printed labels fade over time?
Direct thermal labels fade over time because they rely on a heat-sensitive chemical coating rather than ink. When exposed to environmental heat, ultraviolet (UV) light from sunlight or fluorescent office lighting, or certain chemicals, the thermal emulsion undergoes a reaction that causes the printed text to fade or the background to turn grey. In tropical climates with high ambient heat and humidity, this degradation can happen more rapidly. To prevent fading, store labeled items away from direct sunlight and heat sources, or switch to thermal transfer printing with synthetic labels for long-term archival needs.
How do I remove adhesive residue left by old labels?
Removing stubborn adhesive residue requires a gentle, step-by-step approach to avoid damaging the underlying surface. Start by peeling away as much of the old label as possible using your fingers or a plastic scraper; avoid metal blades which can easily scratch delicate plastics or wood. For remaining sticky residue, apply a small amount of mild solvent like isopropyl alcohol or a specialized citrus-based adhesive remover to a microfiber cloth. Spot-test the solvent on an inconspicuous area of the surface first to ensure it does not cause discoloration or melting, then gently rub the residue until it dissolves, wiping the area clean with a damp cloth afterward.
Community discussion
Share your experience or ask a question. Comments are reviewed before publication.