
Wrapping small gifts in plastic bags does not have to look cheap or rushed. With the right folding techniques, crisp creases, and thoughtful embellishments, a simple clear plastic bag can transform into a sophisticated, boutique-style package. Whether you are preparing delicate jewellery, handmade candies, or small stationery accessories, mastering a few structural folds and securing methods ensures your presentation looks intentional and highly polished.
Materials and Tools You Will Need
To elevate a basic plastic bag into a premium gift presentation, you must begin with the correct materials. The foundation of this method is the bag itself. Look for high-clarity cellophane or polypropylene bags rather than cloudy, low-density polyethylene options. A thickness of at least 30 to 40 microns provides enough structural rigidity to hold crisp folds and resist punctures from sharp edges. You can choose between flat open-top bags, gusseted bags that expand at the sides, or self-adhesive flap bags, depending on the shape of your gift.
Alongside the bags, gather a set of reliable tools to secure and decorate the package. High-quality double-sided tape is essential for creating invisible seams, as standard single-sided tape often leaves visible, messy edges on clear plastic. A pair of sharp, fine-tipped scissors is necessary for clean cuts without fraying your ribbons or tearing the plastic. For securing the tops of the bags, keep a selection of satin ribbons, rustic jute twine, or metallic twist ties on hand.
Products mentioned in this guide
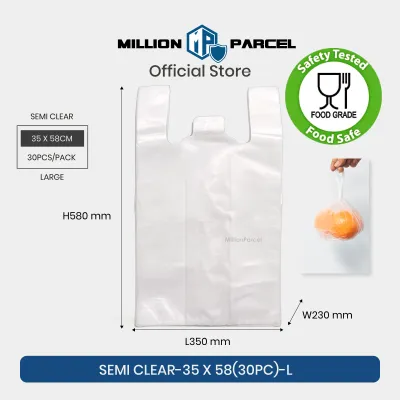
Prices are valid at publication and may change. Please refer to the product page for the latest price.
Finally, structural inserts can make a significant difference in how the final package sits. Thin, acid-free tissue paper adds a layer of mystery and color, while a small piece of custom-cut kraft cardboard or a tiny chipboard backing card provides a sturdy base. If your gift is exceptionally delicate, placing it inside a tiny, plain cardstock inner box before sliding it into the plastic bag ensures it remains protected and perfectly centered.
Preparing the Gift and the Plastic Bag
Before you begin folding, you must prepare both the gift item and the packaging material to ensure a flawless finish. If you are wrapping delicate items like silver earrings or hand-painted pins, wrap them gently in a single sheet of neutral-colored tissue paper first. This step prevents the items from sliding around, scratching against the plastic, or showing fingerprints through the clear material. For loose items like artisanal candies, ensure they are dry and free of loose sugar or oils that could smudge the interior of the bag.

Next, inspect the plastic bag itself. Clear plastic is highly susceptible to dust, lint, and static cling, which can ruin an otherwise perfect presentation. Shake the bag out gently and wipe the exterior with a clean, dry microfiber cloth to remove any stray particles. If the bag has deep creases from storage, you can smooth it out gently against a clean, flat surface using the side of your hand, but avoid using heat as this will melt or warp the plastic.
Sizing is the final preparation step. The bag must be large enough to accommodate the volume of the gift while leaving ample excess material at the top or sides for folding. A bag that is too small will stretch, distorting the plastic and risking a tear at the seams. Conversely, an oversized bag results in bulky, messy folds that obscure the gift. Aim for a bag that leaves at least five to eight centimeters of empty space at the open end, giving you plenty of material to work with during the styling phase.
Step-by-Step Wrapping Techniques
Transforming a simple plastic sleeve into a structured gift requires choosing a folding method that complements the shape of your item. Depending on whether your gift is flat, bulky, or irregular, you can apply one of three primary techniques to achieve a clean, professional look. These methods focus on controlling the excess plastic and creating deliberate, neat lines.
The Classic Gather-and-Tie Method
The gather-and-tie method is ideal for irregular or soft items, such as loose candies, small plush keychains, or rolled fabric accessories. Start by placing your gift flat at the very bottom of an open-top plastic bag, ensuring it is centered. Hold the bag upright on your workspace, and use both hands to pinch the plastic just above the top of the gift.
Slowly work your fingers inward from the outer edges of the bag toward the center, gathering the plastic into neat, accordion-like pleats. This gathering action creates a symmetrical, fan-like ruffle at the top of the bag. Once gathered, hold the pinched section firmly and give it a single, tight twist to create a solid, clean stem. This twist prevents the pleats from unraveling and keeps the gift snugly secured at the bottom.
While holding the twisted stem with one hand, use your other hand to wrap a piece of ribbon or twine tightly around the base of the twist. Tie a double knot to secure the hold, then finish with a neat bow. To ensure a polished look, trim the ends of the ribbon at a clean angle, and use your fingers to fluff out the ruffled plastic above the tie, making sure the edges are even and free of jagged cuts.
The Fold-and-Seal Envelope Style
For flat, rectangular, or rigid items like small notebooks, enamel pins on backing cards, or flat chocolate bars, the fold-and-seal envelope style offers a sleek, minimalist aesthetic. Begin by sliding the item to the bottom of the bag, ensuring it sits perfectly straight. Lay the bag flat on a clean, hard surface with the back side facing upward.
Fold the left and right vertical edges of the plastic bag inward if they extend past the sides of your gift. Use your fingernail or a bone folder to press along these folds, creating sharp, clean creases. Apply a small strip of double-sided tape along the inside of these folded edges to secure them flat against the back of the bag, ensuring the tape remains completely hidden from the front view.
Next, fold the top open flap of the bag downward over the back of the item, pulling it taut so the plastic fits snugly around the gift. Crease this top fold firmly. Apply a strip of double-sided tape or a decorative circular sticker to the edge of the flap, pressing it down securely. This creates a smooth, flat front surface that mimics a professional retail package.
The Pleated Pouch Technique
The pleated pouch technique is perfect for three-dimensional items that need a stable base to stand upright, such as small jars of honey, handmade soaps, or miniature ceramic ornaments. Start by choosing a bag with side gussets, or manually create side folds in a flat bag by pinching the left and right sides inward to form a V-shape crease on each side.
Place your gift inside the bag, pushing it down so it rests flat on the bottom. As the gift settles, the side pleats will naturally expand to accommodate the width. Press the front and back panels of the bag together above the gift, then fold the side creases inward cleanly, creating a neat, box-like structure.
Secure the pleats at the base by placing a tiny piece of clear tape horizontally across the bottom corners if necessary. At the top, fold the excess plastic downward in a series of small, overlapping horizontal pleats, similar to an accordion. Secure the center of these pleats with a small piece of double-sided tape, then punch a single hole through the pleated top to thread a decorative ribbon through, ensuring the pouch remains stable and upright.
Adding Decorative Finishing Touches
Once the structural wrapping is complete, you can use decorative elements to disguise the plastic material and elevate the overall aesthetic. A simple plastic bag can look incredibly sophisticated when paired with natural textures. Try threading a personalized gift tag, a sprig of dried lavender, or a small pressed leaf onto your ribbon before tying the final bow. This contrast between the sleek, modern plastic and the organic texture of dried botanicals creates an appealing, high-end look.
If you opted for the flat envelope style, the back seal is the perfect place to add a touch of elegance. Instead of standard tape, use a custom-designed paper label, a metallic foil sticker, or even a faux wax seal. To apply a wax seal safely to plastic, press the seal onto a silicone baking mat first, let it cool, and then attach it to the plastic bag using a piece of double-sided adhesive tape. This prevents the hot wax from melting or warping the delicate plastic packaging.
For an ultra-premium presentation, consider layering your textures. You can place your neatly wrapped plastic pouch inside a small, open-topped kraft paper box, allowing the clear, shiny top of the bag to peek out. Alternatively, slide the plastic bag inside a sheer organza or linen pouch. This double-layering technique not only protects the gift during transport but also adds an element of anticipation and luxury to the unboxing experience.
Common Mistakes to Avoid
Achieving a professional look with plastic packaging requires precision, and a few common missteps can quickly make the presentation look untidy. The most frequent mistake is overstuffing the bag. When you force an item that is too large into a small plastic sleeve, the seams stretch and turn white, and the plastic loses its flat, glossy surface, resulting in unsightly wrinkles and potential tears. Always leave a comfortable margin around the edges of your gift.
Another error is using low-quality, extremely thin plastic bags, such as standard sandwich bags or cheap utility bags. These materials are highly prone to wrinkling, do not hold sharp creases, and often have a cloudy appearance that obscures the beauty of the gift inside. Investing in crisp, high-clarity cellophane bags ensures your folds remain sharp and the presentation looks intentional rather than improvised.
Finally, avoid leaving too much empty, unsupported space inside the bag. If a small item is allowed to slide freely within a large plastic pouch, it will settle in an awkward corner, making the package look messy and disorganized. Use structural inserts like cardboard backing, tissue paper, or shredded paper filler to keep the item centered and secure, ensuring your careful wrapping remains intact until the recipient opens it.
Frequently Asked Questions (FAQ)
Can I use resealable ziplock bags for gift wrapping?
Yes, you can adapt resealable ziplock bags for gift wrapping, but you must take steps to conceal the industrial-looking zip track. The easiest method is to fold the entire zip mechanism backward over the rear of the package and secure it flat with double-sided tape, transforming it into a clean, fold-over flap. Alternatively, you can wrap a thick band of decorative paper or a wide satin ribbon directly over the zip track on the front of the bag, completely hiding the plastic seal while adding a pop of color.
How do I prevent static cling from ruining the look?
Static cling can attract dust and cause lightweight gifts or tissue paper to stick awkwardly to the sides of the bag. To eliminate static, gently wipe the interior and exterior of the plastic bag with a clean, dry laundry dryer sheet before inserting your gift. Alternatively, you can lightly mist the air around your workspace with water or a specialized anti-static spray, allowing the mist to settle before you begin wrapping, which neutralizes the static charge without leaving residue on the plastic.

Community discussion
Share your experience or ask a question. Comments are reviewed before publication.