
Wrapping mini mooncakes beautifully is an art that combines culinary pride with thoughtful presentation. To achieve a stunning, professional look, you must select grease-resistant wrapping papers like food-grade glassine, pair them with narrow 6mm to 12mm ribbons, and anchor each pastry on a small base support like a mini cupcake liner or cardboard insert. This delicate, scaled-down approach ensures your handmade Mid-Autumn Festival gifts look neat, balanced, and highly appealing to your recipients.
In Singapore, gifting home-baked or boutique mini mooncakes is a cherished tradition during the festive season. Because these pastries are small and often delicate, standard-sized gift boxes can swallow them up, making customized, individual wrapping the perfect way to showcase your creations. By mastering a few simple folding and ribbon-tying techniques, you can transform these bite-sized treats into elegant, festive tokens of appreciation.
Materials and Tools for Mini Mooncake Packaging
Selecting the correct materials is the foundation of successful mini mooncake packaging. Because mini mooncakes typically measure only 3 to 4 centimeters in diameter, standard wrapping supplies will overwhelm them. You must scale down every element, from the thickness of the paper to the width of the decorative ribbon, to maintain visual balance and structural integrity.
Products mentioned in this guide
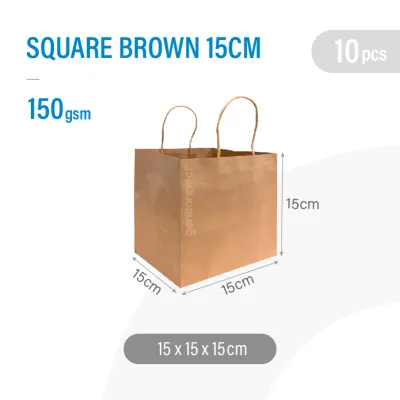
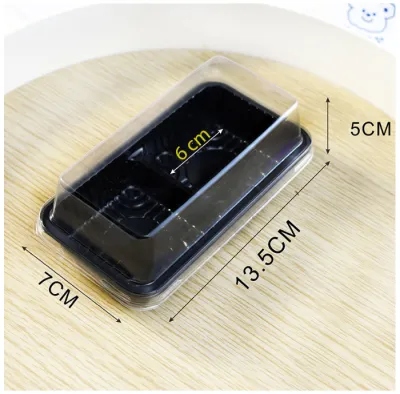
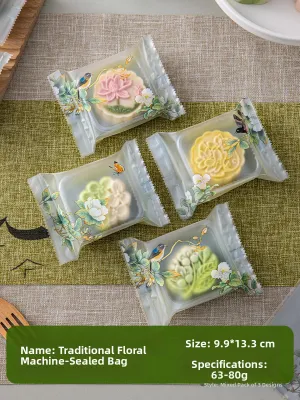
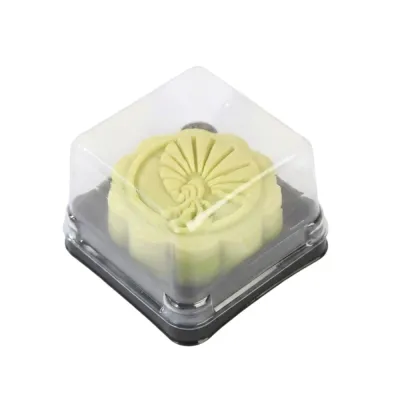
Prices are valid at publication and may change. Please refer to the product page for the latest price.
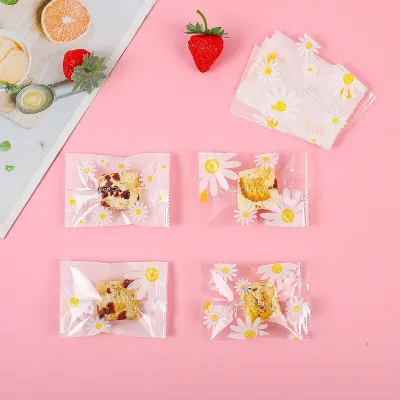
For the primary wrapping layer, grease resistance is the most critical factor to consider. Mooncake crusts, whether traditional baked pastry or delicate snowskin, contain oils and moisture that will quickly seep through standard paper, leaving unsightly stains. Food-safe glassine paper is an excellent choice, offering a semi-translucent, smooth finish that resists grease and folds with crisp precision. Wax paper provides a similar moisture barrier with a classic, rustic look, while clear food-grade cellophane allows the intricate patterns of your mooncakes to remain visible. Always verify that any paper in direct contact with the pastry is explicitly labeled as food-grade by the manufacturer.
Ribbons must also be chosen with scale in mind. A wide ribbon will completely obscure a mini mooncake, making the package look bulky and awkward. Opt for narrow ribbons measuring between 6mm and 12mm in width. Materials like satin, organza, or fine cotton twine work beautifully for small-scale gifts. Satin offers a luxurious sheen that catches the light, while organza adds a delicate, airy touch without adding visual weight.
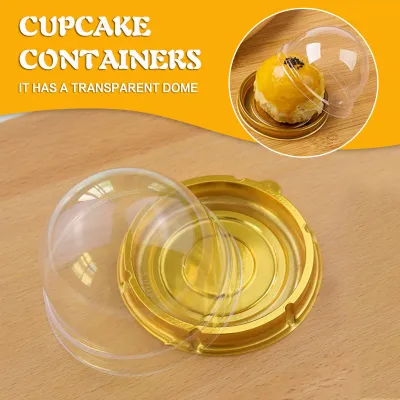
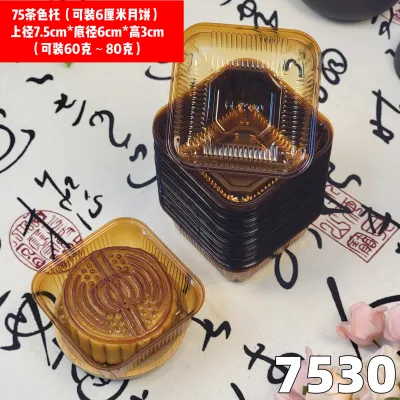
Base supports are essential for keeping the round, delicate pastries stable during transport and wrapping. Without a firm base, the mooncake will slide around inside the paper, causing the folds to collapse and the crust to smudge. Small paper cupcake liners, mini plastic trays, or custom-cut squares of food-safe gold cardboard provide the necessary structural support. These bases keep the mooncake centered and protect the intricate molded details on top of the pastry.
Finally, gather your basic crafting tools before you begin wrapping. You will need a pair of sharp scissors to ensure clean, fray-free cuts on your ribbons and paper. High-quality double-sided tape is indispensable for securing folds invisibly, as standard liquid glue can warp the paper or fail to adhere to wax-coated surfaces. A bone folder—a smooth, flat tool used in paper crafting—is highly recommended for pressing down folds to create crisp, professional creases without tearing the delicate paper.
Step-by-Step Guide to Wrapping Mini Mooncakes
Wrapping miniature pastries requires a methodical approach, a steady hand, and a spotless workspace. Because you are working with small dimensions, even a tiny misalignment or smudge will be highly visible on the finished product. By setting up a clean assembly line and handling each pastry gently, you can achieve consistent, beautiful results for every single piece.

Before you begin, thoroughly clean and dry your wrapping surface to remove any dust, moisture, or oil that could stain your packaging paper. Organize your precut paper sheets, base supports, ribbons, and tools within easy reach to streamline the process.
Preparing the Base and Securing the Mooncakes
The first step in the wrapping process is securing the mini mooncake to its base support to prevent shifting. Place each mini mooncake gently into a small paper liner or onto a custom-cut piece of gold cardboard. If you are using a flat cardboard base, apply a tiny piece of double-sided tape or a food-safe sticker to the underside of the cardboard to anchor it to the exact center of your wrapping paper sheet.
Before placing any pastry onto the packaging material, you must verify that the mooncakes are completely cooled to room temperature. Wrapping warm mooncakes is a common mistake that traps residual heat inside the package. This trapped heat creates condensation, which quickly makes the pastry crust soggy and ruins the crisp texture of the paper. For traditional baked mooncakes, let them rest on a cooling rack for several hours; for snowskin varieties, ensure they are properly chilled according to their specific recipe instructions before wrapping.
Folding and Shaping the Packaging Paper
To achieve a tailored, professional look, you must measure and cut your packaging paper to the correct dimensions. A sheet that is too large will result in bulky, overlapping folds that swallow the mini mooncake, while a sheet that is too small will fail to cover the pastry completely. For a standard mini mooncake on a 4-centimeter base, a square sheet of paper measuring approximately 12 to 15 centimeters on each side is usually ideal. Test the dimensions with a scrap piece of paper first to verify the fit before cutting your final materials.
Place the anchored mooncake and its base in the center of the paper square, oriented diagonally so the corners of the paper point up, down, left, and right. Pull the bottom corner of the paper up over the mooncake, followed by the top corner, overlapping them slightly at the center of the pastry’s top surface. Secure this initial overlap with a small, discreet piece of double-sided tape.
Next, fold the left and right sides inward to create a neat “envelope” fold. To do this, pinch the sides of the paper close to the base support, folding the excess paper into neat, symmetrical pleats along the sides of the mooncake. Press these pleats flat using your bone folder to ensure sharp, clean creases. Fold the remaining side flaps over the top, securing them tightly with double-sided tape at the back or bottom of the package to keep the front face clean and seamless.
Tying and Styling the Ribbon
Once the paper wrapper is secured, the ribbon serves as both a functional closure and the primary decorative element. Cut a length of your chosen 6mm or 12mm ribbon, ensuring you have enough length to wrap around the package and tie a neat bow—usually about 30 to 40 centimeters is sufficient for a mini package.
Slide the ribbon underneath the wrapped mooncake, centering it so that it aligns with the middle of the pastry. Bring the two ends of the ribbon up to the top of the package, crossing them over each other. Pull the ribbon snug, but be careful not to apply excessive force; over-tightening can easily crush the delicate pastry crust beneath the paper.
Tie a simple, secure base knot at the top center of the package to hold the paper folds firmly in place. Once the base knot is secure, you can proceed to style your decorative bow or knot. To finish the ribbon ends professionally, fold each end in half vertically and cut at a 45-degree angle pointing upward to create a clean V-notch, or simply cut diagonally with very sharp scissors to prevent the woven threads from fraying.
Creative Ribbon Tying Techniques for a Gift-Ready Look
Elevating your mini mooncake packaging from simple to stunning relies heavily on how you style the final ribbon. Applying creative tying techniques adds a thoughtful, artisanal touch that highlights the handmade nature of your gifts.
The classic proportionate bow is the most popular choice for a clean, traditional look. To tie a perfect miniature bow, create two small, equal-sized loops with the ribbon ends after securing your base knot. Cross the left loop over the right loop, tuck it under, and pull gently to tighten. Keep the loops small—no larger than the width of the mini mooncake itself—to maintain a balanced silhouette, and trim the tails so they hang just slightly past the edges of the package.
The double-layer accent involves layering two contrasting materials to create a rustic yet refined presentation. First, wrap the package with a thin, natural jute twine or metallic gold thread, tying a secure knot. Next, tie a narrow satin or organza ribbon directly over the twine, leaving the rustic twine ends visible beneath the elegant bow. This contrast between the textured twine and smooth ribbon adds a sophisticated, multi-dimensional look to your gift.
Adding natural or personalized accents is another excellent way to customize each package. Slide a tiny sprig of dried baby’s breath, a single dried lavender stem, or a small pressed leaf under the base knot before tying your final bow. To add a festive touch for the Mid-Autumn Festival, slide a small, customized kraft paper gift tag onto the ribbon. Write a simple “Happy Mid-Autumn” message or the recipient’s name on the tag using a fine-liner pen. Ensure you test your pen on a scrap tag first to verify that the ink does not bleed or smudge on the paper surface, especially in Singapore’s humid climate.
Common Mistakes to Avoid When Wrapping Small Pastries
Wrapping miniature items presents unique challenges that can easily lead to a messy or unappealing presentation. Being aware of common pitfalls will help you avoid wasting materials and protect your delicate baked goods.
- Using paper that is too thick or stiff: Heavy cardstock or thick craft paper resists folding around small curves, resulting in bulky, loose creases that refuse to lie flat. The mini mooncake will end up looking lost or crushed inside a stiff, oversized shell. Always stick to flexible, lightweight, and pliable papers like glassine or thin wax paper that conform easily to small shapes.
- Choosing ribbons that are too wide: A 25mm or wider ribbon will completely cover a mini mooncake, making the package look top-heavy, clumsy, and disproportionate. Keep your ribbons narrow (6mm to 12mm) to ensure the focus remains on the beautifully wrapped pastry.
- Wrapping warm mooncakes: Even a small amount of residual warmth will generate steam inside the sealed paper, creating moisture that ruins the pastry's flaky or tender crust and causes the packaging paper to soften and tear. Always verify that your mooncakes have cooled completely to room temperature before beginning the wrapping process.
- Over-tightening the ribbon or tape: Mini mooncakes are fragile, and excessive pressure can easily deform their shape, smudge their intricate top patterns, or crack the crust. Handle each package with a gentle touch, pulling the ribbon just tight enough to secure the paper without compressing the pastry itself.
- Ignoring Singapore's high humidity: Uncoated papers can absorb atmospheric moisture quickly in tropical climates, causing them to go limp. Store your wrapped mooncakes in an airtight container or a cool, dry place until the moment of gifting to preserve both the crispness of the paper and the freshness of the pastry.
Frequently Asked Questions (FAQ)
Here are answers to some of the most common questions about packaging and preserving mini mooncakes for gifting.
How far in advance can I wrap mini mooncakes?
You should wrap your mini mooncakes only after they have completely cooled, rested, and set. For traditional baked mooncakes, it is best to wrap them within 1 to 2 days of gifting. This timeline ensures the crust retains its optimal texture and prevents the packaging paper from absorbing too much oil from the pastry over time. If you are gifting snowskin mooncakes, wrap them quickly and return them to refrigeration or cold storage immediately to maintain food safety and prevent the delicate skin from melting or drying out.
Can I use regular printer paper for mooncake packaging?
No, you should not use regular printer paper for wrapping mooncakes. Standard printer paper is not certified food-safe, lacks grease resistance, and can easily absorb oils, leaving unsightly transparent stains on the package. Additionally, printer paper may contain chemical bleaches or transfer loose ink fibers onto the food. Always use dedicated food-grade wrapping materials, such as glassine, wax paper, or food-safe cellophane, as the primary layer in direct contact with your pastries. If you want to use decorative non-food-safe paper, wrap the mooncake in a food-safe layer first before applying the decorative outer wrapper.

Community discussion
Share your experience or ask a question. Comments are reviewed before publication.