
Wrapping a goodie bag for kids requires a careful balance of durability, visual appeal, and safety. Children are naturally enthusiastic when opening gifts, which means the wrapping must withstand transport to a school or party venue while remaining easy enough for small hands to open. By using the right combination of sturdy wrapping paper, secure double-sided tape, and soft ribbon, you can create beautiful, structured party favors that keep their contents secure.
This guide provides a comprehensive, step-by-step walkthrough to help you master the art of wrapping goodie bags. You will learn how to select the best materials, execute clean folds, tie secure ribbons, and troubleshoot common wrapping mishaps. Whether you are preparing for a birthday party, a holiday celebration, or a school event, these practical techniques will ensure your party favors look polished and professional.
Gathering Your Wrapping Materials and Tools
Selecting the right materials is the foundation of a successful wrapping project. Kids’ goodie bags often contain a mix of toys, stationery, and treats, which can vary in weight and shape. Choosing durable, high-quality paper and child-safe decorations ensures the bags remain intact until they reach their recipients.
Products mentioned in this guide
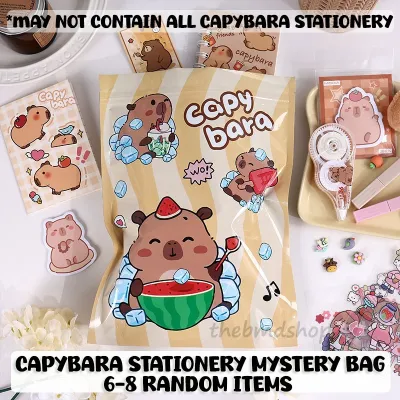
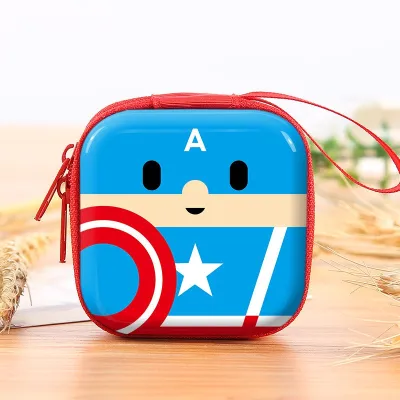
![[SG STOCK] Cute Hand Towel Gift Kids Goodie Bag Gift Children Day Gift Teachers Day Gift Wedding Gift Christmas Gift](https://img.lazcdn.com/g/p/5434cbda0fa58caa44c010193ec155ad.png_400x400q80.png_.webp)
Prices are valid at publication and may change. Please refer to the product page for the latest price.
Choosing Sturdy Wrapping Paper When selecting wrapping paper, pay close attention to the paper weight and texture. Standard lightweight wrapping paper (around 60 to 70 gsm) is highly prone to tearing, especially when wrapping items with sharp corners or irregular shapes. Instead, opt for medium to heavyweight paper (80 to 100 gsm) or high-quality kraft paper. Kraft paper offers excellent tensile strength and a classic, rustic look that pairs beautifully with colorful ribbons. Ensure the paper dimensions are large enough to wrap around your items with a generous overlap of at least 5 cm to prevent the seams from bursting under tension.
Selecting Child-Safe Ribbons Safety is the primary consideration when choosing ribbons for children’s party favors. Opt for wide, soft ribbons made from woven materials such as satin, grosgrain, or cotton herringbone. These materials are gentle on small hands and easy to untie. Avoid thin, metallic curling ribbons or ribbons with integrated wire edges; wire edges can pose a scratch hazard, while thin plastic ribbons can easily become a choking hazard if torn into small pieces. Keep the ribbon length practical, ensuring the trailing ends are short enough to prevent any accidental tripping or tangling.
Preparing Your Tools and Adhesives Having the right tools on hand makes the wrapping process much smoother and more efficient. Gather a pair of sharp stationery scissors, a clear acrylic ruler for precise measurements, and a roll of high-tack double-sided tape. Double-sided tape is highly recommended over standard clear tape because it remains completely hidden beneath the paper folds, resulting in a clean, seamless finish. If children are assisting you with the wrapping process, ensure they use safety scissors with rounded tips, and always supervise the use of any adhesives or cutting tools.
Step-by-Step Instructions for Wrapping the Bags
Creating a structured, professional-looking goodie bag from wrapping paper requires precision during the measuring and folding stages. Follow these steps to construct a sturdy bag that stands upright and holds its shape.

Step 1: Measuring and Cutting the Paper Place your goodie bag items or a small guide box in the center of your wrapping paper sheet. To find the correct width, wrap the paper around the items until the two ends overlap by approximately 5 cm, then mark the cutting line. To determine the height, ensure the paper extends past the top and bottom of the items by a distance equal to slightly more than half of the item’s depth. Use your ruler to draw straight lines on the back of the paper, and cut cleanly along these lines to avoid frayed or jagged edges.
Step 2: Wrapping the Body and Creating the Side Seam Lay the cut paper design-side down on a clean, flat work surface. Place your items in the center of the paper. Fold one long side of the paper over the items, then fold the opposite side over to meet it, ensuring the paper is pulled snug but not overly tight. Apply a continuous strip of double-sided tape along the inner edge of the overlapping paper. Press down firmly from the center outward to secure the seam, ensuring there are no trapped air bubbles or wrinkles.
Step 3: Folding and Securing the Base To create a flat, stable base that allows the goodie bag to stand upright, fold the open bottom end of the paper inward to create two neat triangular flaps on the left and right sides. Fold the top triangular flap down toward the center, then fold the bottom triangular flap up so it overlaps the top flap. Apply a strip of double-sided tape to the overlapping edges and press firmly to seal the bottom. For heavier party favors, you can insert a small piece of recycled cardboard or thick cardstock inside the bottom of the bag before wrapping to distribute the weight evenly and prevent sagging.
Step 4: Creating a Clean Top Collar If you are creating an open-top goodie bag style, fold the top edge of the paper inward by approximately 2 cm to create a clean, reinforced collar. This double-layer fold is crucial because it strengthens the top of the bag, preventing the paper from tearing when you punch holes for the ribbon or attach handles. Press the fold flat with your fingers or a bone folder to create a crisp, professional crease.
Tying the Ribbon and Adding Final Decorations
The ribbon and decorations are what transform a simple wrapped package into an exciting, festive party favor. Using secure tying techniques and safe decorative elements ensures the bags look appealing and remain closed during transport.
The Classic Bow Technique To secure the top of your goodie bag, use a hole puncher to create two holes through the reinforced top collar, spacing them about 5 cm apart. Thread a length of satin or grosgrain ribbon through the holes from the back of the bag to the front. Pull the ribbon ends until they are even, then tie a simple, secure double knot to keep the bag closed. Form two neat loops to tie a classic bow, pulling the loops tight while keeping the tails relatively short to maintain a balanced, tidy appearance.
The Gathered Pouch Method If your wrapping paper is highly flexible or you are wrapping irregular items, you can use the gathered pouch method. Gather the excess paper at the top of the bag together in your hand, pinching it tightly to create a ruffled neck. Wrap a length of ribbon around this pinched neck twice, tie a secure double knot, and finish with a bow. This method is highly forgiving and adds a whimsical, classic look to the party favors.
Adding Safe, Personalized Tags Personalizing each goodie bag with the recipient’s name adds a thoughtful touch to the celebration. Cut custom name tags from thick, colorful cardstock and punch a hole in the corner of each tag. Thread the tag onto the ribbon before tying the final bow so it hangs neatly at the front of the bag. To prevent ink smudging on glossy tags, perform a quick scribble test on a scrap piece of the same material to verify the drying speed and water resistance of your felt-tip pen before writing the children’s names. Avoid using small plastic gems, sequins, or tiny safety pins, which can easily detach and present safety hazards for younger children.
Fixing Common Wrapping Mistakes
Even with careful planning, wrapping mistakes can happen. Knowing how to quickly address these issues saves time and prevents material waste.
Concealing Corner Tears If a sharp corner of a toy or box punctures the wrapping paper during the folding process, there is no need to discard the entire sheet. You can easily conceal small tears by strategically placing a colorful sticker, a decorative paper cutout, or a wide piece of ribbon over the damaged area. This not only hides the mistake but often adds an intentional, layered design element to the bag.
Preventing Ribbon Slippage Smooth, glossy wrapping papers can cause satin or organza ribbons to slide out of place easily. To prevent this, apply a small dot of double-sided tape or a removable glue dot to the underside of the ribbon where it meets the paper at the back of the bag. This holds the ribbon firmly in position without damaging the paper surface or affecting the look of the bow.
Handling Bulky or Sharp-Edged Toys When wrapping bulky, heavy, or sharp-edged items, rigid folds can easily tear under pressure. To manage this, wrap the sharp-edged items in a layer of soft tissue paper before placing them inside the wrapping paper. This acts as a protective cushion, reducing friction and preventing the outer wrapping paper from puncturing.
Frequently Asked Questions (FAQ)
What is the best way to wrap an overfilled goodie bag?
When a goodie bag is packed to capacity, standard folding techniques can cause the seams to burst. The most effective approach is to leave extra paper at the top of the bag during the cutting stage. Instead of folding the top flat, gather the excess paper together to form a gathered neck. Secure this neck tightly with a soft ribbon using a double knot. This gather-and-tie method accommodates the extra volume naturally and distributes the tension evenly across the paper, preventing tears.
How can I prevent the wrapping paper from tearing easily?
Preventing tears starts with selecting the right paper weight and using proper assembly techniques. Always check the paper weight before purchasing; thicker grades, such as 90 gsm kraft paper or laminated wrapping paper, offer much higher tensile strength than thin, budget options. Additionally, avoid pulling the paper too tight when securing the seams with double-sided tape. You can also reinforce high-stress areas, such as the bottom folds, by placing a strip of clear packing tape on the inside of the paper before folding, or by inserting a small piece of recycled cardstock to act as a supportive base.
Community discussion
Share your experience or ask a question. Comments are reviewed before publication.