
Honeycomb paper has become a standout choice for gift wrapping, offering a beautiful, textured alternative to traditional plastic wrap and glossy paper. Made from expandable kraft paper, this material features precision-cut slits that open into a three-dimensional interlocking mesh when stretched. This unique structure provides natural cushioning for delicate items while lending a modern, organic aesthetic to any gift. However, because honeycomb paper behaves differently than standard flat wrapping paper, achieving a neat, professional finish requires a specific approach to stretching, folding, and securing the material. By mastering a few fundamental techniques, you can transform a simple roll of die-cut kraft paper into an elegant, structurally secure presentation.
Preparing Your Gift and Wrapping Materials
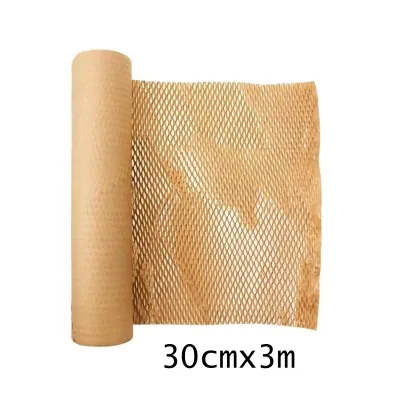
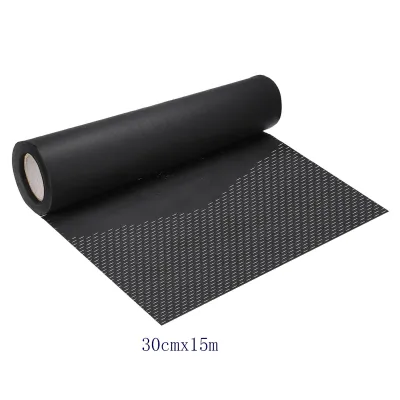
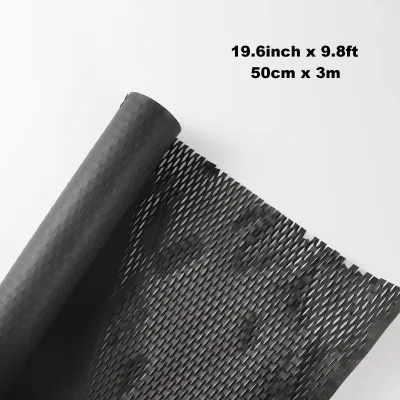
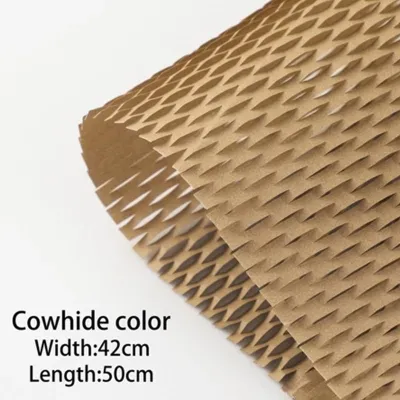
Before you begin wrapping, select the right grade of honeycomb paper and gather tools that complement its physical properties. Standard honeycomb wrapping paper is typically sold in rolls of varying widths, with 30-centimeter and 50-centimeter options being the most common. For small to medium items like books, cosmetics, or mugs, a 30-centimeter roll is highly manageable. Larger items, such as shoe boxes or homeware, require the wider 50-centimeter format to ensure complete coverage without awkward patching.
When calculating how much paper you need, account for the material’s stretch factor. In its unstretched, flat state, honeycomb paper is compact. Once fully expanded, it typically stretches to approximately 1.5 to 1.6 times its original length. However, as the paper stretches longitudinally, it undergoes a slight lateral shrinkage, losing about 10% of its width. Always choose a roll width that is wider than your gift’s height to compensate for this narrowing effect.
Products mentioned in this guide
Prices are valid at publication and may change. Please refer to the product page for the latest price.
Unlike standard wrapping setups, honeycomb paper requires specific tools to ensure a clean finish:
- Sharp Scissors: Dull blades will snag on the delicate die-cut mesh, causing jagged edges or accidental tears. High-quality stationery scissors are necessary for clean, precise cuts.
- Discreet Adhesives: Standard clear plastic tape does not adhere well to the highly textured, open-cell surface of expanded honeycomb paper. Instead, opt for double-sided tissue tape, which can be hidden entirely beneath the folds, or self-adhesive kraft paper tape, which blends seamlessly with the natural brown or white paper fibers.
- A Clean, Flat Workspace: Set up your wrapping station on a spacious, dry table. Because honeycomb paper is highly porous, it can absorb ambient moisture. In humid environments, working quickly on a dry surface ensures the paper retains its crispness and structural tension.
Step-by-Step Wrapping Technique for a Neat Finish
Wrapping with honeycomb paper is an active process that relies on physical tension to lock the paper’s three-dimensional cells into place. Follow these steps to achieve a tight, symmetrical wrap.

Step 1: Measure and Cut the Paper Place your gift on the workspace. Pull a section of the flat, unstretched honeycomb paper from the roll and lay it flat. Place your gift on top of the paper to estimate the required length. To ensure adequate coverage, the unstretched paper should easily wrap around the entire perimeter of the gift with an overlap of at least 5 to 10 centimeters. Once you have measured this length, use your scissors to make a straight, clean cut across the width of the roll.
Step 2: Activate the Honeycomb Structure Anchor one end of the cut paper sheet on your workspace. Grasp the opposite end firmly with both hands, distributing your fingers evenly along the edge to prevent concentrated stress points. Gently and steadily pull the paper outward. You will observe the flat slits begin to open, rising up to form distinct, hexagonal 3D cells. Continue pulling until the entire sheet is uniformly expanded. Avoid sudden, jerky movements, which can snap the delicate paper bridges between the cells. The paper should feel springy and hold its expanded shape naturally.
Step 3: Position and Wrap the Gift Place your gift in the center of the fully stretched paper sheet, aligning it parallel to the direction of the cells. Take one side of the expanded paper and pull it snugly over the top of the gift, keeping the tension firm so the cells do not collapse. Hold this side down, then bring the opposite side of the paper up and over, overlapping the first layer by several centimeters.
Step 4: Interlock the Seams One of the most remarkable features of honeycomb paper is its ability to self-interlock. Press the overlapping layers of expanded cells gently together. The open hexagonal structures will naturally hook into one another, creating a secure seam that often requires no tape at all to stay closed during the wrapping process. If the paper feels loose, gently pull the outer layer tighter before pressing the cells together to lock them in place.
Securing the Wrap and Adding Final Touches
Once the main body of the gift is wrapped, managing the open ends and securing the package is the next step to achieving a polished look. Because honeycomb paper is significantly thicker than standard wrapping paper, traditional folding methods can result in bulky, untidy corners.
To fold the ends neatly, use a pleating or tucking technique. Start by pushing the top edge of the open paper end downward against the side of the gift, creating a flat, triangular flap on either side. Next, fold the side flaps inward toward the center, pressing them firmly to compress the honeycomb cells slightly. Finally, fold the bottom flap upward. This sequence creates a clean, flat profile on the sides of your package.
While the interlocking cells provide excellent friction, securing critical stress points ensures the wrap remains intact during transport. Apply a small strip of double-sided tape to the inside of the final bottom flap before pressing it against the side of the package. This keeps the adhesive completely hidden, preserving the clean, organic aesthetic of the paper. Alternatively, a small strip of color-matched kraft paper tape can be applied across the seam for extra security.
To elevate the presentation, select embellishments that complement the rustic, eco-friendly nature of the material. Avoid glossy plastic ribbons, which clash with the paper’s matte texture. Instead, use natural cotton twine, jute string, or paper raffia. Wrap the twine around the package twice, tying it in a simple, neat bow. For a touch of elegance, tuck a small sprig of dried botanicals—such as lavender, eucalyptus, or baby’s breath—under the twine. A simple tag made from recycled cardstock completes the look, offering a thoughtful, minimalist presentation that is highly appreciated for modern gifting occasions.
Troubleshooting Tears, Gaps, and Awkward Shapes
Working with a textured, expandable medium can occasionally present challenges, especially if you are wrapping items with sharp edges or irregular dimensions. Understanding how to adapt your technique will help you avoid wasting material.
Handling Tears and Sharp Corners If the honeycomb paper tears during the stretching or wrapping phase, it is usually a sign of overstretching or concentrated pressure from a sharp corner on the gift box. To prevent this, always stretch the paper mindfully, stopping as soon as the hexagonal cells are fully open. If your gift has sharp, rigid corners, consider wrapping the item in a single layer of tissue paper first. This inner layer acts as a buffer, softening the sharp edges and allowing the honeycomb paper to glide smoothly over the corners without snagging or tearing.
Fixing Loose Wraps and Gaps A loose, sagging wrap occurs when there is insufficient tension during the wrapping process, or if the paper was cut too short, preventing a proper overlap. If you notice gaps where the gift is visible, do not attempt to patch them with small scraps of paper, as this looks untidy. Instead, carefully unwrap the gift, smooth the paper back down, and re-wrap it, ensuring you maintain consistent, firm tension as you pull the paper over the object. If the sheet is simply too small, set it aside for a smaller gift and cut a fresh, larger piece.
Wrapping Irregular and Fragile Items Cylindrical items, such as candles or bottles, require a modified approach. Instead of folding the ends flat, roll the cylinder along the length of the stretched honeycomb paper. Once fully wrapped, gather the excess paper at both ends of the cylinder and twist them gently. Secure each twisted end with a piece of twine to create a classic, elegant “cracker” shape. For highly fragile or soft items, such as delicate glassware or clothing, you can use a double layer of honeycomb paper. Wrap the item once to provide a protective, cushioned core, then apply a second, neatly finished outer layer for presentation.
Frequently Asked Questions (FAQ)
Can honeycomb paper be reused for multiple gifts?
Honeycomb paper can be reused, provided the paper fibers have not suffered significant wear or permanent deformation. After unwrapping a gift, inspect the paper’s structural integrity. If the hexagonal cells collapse back into a relatively flat state and retain their elasticity, the paper can easily be stored and stretched again for another package. However, if the paper has been heavily creased, torn, or exposed to moisture, the fibers will lose their natural tension, making it difficult to achieve a neat, secure wrap on a new item.
Is honeycomb paper suitable for heavy or fragile items?
Yes, honeycomb paper is highly suitable for both heavy and fragile items due to its excellent shock-absorbing geometry. When stretched, the angled kraft paper walls of the hexagonal cells act as miniature springs, dispersing impact energy away from the enclosed object. For moderately fragile items like ceramic mugs or small glass jars, a single, well-tensioned wrap is highly effective. However, for exceptionally heavy or highly delicate items, such as heavy stoneware or thin crystal glassware, it is recommended to wrap the item in multiple layers of honeycomb paper or place it inside a rigid cardboard box before applying the decorative outer wrap.
Community discussion
Share your experience or ask a question. Comments are reviewed before publication.